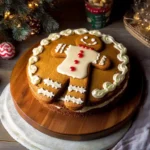
Description of this recipe
This Gingerbread Cake Roll is a festive and delicious dessert perfect for the holiday season. A tender, spiced gingerbread cake is swirled with a creamy, tangy cream cheese filling, creating a beautiful and flavorful treat that’s sure to impress. It’s a delightful twist on traditional gingerbread, offering a moist and satisfying alternative to cookies or bread.
Why you will love this recipe
You’ll adore this Gingerbread Cake Roll for its perfect balance of warm spices and creamy sweetness. The soft, airy gingerbread cake complements the rich cream cheese filling, resulting in a melt-in-your-mouth experience. The visual appeal of the spiral design makes it a stunning centerpiece for any holiday table. It’s also surprisingly easy to make, making it a winner for both experienced bakers and those new to cake rolls.
Ingredients:
For the Gingerbread Sheet Cake
- ¾ cup all-purpose flour
- 1 teaspoon baking powder
- ½ teaspoon baking soda
- 2 teaspoons ground cinnamon
- 1 teaspoon ground ginger
- ¼ teaspoon ground nutmeg
- ¼ teaspoon ground cloves
- ½ teaspoon kosher salt
- 3 large eggs, at room temperature
- ¾ cup granulated sugar
- ¼ cup light brown sugar
- ¼ cup molasses
- 1 teaspoon vanilla extract
- ½ teaspoon lemon juice
For the Cream Cheese Filling
- 8 ounces cream cheese, softened at room temperature
- ½ cup (1 stick) unsalted butter, softened at room temperature
- ½ teaspoon vanilla extract
- 1 ¼ cup powdered sugar, plus more for sprinkling
Preparation:
Step 1: Preheat the oven to 350°F (175°C). Line a 17½” x 12½” jelly roll pan completely with parchment paper. Ensure the paper extends slightly over the edges for easy removal of the cake later. This is crucial to prevent sticking and ensure a smooth roll.
Step 2: In a large bowl, sift together the all-purpose flour, baking powder, baking soda, ground cinnamon, ground ginger, ground nutmeg, ground cloves, and kosher salt. Sifting ensures that there are no lumps and that the dry ingredients are evenly distributed, leading to a more uniform and tender cake texture. Set this mixture aside.
Step 3: In the bowl of a stand mixer fitted with the whisk attachment (or using a hand mixer), beat the large eggs, granulated sugar, light brown sugar, molasses, vanilla extract, and lemon juice until smooth and well combined. Beat for at least 3-4 minutes, until the mixture lightens slightly in color and becomes somewhat thick. This step is essential for creating a light and airy cake base. The lemon juice helps to balance the sweetness and enhance the other flavors.
Step 4: Gradually add the sifted dry ingredients to the wet ingredients, mixing on low speed until just combined. Be careful not to overmix, as this can develop the gluten in the flour and result in a tough cake. Mix until no streaks of flour remain, but stop immediately after that.
Step 5: Using a spatula, spread the batter evenly into the prepared jelly roll pan. The batter will be relatively thin, which is exactly what you want. Make sure it reaches all corners of the pan and that there are no bare spots. A thin, even layer ensures that the cake will bake uniformly and roll up nicely without cracking.
Step 6: Bake in the preheated oven for 12 to 14 minutes, or until a toothpick inserted into the center comes out clean. Keep a close eye on the cake; it should be golden brown and spring back lightly when touched. Overbaking will result in a dry, brittle cake that is difficult to roll.
Step 7: Cool the cake in the pan at room temperature for about 5 minutes. This allows the cake to set slightly and makes it easier to handle. Do not let it cool completely in the pan, as it may become too stiff to roll.
Step 8: While the cake is baking and cooling, prepare a large sheet of parchment paper, slightly larger than the baking sheet. Sift a generous amount of powdered sugar evenly over the parchment paper. This prevents the cake from sticking and adds a touch of sweetness.
Step 9: Gently flip the cooled cake onto the prepared parchment paper, so it lands in the middle. Carefully peel off the parchment paper that lined the baking sheet. If any of the cake sticks to the paper, use a small spatula to gently loosen it.
Step 10: Starting at one short end, roll the cake up tightly in the powdered sugar-coated parchment paper. Roll it up firmly but gently to avoid cracking the cake. Place the rolled cake, seam-side down, in the refrigerator to cool for about 45 minutes to an hour. This allows the cake to set and maintain its rolled shape.
Step 11: While the cake is cooling, prepare the cream cheese filling. In the bowl of a stand mixer (or using a hand mixer), combine the softened cream cheese, softened unsalted butter, vanilla extract, and powdered sugar. Beat until smooth, light, and fluffy. Make sure the cream cheese and butter are at room temperature to avoid lumps in the filling.
Step 12: Remove the cooled cake from the refrigerator and carefully unroll it onto a flat surface. Be gentle to prevent tearing.
Step 13: Spread the cream cheese filling evenly over the entire surface of the unrolled cake, leaving a small border at one end. This prevents the filling from squeezing out when you re-roll the cake.
Step 14: Gently re-roll the cake up tightly, starting from the same end as before. Wrap the rolled cake tightly in plastic wrap and refrigerate for at least one hour, or preferably longer (up to 2-3 hours), to allow the filling to set completely.
Step 15: When ready to serve, remove the cake from the refrigerator and unwrap it. Trim the ends of the roll to create clean, even edges. Slice the cake into ¾-inch to 1-inch thick slices using a serrated knife.
Step 16: Sift powdered sugar over the top of the sliced cake for a final touch of elegance. Serve immediately and enjoy!
COOKING Rating:
Intermediate
Serving Suggestions:
- Serve chilled as a dessert during holiday gatherings.
- Pair with a warm beverage like coffee, tea, or hot chocolate.
- Accompany with a scoop of vanilla ice cream or a dollop of whipped cream.
- Garnish with fresh cranberries or a dusting of cocoa powder for added visual appeal.
Tips:
- Ensure all ingredients are at room temperature for optimal mixing and texture.
- Don’t overbake the cake; a slightly underbaked cake is better than a dry one.
- Roll the cake tightly but gently to avoid cracking.
- Chill the cake thoroughly before slicing for clean, even slices.
- For a more intense gingerbread flavor, add an extra teaspoon of ground ginger to the cake batter.
Prep Time:
30 minutes
Cook Time:
14 minutes
Total Time:
2 hours (includes chilling time)
Nutritional Information:
(Per serving, approximate)
Calories:
350
Protein:
4g
Sodium:
200mg
Conclusion
This Gingerbread Cake Roll is more than just a dessert; it’s a festive experience that brings the warmth and spice of the holidays to your table. With its tender gingerbread cake and creamy cream cheese filling, it’s a delightful treat that’s sure to impress your family and friends. So gather your ingredients, follow the simple steps, and create a masterpiece that will be remembered long after the last slice is enjoyed. Happy baking!
Questions and Answers about this Recipe:
Q1: Can I make this cake roll ahead of time?
A: Absolutely! In fact, making it ahead of time is recommended. The cake roll needs to chill for at least an hour to allow the filling to set properly. You can make it up to 2-3 days in advance and store it in the refrigerator, tightly wrapped in plastic wrap. Just slice and dust with powdered sugar before serving.
Q2: What if my cake cracks when I roll it?
A: Cracking can happen, especially if the cake is slightly overbaked or too dry. To minimize cracking, make sure not to overbake the cake. Also, roll the cake gently and tightly while it’s still slightly warm. If it does crack, don’t worry too much! The cracks will be hidden by the filling and powdered sugar. You can also try rolling it with a slightly damp (not wet!) tea towel instead of parchment paper to keep it more moist.
Q3: Can I use a different type of filling?
A: Yes, you can customize the filling to your liking. A lemon curd filling would add a bright, tangy flavor. A chocolate ganache would create a decadent treat. You could also add chopped nuts, dried cranberries, or chocolate chips to the cream cheese filling for added texture and flavor.
Q4: Can I freeze the Gingerbread Cake Roll?
A: Yes, you can freeze the cake roll. Wrap it tightly in plastic wrap, then in aluminum foil, and freeze for up to 2 months. Thaw it in the refrigerator overnight before slicing and serving. Be aware that the texture of the cream cheese filling might change slightly after freezing and thawing.
Q5: What can I do if I don’t have a jelly roll pan?
A: While a jelly roll pan is ideal for this recipe, you can use a regular baking sheet with sides. Just make sure it’s large enough to accommodate the batter. You might need to adjust the baking time slightly, as the cake might be a bit thicker. Keep a close eye on it and test for doneness with a toothpick. Alternatively, you can divide the batter into two smaller baking sheets to achieve a thinner cake layer.