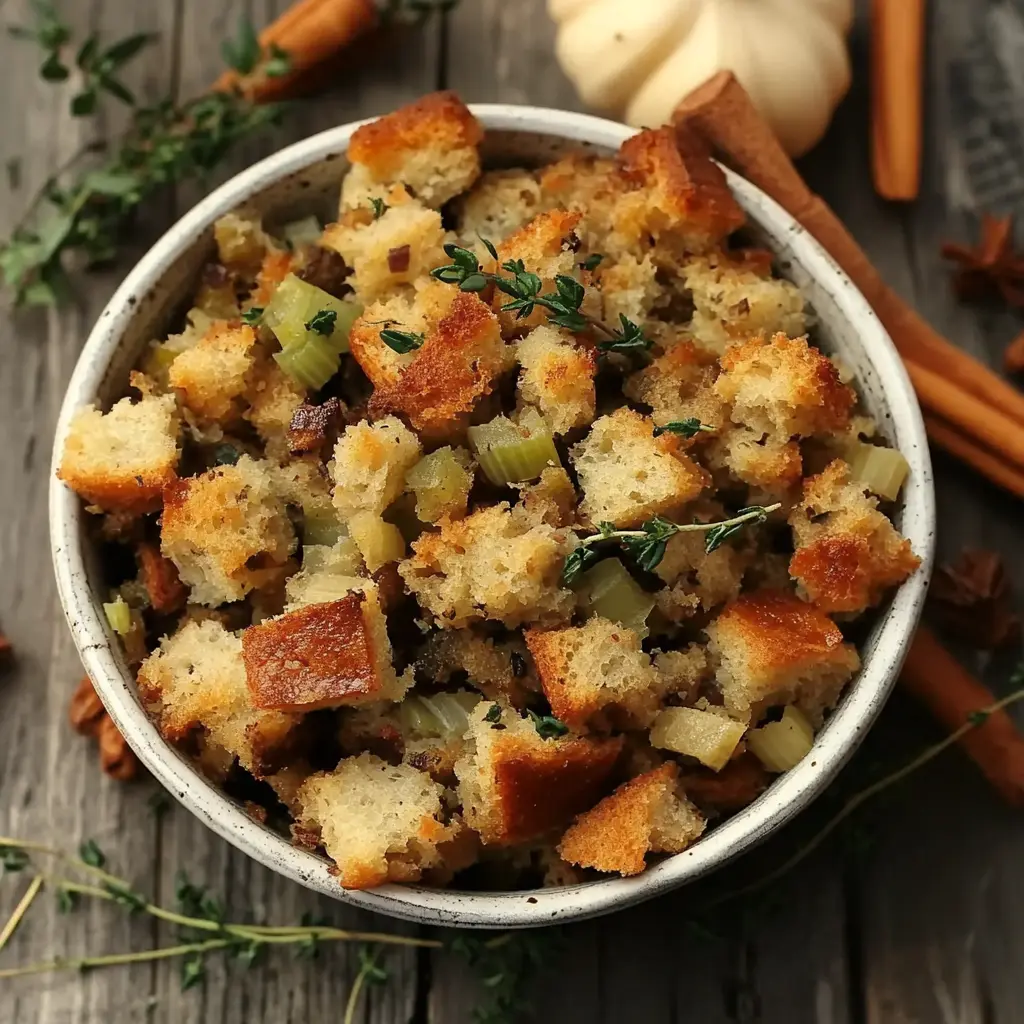
Description of this recipe:
This recipe is a timeless classic, a Thanksgiving staple passed down through generations. Grandma’s Thanksgiving Stuffing is the epitome of comfort food, a savory blend of stale bread, aromatic vegetables, and herbaceous seasonings, all baked to golden-brown perfection. This is more than just a side dish; it’s a culinary hug, a nostalgic journey back to family gatherings and cherished memories. It’s the kind of dish that evokes warmth, gratitude, and the comforting aroma of Thanksgiving Day. The recipe is carefully crafted to balance moisture and texture, ensuring a stuffing that’s both tender and delightfully crispy on top.
Why you will love this recipe:
You’ll fall in love with this stuffing because it’s simple, authentic, and utterly delicious. It’s incredibly versatile, easily adaptable to your own taste preferences – add sausage, cranberries, or nuts for a personalized twist. But beyond its taste and adaptability, it’s the emotional connection it brings that truly sets it apart. This recipe carries the weight of tradition, offering a comforting sense of familiarity and belonging. The aroma alone will transport you back to cherished family moments, creating new memories with every bite. It’s also a forgiving recipe, perfect for novice cooks and seasoned chefs alike. Whether you’re looking to impress your guests or simply crave a taste of home, Grandma’s Thanksgiving Stuffing is guaranteed to deliver. Introduction
Thanksgiving wouldn’t be Thanksgiving without a hearty, flavorful stuffing. This isn’t just any stuffing recipe; it’s Grandma’s Thanksgiving Stuffing, a recipe perfected over decades, filled with love and tradition. Every Thanksgiving, the scent of this stuffing wafting through the house signaled that the holiday had officially begun. This recipe is more than just a combination of ingredients; it’s a piece of family history, a reminder of the importance of gathering, sharing, and savoring the simple joys of life. The beauty of this recipe lies in its simplicity and the use of humble ingredients to create something truly extraordinary. It transforms stale bread into a culinary masterpiece, proving that resourcefulness and love are the most important ingredients of all. This stuffing is not only delicious but also incredibly versatile. While this recipe is a tried-and-true classic, it can easily be adapted to suit your own taste preferences and dietary needs. Feel free to add sausage, cranberries, or nuts for a personalized touch. Whether you’re hosting your first Thanksgiving or continuing a long-standing family tradition, Grandma’s Thanksgiving Stuffing is sure to be a crowd-pleaser. It’s a recipe that will be requested year after year, a testament to its enduring appeal and the magic it brings to the Thanksgiving table. Get ready to embark on a culinary journey filled with warmth, nostalgia, and the irresistible aroma of Grandma’s Thanksgiving Stuffing.
Ingredients:
- 1 loaf of stale bread, cubed (about 10 cups): Stale bread is crucial as it absorbs the flavors without becoming mushy.
- 1/2 cup unsalted butter: Adds richness and flavor, while helping to bind the ingredients.
- 1 large onion, diced: Provides a savory base note and aromatic depth.
- 3 celery stalks, diced: Contributes a subtle, refreshing crunch and enhances the overall flavor profile.
- 2 cloves garlic, minced: Infuses the stuffing with a pungent, aromatic kick.
- 1/4 cup fresh parsley, chopped: Offers a bright, herbaceous counterpoint to the richer ingredients.
- 1 tablespoon fresh thyme, chopped: Adds a delicate, earthy flavor that complements the other herbs.
- 1 tablespoon fresh sage, chopped: Imparts a warm, slightly peppery aroma that is quintessential to Thanksgiving.
- 1 teaspoon salt: Enhances the flavors of all the ingredients and helps to balance the sweetness.
- 1/2 teaspoon black pepper: Provides a subtle, spicy kick that adds depth and complexity.
- 1/2 teaspoon dried rosemary: Contributes a piney, aromatic note that rounds out the herb blend.
- 2 1/2 cups chicken or vegetable broth: Provides moisture and infuses the stuffing with savory flavor.
- 2 large eggs, beaten: Help to bind the ingredients together and create a cohesive texture.
Preparation:
Step 1: Preheat the oven to 350°F (175°C) and grease a large baking dish. This ensures that the stuffing cooks evenly and doesn’t stick to the pan. Greasing the dish is essential for easy removal and cleanup.
Step 2: Spread bread cubes on a baking sheet and bake for 10-15 minutes to dry them out. Transfer to a large mixing bowl. Drying out the bread is a critical step to prevent the stuffing from becoming soggy. Baking the bread cubes allows them to retain their shape and texture while absorbing the flavorful broth.
Step 3: In a skillet, melt butter over medium heat. Add onion, celery, and garlic; cook for about 5 minutes until softened. Sautéing the vegetables in butter creates a flavorful base for the stuffing. The onion, celery, and garlic release their aromatic compounds, infusing the butter with their essence and creating a delicious foundation for the other ingredients.
Step 4: Stir in parsley, thyme, sage, salt, pepper, and rosemary; cook for another minute until fragrant. Adding the herbs at the end of the sautéing process helps to release their essential oils, maximizing their flavor and aroma. Cooking them briefly in the butter allows them to meld together and create a harmonious blend of herbaceous notes.
Step 5: Pour the vegetable mixture over the bread cubes in the bowl. Add beaten eggs and broth; mix gently until moistened but not soggy. Adjust broth if needed. Gently mixing the ingredients ensures that the bread cubes are evenly coated with the vegetable mixture and broth without becoming overly saturated. The goal is to achieve a moist but not soggy consistency, as this will result in a stuffing that is both tender and retains its shape.
Step 6: Transfer the mixture to the greased baking dish, spreading evenly. Evenly spreading the mixture in the baking dish ensures that the stuffing cooks uniformly and develops a golden-brown crust on top. This also allows for optimal heat distribution, resulting in a perfectly cooked stuffing from edge to edge.
Step 7: Bake uncovered for 40-45 minutes, or until the top is golden brown and crispy. Baking the stuffing uncovered allows the moisture to evaporate, creating a crispy top while maintaining a tender interior. The golden-brown color is an indicator that the stuffing is cooked through and has developed a desirable texture and flavor.
COOKING Rating:
Easy
Serving Suggestions:
- Serve alongside roasted turkey, mashed potatoes, cranberry sauce, and green bean casserole for a traditional Thanksgiving feast.
- Pair with roasted chicken or pork for a comforting weeknight meal.
- Use as a filling for stuffed bell peppers or zucchini.
- Serve as a side dish with a simple salad for a light and flavorful lunch.
Tips:
- Use stale bread for the best texture. Day-old bread works well, or you can dry out fresh bread in a low oven.
- Don’t overmix the ingredients, as this can lead to a soggy stuffing.
- Adjust the amount of broth based on the dryness of the bread.
- For a richer flavor, use chicken broth instead of vegetable broth.
- Add sausage, cranberries, or nuts for a personalized twist.
- If the top of the stuffing starts to brown too quickly, cover it loosely with foil.
Prep Time:
20 minutes
Cook Time:
55-60 minutes
Total Time:
1 hour 15 minutes – 1 hour 20 minutes
Nutritional Information:
(Note: Nutritional information is approximate and may vary based on specific ingredients and portion sizes.)
Calories:
Approximately 250-300 per serving
Protein:
Approximately 8-10 grams per serving
Sodium:
Approximately 400-500 mg per serving
Conclusion
Grandma’s Thanksgiving Stuffing is more than just a recipe; it’s a tradition, a memory, and a celebration of family and food. This recipe is a testament to the power of simple ingredients and the magic that can happen when they are combined with love and care. Whether you’re a seasoned cook or a novice in the kitchen, this recipe is sure to impress your guests and create lasting memories. So, gather your ingredients, preheat your oven, and prepare to embark on a culinary journey that will transport you back to the warmth and comfort of Grandma’s kitchen.
5 Questions and Answers about this Recipe
Question 1: Can I make this stuffing ahead of time?
Answer: Absolutely! In fact, making the stuffing ahead of time can actually enhance its flavor. Prepare the stuffing according to the instructions, but don’t bake it. Cover it tightly with plastic wrap and refrigerate for up to 24 hours. When you’re ready to bake, remove the plastic wrap and bake as directed, adding an extra 10-15 minutes to the cooking time if necessary. This allows the flavors to meld together and creates a more cohesive and flavorful stuffing.
Question 2: What if I don’t have stale bread? Can I use fresh bread?
Answer: While stale bread is ideal for stuffing, you can certainly use fresh bread in a pinch. To prevent the stuffing from becoming soggy, it’s essential to dry out the fresh bread before using it. Cut the bread into cubes and spread them on a baking sheet. Bake them in a low oven (200°F or 95°C) for about 30-45 minutes, or until they are dry and slightly crisp. This will help the bread retain its shape and texture while absorbing the flavorful broth.
Question 3: Can I add meat to this stuffing?
Answer: Yes, you can! Adding meat to this stuffing is a great way to customize it to your taste preferences. Cooked sausage, bacon, or ground beef are all excellent additions. Simply brown the meat in a skillet before adding it to the vegetable mixture. Be sure to drain off any excess grease before incorporating it into the stuffing. This will add a savory element and enhance the overall flavor of the dish.
Question 4: I don’t have fresh herbs. Can I use dried herbs instead?
Answer: Yes, you can substitute dried herbs for fresh herbs, but keep in mind that dried herbs have a more concentrated flavor. As a general rule, use about one-third of the amount of dried herbs as you would fresh herbs. So, if the recipe calls for 1 tablespoon of fresh thyme, use 1 teaspoon of dried thyme. Be sure to crumble the dried herbs between your fingers before adding them to the stuffing to release their essential oils.
Question 5: Can I freeze this stuffing?
Answer: Yes, you can freeze leftover stuffing for up to 2-3 months. Allow the stuffing to cool completely before transferring it to an airtight container or freezer bag. To reheat, thaw the stuffing in the refrigerator overnight. Bake it in a preheated oven at 350°F (175°C) for about 20-25 minutes, or until heated through. You can also reheat it in the microwave, but be sure to add a splash of broth to prevent it from drying out.