Description of this recipe
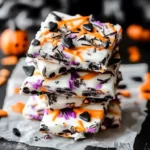
These Halloween Chocolate Chip Cookies are a spooktacular twist on a classic favorite! Imagine soft, chewy chocolate chip cookies bursting with festive Halloween M&M’s and adorned with candy eyeballs and colorful sprinkles. These cookies are not only delicious but also a fun and engaging activity for the whole family to enjoy during the Halloween season. They’re perfect for Halloween parties, school events, or simply a spooky treat on a cool autumn evening.
Why you will love this recipe
You’ll absolutely fall in love with these Halloween Chocolate Chip Cookies for several reasons:
- Festive and Fun: These cookies are a visual treat, decorated with Halloween-themed candies and sprinkles that capture the spirit of the holiday. The candy eyeballs add a playful, spooky touch that kids and adults alike will adore.
- Easy to Make: The recipe is straightforward and easy to follow, making it a great baking project for bakers of all skill levels. The simple steps ensure that even beginner bakers can create impressive-looking and delicious cookies.
- Customizable: This recipe is highly adaptable. Feel free to experiment with different types of Halloween candies, sprinkles, or even add ingredients like chopped nuts or peanut butter chips to customize the cookies to your liking.
- Perfect Texture: The cookies have a delightful soft and chewy texture, thanks to the combination of butter, granulated sugar, and brown sugar. The slightly underbaked centers ensure that each bite is a melt-in-your-mouth experience.
- Great for Sharing: These cookies are perfect for sharing with friends, family, and neighbors. They make a wonderful addition to any Halloween gathering and are sure to be a hit with everyone who tries them.
- Engaging Activity: Baking these cookies is a fantastic activity to do with kids. They can help with measuring ingredients, mixing the dough, and, most importantly, decorating the cookies with candies and sprinkles. It’s a fun and memorable way to spend time together during the Halloween season.
- Flavorful: The combination of vanilla extract, chocolate chips, and Halloween candies creates a delightful symphony of flavors that will tantalize your taste buds. The sweetness of the sugars perfectly complements the richness of the butter and the subtle saltiness of the dough.
Ingredients:
Base Cookie Dough:
- 1 cup (226g) unsalted butter, softened
- ¾ cup (150g) granulated sugar
- ¾ cup (165g) packed brown sugar
- 2 large eggs
- 1 tsp vanilla extract
- 2½ cups (310g) all-purpose flour
- 1 tsp baking soda
- ½ tsp salt
Add-ins & Decorations:
- 1 cup (180g) chocolate chips
- 1 cup (170g) Halloween M&M’s or candy-coated chocolates
- Candy eyeballs (as many as desired)
- Halloween sprinkles (optional)
Preparation:
Step 1: Preheat the oven
Preheat your oven to 350°F (175°C). This ensures that the oven is at the correct temperature when you place the cookies inside, allowing them to bake evenly. Line baking sheets with parchment paper or silicone baking mats. This prevents the cookies from sticking to the baking sheet and makes cleanup a breeze. Parchment paper also helps the cookies bake more evenly by distributing heat.
Step 2: Cream the butter and sugars
In a large mixing bowl, cream together the softened butter, granulated sugar, and packed brown sugar using an electric mixer or hand mixer. Beat the mixture until it becomes light and creamy in color (about 2 minutes). This process incorporates air into the butter and sugar, which is essential for creating a light and tender cookie texture. Make sure the butter is properly softened, but not melted, to achieve the best results.
Step 3: Add eggs and vanilla
Beat in the eggs one at a time, ensuring that each egg is fully incorporated before adding the next. This helps to emulsify the mixture and create a smooth batter. Then, mix in the vanilla extract until fully combined. Vanilla extract enhances the flavor of the cookies and adds a warm, comforting aroma.
Step 4: Mix dry ingredients
In a separate bowl, whisk together the all-purpose flour, baking soda, and salt. Whisking ensures that the dry ingredients are evenly distributed throughout the flour. Gradually add the dry ingredients to the wet ingredients, mixing until a soft dough forms. Be careful not to overmix the dough, as this can result in tough cookies. Mix until just combined.
Step 5: Fold in the mix-ins
Gently stir in the chocolate chips and half of the Halloween candies into the dough. Reserve the remaining candies for topping the cookies after baking. Folding in the mix-ins ensures that they are evenly distributed throughout the dough without breaking or crushing them.
Step 6: Shape the cookies
Scoop tablespoon-sized balls of dough and place them 2 inches apart on the prepared baking sheets. Using a cookie scoop or tablespoon helps to ensure that all the cookies are the same size, which promotes even baking. Placing the cookies 2 inches apart allows them to spread out during baking without sticking together.
Step 7: Bake
Bake for 9–11 minutes, or until the edges are set but the centers are still soft. The baking time may vary depending on your oven, so keep a close eye on the cookies. Don’t overbake the cookies, as this can make them dry and brittle. Slightly underbaking them ensures that they remain soft and chewy.
Step 8: Decorate
Immediately after removing the cookies from the oven, gently press the remaining Halloween M&M’s, candy eyes, and sprinkles on top while the cookies are still warm. The heat from the cookies will help the candies and sprinkles adhere to the surface. Get creative with your decorations and let your imagination run wild!
Step 9: Cool
Let the cookies cool on the baking sheet for 5 minutes before transferring them to a wire rack to cool completely. Allowing the cookies to cool slightly on the baking sheet helps them to firm up and prevents them from breaking when you transfer them. Cooling them completely on a wire rack ensures that they don’t continue to bake from the residual heat of the baking sheet.
COOKING Rating:
Easy
Serving Suggestions:
- Serve these cookies warm or at room temperature.
- Pair them with a glass of cold milk, hot chocolate, or a scoop of vanilla ice cream.
- Package them in festive bags or boxes for Halloween treats or party favors.
- Serve them as part of a Halloween dessert platter alongside other spooky treats like brownies, cupcakes, and candy apples.
Tips:
- Use softened butter for the best results. If the butter is too cold, it will be difficult to cream with the sugar. If it’s too melted, the cookies may spread too thin during baking.
- Don’t overmix the dough. Overmixing can develop the gluten in the flour, resulting in tough cookies.
- Chill the dough for 30 minutes before baking. This helps to prevent the cookies from spreading too much during baking and enhances their flavor.
- Use high-quality chocolate chips for the best flavor.
- Store the cookies in an airtight container at room temperature for up to 3 days.
Prep Time:
20 minutes
Cook Time:
9-11 minutes
Total Time:
30-35 minutes
Nutritional Information:
(per cookie, approximate)
Calories:
180
Protein:
2g
Sodium:
75mg
Conclusion
These Halloween Chocolate Chip Cookies are a delightful and festive treat that is sure to bring smiles to faces of all ages. The combination of classic chocolate chip cookie flavors with spooky Halloween decorations makes them a perfect addition to any Halloween celebration. Whether you’re baking them with your kids, sharing them with friends, or simply enjoying them as a special treat, these cookies are a guaranteed hit. The ease of the recipe and the customizable nature of the decorations make them a versatile and enjoyable baking project. So, gather your ingredients, preheat your oven, and get ready to create some spooky and delicious memories with these Halloween Chocolate Chip Cookies! They are more than just a recipe; they are an opportunity to embrace the spirit of Halloween and create lasting traditions. Happy baking and Happy Halloween!
Questions and Answers About This Recipe
Q1: Can I use different types of chocolate chips in this recipe?
A: Absolutely! Feel free to experiment with different types of chocolate chips to customize the flavor of your cookies. Semi-sweet chocolate chips, milk chocolate chips, dark chocolate chips, or even white chocolate chips would all work well in this recipe. You can also use a combination of different types of chocolate chips for a more complex flavor profile.
Q2: Can I make the dough ahead of time and bake the cookies later?
A: Yes, you can definitely make the dough ahead of time. After preparing the dough, wrap it tightly in plastic wrap and store it in the refrigerator for up to 2 days. When you’re ready to bake the cookies, let the dough sit at room temperature for about 30 minutes to soften slightly, then proceed with shaping and baking as directed in the recipe.
Q3: What if I don’t have Halloween M&M’s? Can I use something else?
A: Of course! If you don’t have Halloween M&M’s, you can use any type of candy-coated chocolates, such as regular M&M’s, peanut M&M’s, or even chopped-up chocolate bars. You can also use other Halloween-themed candies, such as candy corn or chocolate-covered pretzels, to decorate the cookies.
Q4: Can I add nuts to this recipe?
A: Yes, adding nuts is a great way to add extra flavor and texture to these cookies. You can add about ½ cup of chopped nuts, such as walnuts, pecans, or almonds, to the dough along with the chocolate chips and Halloween candies.
Q5: How do I prevent the cookies from spreading too thin during baking?
A: There are several things you can do to prevent the cookies from spreading too thin during baking. First, make sure that your butter is softened but not melted. Second, avoid overmixing the dough. Third, chill the dough for at least 30 minutes before baking. Finally, make sure that your oven is at the correct temperature. If your oven is too hot, the cookies may spread too quickly.


