Description of this recipe:
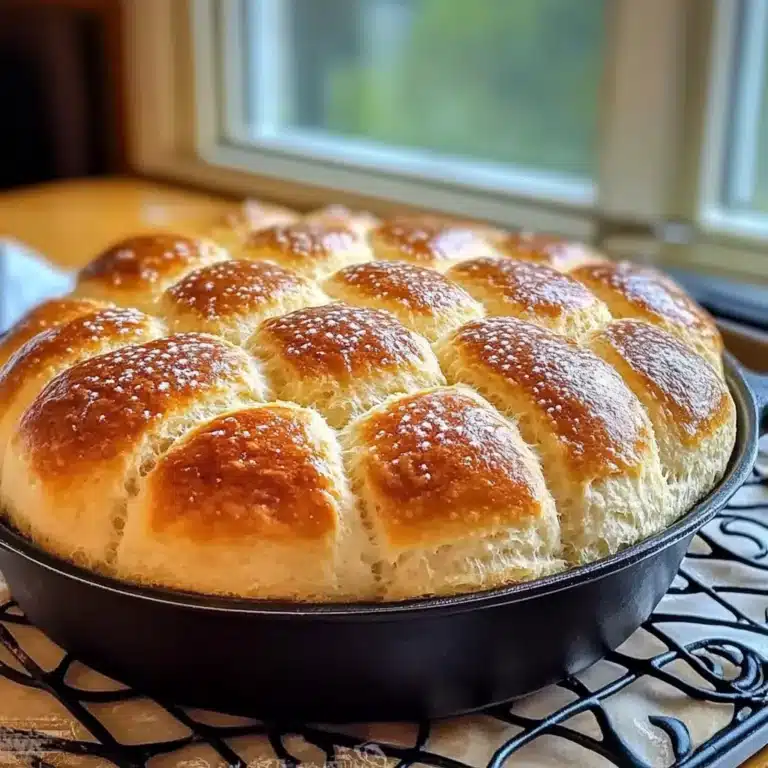
This Homemade Biscuit Bread recipe takes the comforting flavors of classic biscuits and transforms them into a rustic, shareable loaf. Perfect for breakfast, brunch, or as a side to your favorite hearty meal, this bread boasts a tender, flaky interior and a beautifully golden-brown crust. It’s surprisingly simple to make, requiring no yeast and minimal kneading, making it an ideal choice for both beginner and experienced bakers alike. This recipe captures the essence of homemade goodness, offering a warm and satisfying experience with every slice.
Why you will love this recipe:
You’ll fall in love with this biscuit bread for several reasons. First and foremost, its simplicity is incredibly appealing. Forget complicated bread-making techniques; this recipe relies on straightforward steps and readily available ingredients. The result is a bread that’s both impressive and achievable.
Secondly, the texture is divine. The use of cold butter and the careful mixing technique create a bread with a delicate, flaky crumb that practically melts in your mouth. It’s the perfect balance of soft and slightly chewy, offering a satisfying bite every time.
Thirdly, its versatility makes it a winner. Enjoy it warm with a slather of butter and honey for breakfast, serve it alongside a bowl of hearty soup or stew for dinner, or use it to make delicious sandwiches. The possibilities are endless.
Finally, the aroma that fills your kitchen as this bread bakes is simply irresistible. It’s a comforting, homey scent that evokes feelings of warmth and happiness. This recipe is more than just a way to make bread; it’s an experience that engages all your senses.
Ingredients:
- 3 cups all-purpose flour
- 1 tablespoon sugar
- 1/2 teaspoon salt
- 4 teaspoons baking powder
- 1/2 teaspoon cream of tartar
- 3/4 cup (1 1/2 sticks) cold unsalted butter, cubed
- 1 cup milk
Preparation:
Step 1: Preheat and Prepare:
Preheat your oven to 425°F (220°C). This high temperature is crucial for creating the signature flaky texture of biscuit bread. Ensure your oven is properly calibrated for consistent results. While the oven is preheating, prepare your baking pan. You can use a 9-inch round cake pan or a 10-inch cast iron skillet. Grease the pan generously with butter or cooking spray to prevent the bread from sticking. A well-greased pan ensures easy removal and a beautifully browned crust.
Step 2: Mix Dry Ingredients:
In a large mixing bowl, combine the dry ingredients: 3 cups of all-purpose flour, 1 tablespoon of sugar, 1/2 teaspoon of salt, 4 teaspoons of baking powder, and 1/2 teaspoon of cream of tartar. Sifting the flour before measuring helps to remove any lumps and ensures a lighter, more airy texture. The sugar adds a touch of sweetness that complements the savory flavors, while the salt enhances the overall taste. Baking powder is the leavening agent that gives the bread its rise, and cream of tartar helps to stabilize the baking powder, resulting in a more consistent texture. Whisk the dry ingredients together thoroughly to ensure they are evenly distributed.
Step 3: Incorporate Cold Butter:
This step is critical for achieving the signature flaky texture of biscuit bread. Take 3/4 cup (1 1/2 sticks) of cold, unsalted butter and cut it into small cubes. The butter must be very cold; you can even chill it in the freezer for 15-20 minutes before using. Add the cubed butter to the dry ingredients. Use a pastry cutter or two forks to cut the butter into the flour mixture. The goal is to break the butter down into small, pea-sized pieces, leaving some larger pieces intact. This creates layers of butter within the dough, which will melt during baking and create pockets of air, resulting in a flaky texture. Work quickly to prevent the butter from melting. The mixture should resemble coarse crumbs when you’re finished.
Step 4: Add Milk:
Gradually add 1 cup of milk to the dry ingredients and butter mixture. Pour the milk in slowly, stirring gently with a wooden spoon or spatula. Mix just until the dough comes together. It’s important not to overmix the dough at this stage, as overmixing will develop the gluten in the flour, resulting in a tough bread. The dough should be slightly shaggy and sticky.
Step 5: Knead and Shape:
Lightly flour a clean work surface. Turn the dough out onto the floured surface and gently knead it for 1-2 minutes. Kneading helps to bring the dough together and create a smoother texture. Be careful not to overknead; the dough should still be slightly soft and pliable. Shape the dough into a round loaf and place it in your prepared baking pan. You can score the top of the loaf with a sharp knife or kitchen shears to create a decorative pattern and allow steam to escape during baking.
Step 6: Bake:
Place the pan in the preheated oven and bake for 25-30 minutes, or until the bread is golden brown and a toothpick inserted into the center comes out clean. The baking time may vary depending on your oven, so it’s important to keep an eye on the bread. If the top starts to brown too quickly, you can tent it with aluminum foil.
Step 7: Cool and Serve:
Once the bread is baked, remove it from the oven and let it cool in the pan for a few minutes before slicing. Serving the bread warm enhances its flavor and texture.
COOKING Rating:
Easy
Serving Suggestions:
- Serve warm with butter, jam, honey, or maple syrup for breakfast or brunch.
- Serve as a side dish with soups, stews, chili, or roasts.
- Use it to make sandwiches or toast it for a delicious snack.
- Top with savory toppings like cheese, herbs, and garlic for a flavorful appetizer.
- Serve with whipped cream and fresh berries for a simple dessert.
Tips:
- For the flakiest texture, use very cold butter and milk.
- Don’t overmix the dough, as this will result in a tough bread.
- If the dough is too sticky, add a little more flour, one tablespoon at a time.
- If the top of the bread browns too quickly, tent it with aluminum foil.
- Store leftover bread in an airtight container at room temperature for up to 2 days.
- Reheat the bread in the oven or microwave to restore its warmth and texture.
- For extra flavor, add herbs, cheese, or spices to the dough.
- Experiment with different types of flour, such as whole wheat or spelt flour, for a unique twist.
Prep Time:
15 minutes
Cook Time:
25-30 minutes
Total Time:
40-45 minutes
Nutritional Information:
(Estimated, per serving)
- Calories: 250-300
- Protein: 5-7 grams
- Sodium: 200-300mg
Conclusion:
This Homemade Biscuit Bread recipe is a delightful way to enjoy the comforting flavors of biscuits in a convenient and shareable loaf. With its simple ingredients, easy preparation, and irresistible taste, this bread is sure to become a favorite in your kitchen. Whether you’re serving it for breakfast, lunch, or dinner, it’s a versatile and satisfying dish that will bring joy to your table. So, gather your ingredients, preheat your oven, and get ready to experience the magic of homemade biscuit bread.
Questions and Answers:
- Q: Can I use self-rising flour instead of all-purpose flour?
- A: While you can technically use self-rising flour, it’s not recommended for this recipe. Self-rising flour already contains baking powder and salt, so you’ll need to adjust the other ingredients accordingly. If you do use self-rising flour, omit the baking powder and salt from the recipe. However, the texture and flavor may not be exactly the same as the original recipe.
- Q: Can I freeze this biscuit bread?
- A: Yes, you can freeze this biscuit bread for longer storage. Allow the bread to cool completely before wrapping it tightly in plastic wrap and then placing it in a freezer-safe bag. Freeze for up to 2-3 months. When you’re ready to eat it, thaw the bread overnight in the refrigerator or at room temperature. Reheat it in the oven or microwave to restore its warmth and texture.
- Q: Can I add cheese to this recipe?
- A: Absolutely! Adding cheese to this biscuit bread is a fantastic way to enhance its flavor. You can add about 1 cup of shredded cheese, such as cheddar, Monterey Jack, or Gruyere, to the dry ingredients before adding the milk. Gently mix the cheese into the dough and proceed with the recipe as directed. The cheese will melt during baking, creating a cheesy, flavorful bread.
- Q: What can I use instead of milk?
- A: If you don’t have milk on hand, you can substitute it with other liquids such as buttermilk, heavy cream, or even plain yogurt mixed with water. Buttermilk will add a tangy flavor to the bread, while heavy cream will make it richer and more tender. If using yogurt, mix equal parts yogurt and water to achieve the consistency of milk.
- Q: How do I prevent the bottom of the bread from burning?
- A: To prevent the bottom of the bread from burning, you can place a baking sheet on the rack below the bread. This will help to deflect some of the heat and prevent the bottom from browning too quickly. You can also try lowering the oven temperature by 25 degrees Fahrenheit and baking the bread for a longer period of time. Make sure to check the bread frequently to ensure it doesn’t burn.