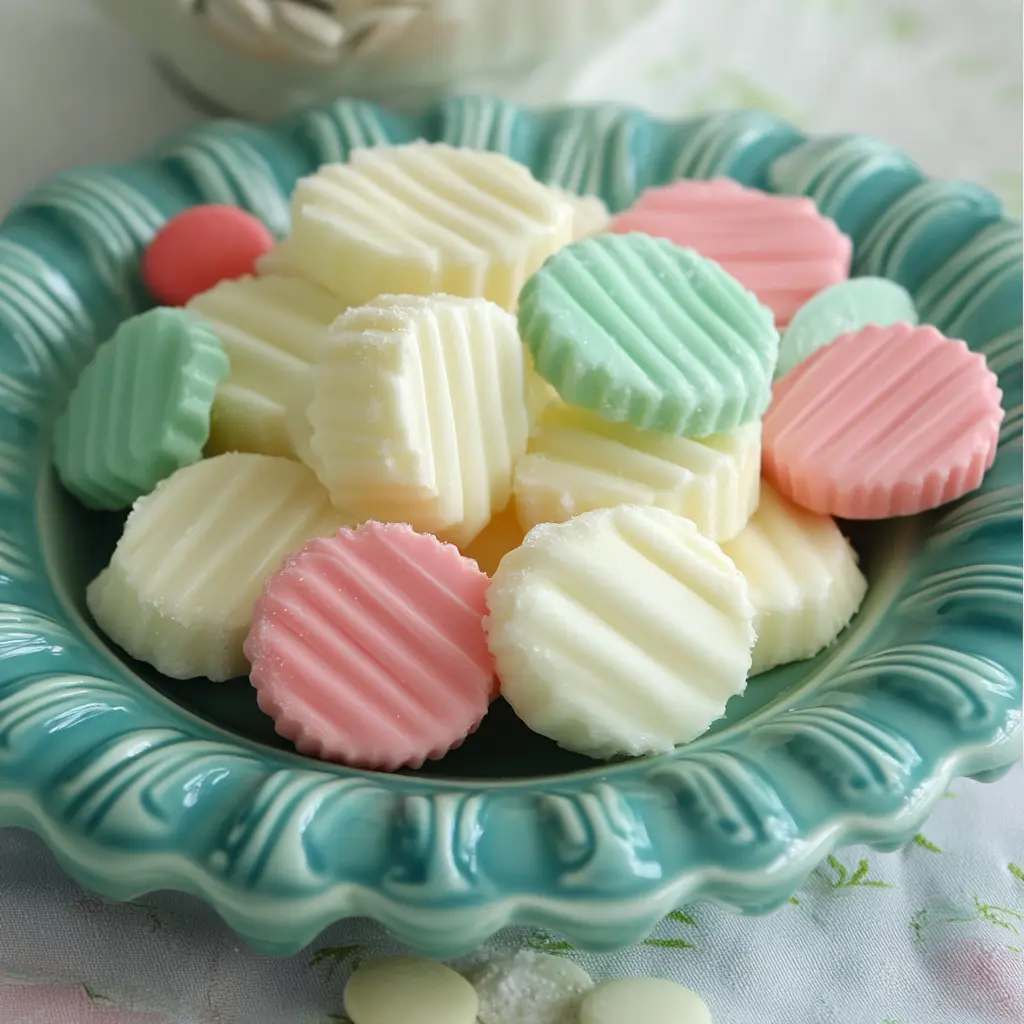
Homemade cream cheese mints are delightful, melt-in-your-mouth confections that combine the creamy richness of butter and cream with the refreshing flavor of peppermint. These little treats are perfect for any occasion, from holiday gatherings to casual get-togethers. Their vibrant colors and sweet taste make them a favorite among both children and adults.
Why You Will Love This Recipe
You will love this recipe because it is incredibly easy to make and requires minimal ingredients. The mints can be customized in color and flavor intensity, allowing you to tailor them to your taste. They are also a fun project to do with kids, making them perfect for family bonding time. Plus, they store well, which means you can prepare them in advance for parties or special events. You’ll be amazed at how a simple mixture of butter, sugar, and peppermint extract can result in such a delightful treat!
Introduction
Cream cheese mints have been a beloved treat for generations, often served at weddings, baby showers, and holiday parties. Their smooth texture and refreshing flavor make them a delightful palate cleanser or sweet treat after a meal. This recipe is a straightforward way to create these charming mints in your own kitchen. With just a few ingredients and some simple steps, you can impress your friends and family with your homemade confections. Let’s dive into the recipe!
Ingredients:
- 1 stick unsalted butter, softened
- 1 tablespoon whipping cream
- 4 cups powdered sugar, divided (plus more for dusting)
- ½ teaspoon pure peppermint extract
- 1-4 drops food coloring (optional, for desired brightness)
Preparation:
Step 1: In the bowl of a stand mixer, combine the softened butter, whipping cream, 1 cup of powdered sugar, and peppermint extract. Mix on medium speed until the mixture is smooth and creamy.
Step 2: Scrape down the sides of the bowl to ensure all ingredients are well incorporated. Gradually add another cup of powdered sugar and mix again. Repeat this process until all the powdered sugar is added and the dough begins to pull away from the sides of the bowl.
Step 3: If you are using multiple colors, divide the dough evenly into sections. Wrap each section in plastic wrap to prevent it from drying out. A kitchen scale can be helpful for even division.
Step 4: Take one section of dough and add 1-4 drops of your chosen food coloring. Knead the dough with your hands until the color is evenly distributed. Wrap the colored dough in plastic wrap and refrigerate for about 1 hour. Repeat this process for the remaining colors.
Step 5: Once the dough has chilled, dust a cutting board with powdered sugar. Working with one color at a time, roll the dough into ½-inch thick ropes using the palms of your hands. Cut the ropes into small pieces with a sharp knife or dough scraper. You can leave the cut pieces on the cutting board or transfer them to a baking sheet. Allow the mints to dry at room temperature for about 12 hours.
Serving Suggestions:
These colorful mints can be served in decorative candy dishes or wrapped in cellophane bags for party favors. They pair wonderfully with coffee or tea and can be a delightful addition to dessert platters during celebrations.
Tips:
- Storage: Keep your butter mints at room temperature in an airtight container for up to 2 weeks, or refrigerate them for up to 1 month.
- Freezing: You can freeze the mints in airtight containers or freezer bags for up to 2 months.
- Extract vs. Oil: Use peppermint extract instead of peppermint oil, as the oil is much stronger. A good rule of thumb is that 1/4 teaspoon of oil equals 1 teaspoon of extract.
- Consistency: If the dough is too sticky, add more powdered sugar until you achieve the right consistency. It should be pliable but not overly stiff.
- Coloring: For vibrant colors, experiment with food coloring. Start with a few drops and add more if needed to achieve your desired shade.
Prep Time: 15 minutes
Cook Time: 12 hours (drying time)
Total Time: 12 hours 15 minutes
Nutritional Information (per mint, approx.):
- Calories: 50
- Protein: 0.2g
- Sodium: 5mg
Conclusion
Homemade cream cheese mints are not just a treat; they are a delightful experience that brings joy to any occasion. With their creamy texture, refreshing peppermint flavor, and beautiful colors, these mints are sure to impress your guests and satisfy your sweet tooth. Whether you make them for a special event or just to enjoy at home, they are a simple yet elegant addition to your dessert repertoire. So gather your ingredients, roll up your sleeves, and get ready to create a batch of these delightful mints!
Questions and Answers
1. Can I use a different flavor instead of peppermint?
Absolutely! You can experiment with other extracts such as spearmint, vanilla, or almond to create different flavor profiles for your mints.
2. How should I store the mints?
Store the mints in an airtight container at room temperature for up to 2 weeks, or in the refrigerator for up to 1 month. They can also be frozen for up to 2 months.
3. What if my dough is too sticky?
If your dough is too sticky, simply add more powdered sugar gradually until you achieve a workable consistency that is not too stiff.
4. How long do the mints need to dry?
The mints should dry at room temperature for about 12 hours. This allows them to firm up and develop a nice texture.
5. Can I make these mints in advance?
Yes! These mints can be made in advance and stored properly, making them a great option for preparing ahead of time for parties or events.