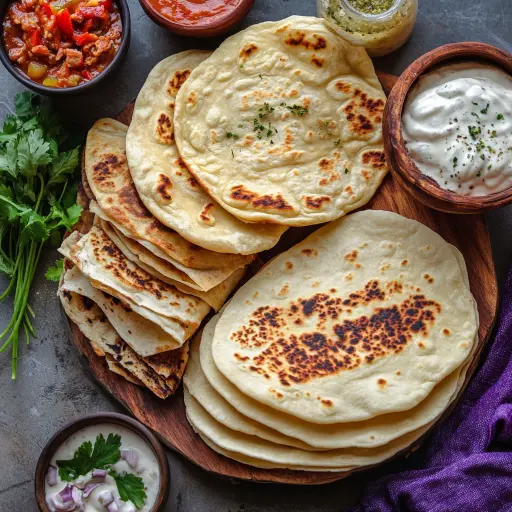
Description: This recipe offers a delightful journey into the world of homemade flatbreads. With a single dough-making session, you can create three distinct and versatile bread: soft and pliable flour tortillas, fluffy and slightly tangy naan, and pocket-forming pita bread. These recipes are designed to be straightforward and rewarding, allowing you to customize your bread based on your preferences and culinary needs. Perfect for tacos, wraps, dips, or even homemade pizzas!
Ingredients:
For the Flour Tortillas:
4 cups all-purpose flour 1 1/2 teaspoons salt 2 teaspoons baking powder 1 2/3 cups hot water 1/4 cup unsalted butter, melted
For the Pita Bread:
2 1/4 teaspoons (1 packet) active dry yeast 1 teaspoon sugar 3/4 cup warm water (around 100°F / 38°C) 2 cups all-purpose flour (plus extra for dusting) 1 teaspoon salt 1 tablespoon olive oil
For the Naan Flatbread:
2 cups all-purpose flour (plus extra for dusting) 2 teaspoons sugar 1 teaspoon instant yeast or active dry yeast 1/2 teaspoon salt 3/4 cup warm water 2 tablespoons plain yogurt 2 tablespoons olive oil or melted butter
Optional for Naan:
Melted butter or garlic butter for brushing Chopped fresh cilantro for garnish
Preparation:
Flour Tortillas
Step 1: Combine Dry Ingredients: In a large bowl, whisk together the all-purpose flour, salt, and baking powder until they are thoroughly combined. This ensures even distribution of the leavening agent (baking powder) and the salt. Even distribution guarantees consistent flavor and texture throughout the tortillas. Step 2: Add Wet Ingredients: Pour the hot water and melted butter into the bowl with the dry ingredients. The hot water helps to activate the gluten in the flour, creating a more pliable dough. The melted butter adds richness and tenderness to the tortillas. Step 3: Mix the Dough: Using your hands or a sturdy spatula, mix the ingredients together until a cohesive ball of dough forms. If the dough is too sticky, gradually add more flour, one tablespoon at a time, until it becomes manageable and less tacky. Be careful not to add too much flour, as this can result in dry tortillas. Step 4: Knead the Dough: Transfer the dough onto a lightly floured work surface. Knead the dough for approximately 10 times, until it becomes smooth and elastic. Kneading develops the gluten, which contributes to the tortillas’ flexibility and ability to hold their shape. Step 5: Divide and Shape: Divide the dough into 12 equal portions. Form each portion into a ball and then flatten it slightly into the shape of a hockey puck. Step 6: Rest the Dough: Flour each piece of dough on both sides and arrange them on a plate or baking sheet. Cover them with a clean kitchen towel to prevent them from drying out. Let the dough rest for at least 15 minutes, or up to 30 minutes, to allow the gluten to relax. This will make the tortillas easier to roll out. Step 7: Cook the Tortillas: Heat a large nonstick sauté pan or griddle over medium-high heat. Make sure the pan is hot before adding the tortillas to ensure proper cooking. Step 8: Roll Out and Cook: Roll out one piece of dough into an 8-inch circle using a rolling pin. Carefully transfer the rolled-out tortilla to the hot pan. Cook the tortilla for about 1 minute on the first side, until it begins to puff up and develop light golden-brown spots. Step 9: Flip and Finish Cooking: Flip the tortilla and continue cooking it for an additional 30 seconds, or until golden brown spots appear on both sides. Avoid overcooking, as this will make the tortillas brittle. Step 10: Keep Warm: Transfer the cooked tortilla from the pan to a clean kitchen towel. Wrap the tortilla in the towel to keep it warm and pliable while you roll out and cook the remaining tortillas. This will prevent them from drying out and becoming stiff.
Pita Bread
Step 1: Activate the Yeast: In a small bowl, mix the warm water, sugar, and active dry yeast. Let the mixture sit for about 5-10 minutes, until it becomes frothy. This indicates that the yeast is active and viable. Step 2: Combine Ingredients: In a large bowl, combine the flour and salt. Add the yeast mixture and olive oil. Stir until a shaggy dough forms. Step 3: Knead the Dough: Turn the dough out onto a lightly floured surface and knead for about 5-7 minutes, until smooth and elastic. The dough should be slightly tacky but not overly sticky. Step 4: First Rise: Place the dough in a lightly oiled bowl, turning to coat. Cover the bowl with a cloth or plastic wrap and let it rise in a warm place until doubled in size, about 1 hour. Step 5: Divide and Shape: Punch down the dough to release the air. Divide it into 6-8 equal pieces. Roll each piece into a ball, then flatten into circles about 1/4 inch thick. Step 6: Cook the Pitas: Heat a heavy skillet or cast iron pan over medium-high heat. Place one pita in the hot pan. Cook for about 1-2 minutes until bubbles form and the bottom is lightly browned, then flip and cook another 1-2 minutes, until the other side is also lightly browned and puffed up. Step 7: Keep Warm: Wrap the cooked pitas in a clean kitchen towel to keep them soft and pliable.
Naan Flatbread
Step 1: Combine Dry Ingredients: In a large bowl, whisk together the flour, sugar, yeast, and salt. Step 2: Add Wet Ingredients: Add the warm water, yogurt, and olive oil (or melted butter) to the dry ingredients. Stir until a rough dough forms. Step 3: Knead the Dough: Turn the dough out onto a floured surface and knead for 5-7 minutes, until smooth and soft. If the dough is too sticky, add a little more flour. If it’s too dry, add a splash of water. Step 4: First Rise: Place the dough in a greased bowl, turning to coat. Cover with a towel and let it rise in a warm place until doubled, about 1 hour. Step 5: Divide and Shape: Punch down the dough and divide into 6-8 pieces. Roll each piece into an oval or teardrop shape about 1/4 inch thick. Step 6: Cook the Naan: Heat a cast iron skillet or heavy pan over high heat until very hot. Cook each naan for about 1-2 minutes on the first side, until bubbles form. Flip and cook another 30-60 seconds, until the other side is browned. Step 7: Brush and Serve: Immediately brush the hot naan with melted butter or garlic butter. Sprinkle with chopped fresh cilantro, if desired.
Why You Will Love This Recipe
Versatility: This recipe provides three different types of flatbread from a single dough-making base, offering incredible versatility for various meals and cuisines. Homemade Goodness: The taste and texture of homemade flatbreads far surpass store-bought options, offering a fresh and authentic experience. Customizable: Each flatbread can be easily customized with different flavors, herbs, or toppings to suit your taste preferences. Fun and Engaging: Making flatbreads at home is a fun and rewarding culinary activity that can involve the whole family. Cost-Effective: Making your own flatbreads is often more economical than buying them pre-made. Healthier Option: You control the ingredients, allowing you to use healthier options like whole wheat flour or less salt.
Serving Suggestions:
Flour Tortillas:
Tacos: Fill with your favorite taco fillings such as seasoned ground beef, chicken, or vegetarian options. Burritos: Wrap with rice, beans, cheese, and your choice of protein. Quesadillas: Layer with cheese and other fillings, then grill or pan-fry until golden brown and the cheese is melted. Enchiladas: Roll up with a savory filling and bake in enchilada sauce. Wraps: Use as a wrap for sandwiches, salads, or deli meats.
Pita Bread:
Sandwiches: Slice open and fill with sandwich fillings like hummus, falafel, or grilled vegetables. Gyros or Shawarma: Wrap with seasoned meat, tzatziki sauce, and vegetables. Dips: Serve warm with dips like hummus, baba ganoush, or yogurt-based dips. Pocket Bread Pizzas: Fill with pizza sauce, cheese, and toppings, then bake until golden brown and the cheese is melted. Salads: Cut into triangles, toast, and use as croutons in salads.
Naan Flatbread:
Classic Dipper: Serve warm with hummus, tzatziki, or baba ganoush. Indian Curries: Perfect for scooping up Indian curries like butter chicken or tikka masala. Wraps & Sandwiches: Use naan as a soft wrap for gyros, shawarma, or falafel. Naan Pizza: Top with tomato sauce, cheese, and your favorite toppings. Grilled Cheese: Use naan as a unique alternative to bread for grilled cheese sandwiches.
Tips:
For softer tortillas, brush them with melted butter as soon as they come off the pan and keep them covered in a towel. For a chewier naan, use bread flour instead of all-purpose flour. To prevent the pita bread from becoming too dry, ensure the dough is properly hydrated and wrap them in a clean kitchen towel immediately after cooking. If you have trouble rolling out the dough, let it rest for a few more minutes to allow the gluten to relax further. Don’t overcrowd the pan when cooking the flatbreads, as this can lower the temperature and result in uneven cooking. Store leftover flatbreads in an airtight container or resealable bag at room temperature for up to 3 days or in the freezer for longer storage.
Prep Time:
Tortillas: 20 minutes Pita Bread: 30 minutes + 1 hour rising Naan: 30 minutes + 1 hour rising
Cook Time:
Tortillas: 15 minutes Pita Bread: 15 minutes Naan: 15 minutes
Total Time:
Tortillas: 35 minutes Pita Bread: 1 hour 45 minutes Naan: 1 hour 45 minutes
Nutritional Information (Per Serving, estimated):
(Values can vary based on specific ingredients and serving size)
Tortillas (per tortilla):
Calories: 150-200 Protein: 3-4g Sodium: 200-250mg
Pita Bread (per pita):
Calories: 120-150 Protein: 4-5g Sodium: 150-200mg
Naan (per naan):
Calories: 180-220 Protein: 5-6g Sodium: 180-230mg
Conclusion
This homemade flatbread trio provides a fantastic opportunity to elevate your culinary skills and enjoy the satisfaction of creating delicious, versatile breads from scratch. Whether you’re craving tacos, gyros, or a warm naan to dip in your favorite curry, these recipes offer a foundation for endless possibilities. Experiment with different flavors and toppings to create your own signature flatbread creations!
Q&A
Q1: Can I use whole wheat flour for these recipes? A1: Yes, you can substitute a portion of the all-purpose flour with whole wheat flour for a nuttier flavor and added fiber. However, keep in mind that whole wheat flour absorbs more liquid, so you may need to adjust the amount of water accordingly. Start by substituting about 1/2 to 1 cup of the all-purpose flour with whole wheat flour. Also, whole wheat dough can sometimes be denser, so allowing a longer rise time can help improve the texture.
Q2: How do I prevent the flatbreads from drying out? A2: To prevent the flatbreads from drying out, it’s crucial to keep them covered while cooking and after they are cooked. As soon as the flatbreads come off the pan, wrap them in a clean kitchen towel to trap the steam and keep them soft. For longer storage, place the cooled flatbreads in an airtight container or resealable plastic bag. You can also lightly brush them with melted butter or olive oil before wrapping them.
Q3: Can I freeze these flatbreads? A3: Absolutely! Flatbreads freeze very well. Allow the cooked flatbreads to cool completely. Then, stack them with parchment paper in between each flatbread to prevent them from sticking together. Place the stack in a freezer-safe bag or container and freeze for up to 2-3 months. To reheat, thaw the flatbreads in the refrigerator or at room temperature, then warm them in a skillet, microwave, or oven.
Q4: What if my dough is too sticky or too dry? A4: If your dough is too sticky, gradually add flour, one tablespoon at a time, until the dough becomes manageable and less tacky. If the dough is too dry, add a small amount of water, one teaspoon at a time, until the dough comes together. Be careful not to add too much of either ingredient, as this can affect the final texture of the flatbreads.
Q5: Can I add herbs or spices to the dough? A5: Yes, you can definitely add herbs or spices to the dough to enhance the flavor. Some popular additions include garlic powder, onion powder, dried oregano, dried basil, cumin, or chili powder. Simply mix the herbs or spices into the dry ingredients before adding the wet ingredients. Experiment with different combinations to create your own unique flavor profiles.