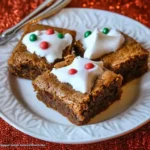
Description of this recipe
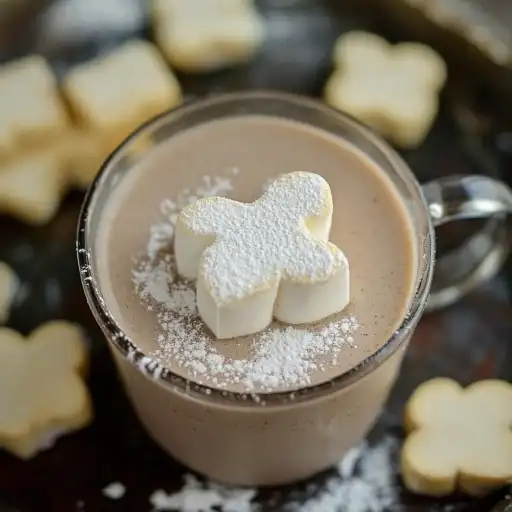
These homemade gingerbread marshmallows are a delightful twist on the classic treat, perfect for adding a festive touch to your hot chocolate, holiday desserts, or simply enjoying on their own. Infused with warm gingerbread spices and rich molasses, these marshmallows offer a unique and comforting flavor experience that’s far superior to anything you can buy in a store. The texture is light, fluffy, and perfectly pillowy, making each bite a melt-in-your-mouth sensation. This recipe is designed for those who appreciate the art of homemade goodies and want to impress their friends and family with a truly special treat.
Why you will love this recipe
You’ll fall in love with these gingerbread marshmallows because they’re incredibly delicious, surprisingly easy to make, and bring a touch of holiday magic to any occasion. Unlike store-bought marshmallows, these are bursting with authentic gingerbread flavor that warms you from the inside out. The process of making them is also quite therapeutic, transforming simple ingredients into something extraordinary. Plus, these marshmallows are a fantastic conversation starter and make wonderful homemade gifts. Get ready to be the star of your next holiday gathering!
Ingredients:
- 2 packs (2 tablespoons) unflavored gelatin (Knox brand recommended)
- 1/2 cup cold water, divided
- 2 cups granulated sugar
- 1 cup water
- 2 tablespoons molasses
- 1 teaspoon gingerbread spice blend (or a mix of cinnamon, ginger, cloves, and nutmeg)
- 1 tablespoon unsalted butter, softened
- Approximately 1/4 cup cornstarch, for dusting
Preparation:
Step 1: Bloom the Gelatin
In a small bowl, combine the gelatin with 1/4 cup of cold water. Stir well to ensure all the gelatin is moistened. Let it sit for about 10 minutes to “bloom.” This process allows the gelatin to absorb the water and soften, which is crucial for achieving the right marshmallow texture.
Step 2: Prepare the Pan
While the gelatin is blooming, generously grease a 9×13 inch baking pan with softened butter. Make sure to coat the bottom and sides thoroughly to prevent the marshmallows from sticking. Alternatively, you can line the pan with parchment paper, leaving an overhang on the sides for easy removal.
Step 3: Create the Sugar Syrup
In a medium saucepan, combine the granulated sugar and 1 cup of water. Place the saucepan over medium heat and stir constantly until the sugar is completely dissolved. Once the sugar is dissolved, bring the mixture to a gentle simmer.
Step 4: Incorporate the Gelatin
Carefully add the bloomed gelatin to the simmering sugar syrup. Stir gently until the gelatin is fully dissolved. It’s important to ensure there are no clumps of gelatin remaining, as this will affect the final texture of the marshmallows.
Step 5: Boil the Syrup
Once the gelatin is dissolved, stop stirring and allow the mixture to come to a gentle boil. Let it boil for 15 minutes without stirring. This step is critical for achieving the correct consistency of the marshmallow base. Monitor the mixture closely, and if it starts to boil up too aggressively, reduce the heat slightly to prevent it from burning.
Step 6: Flavor the Marshmallow Base
After 15 minutes of boiling, carefully pour the hot syrup into the bowl of a stand mixer fitted with the whisk attachment. Add the molasses and gingerbread spice to the bowl.
Step 7: Mix on Low Speed
Start mixing the ingredients on low speed (around speed 2 on a KitchenAid mixer) for 3 minutes. This initial slow mixing helps to combine the molasses and spices evenly without splattering the hot liquid.
Step 8: Increase to Medium Speed
After 3 minutes, increase the mixer speed to medium (around speed 4 on a KitchenAid mixer) and continue mixing for another 2 minutes. During this time, the mixture will begin to cool slightly and become foamy and lighter in color.
Step 9: Whip to Perfection
Increase the mixer speed to high (around speed 8 on a KitchenAid mixer) and whip the mixture for a final 9 minutes. This high-speed whipping is what creates the light and fluffy texture of the marshmallows. The mixture will significantly increase in volume and become very light and airy. The marshmallows are ready when you can dip a finger or spoon into the mixture, and it holds its shape without dripping.
Step 10: Pour into the Prepared Pan
Gently pour the whipped marshmallow mixture into the prepared baking pan. Use a spatula to spread it evenly, ensuring it reaches all corners of the pan.
Step 11: Rest and Set
Cover the pan with plastic wrap or parchment paper and let it rest at room temperature for at least 3 hours, or preferably overnight. This resting period allows the marshmallows to fully set and firm up.
Step 12: Prepare for Cutting
Once the marshmallows are set, dust the top of the marshmallow slab and a clean work surface generously with cornstarch. This prevents the marshmallows from sticking to everything.
Step 13: Remove from the Pan
Gently loosen the edges of the marshmallow from the pan. If you lined the pan with parchment paper, lift the overhang to remove the marshmallow slab easily. Otherwise, carefully invert the pan onto the prepared work surface.
Step 14: Cut the Marshmallows
Dust the top of the marshmallow slab again with cornstarch. Use a pizza cutter, sharp knife, or cookie cutters to cut the marshmallows into desired shapes and sizes. If your cutting tool becomes sticky, rinse it with water, dry it thoroughly, and continue cutting.
Step 15: Coat with Cornstarch
After cutting, ensure each marshmallow is fully coated with cornstarch to prevent them from sticking together. Toss the marshmallows gently in a bowl of cornstarch to coat all sides.
Step 16: Store Properly
Store the finished gingerbread marshmallows in an airtight container at room temperature for up to one week. The cornstarch coating will help to keep them from sticking together during storage.
COOKING Rating:
Intermediate
Serving Suggestions:
- Add them to hot chocolate or coffee for a festive treat.
- Use them in s’mores for a gingerbread-flavored twist.
- Chop them up and mix them into rice crispy treats.
- Serve them alongside other holiday desserts.
- Package them in decorative bags or jars as homemade gifts.
Tips:
- Use a high-quality gingerbread spice blend for the best flavor.
- Make sure to grease the pan thoroughly to prevent sticking.
- Don’t stir the sugar syrup while it’s boiling to avoid crystallization.
- Whip the marshmallow mixture until it’s very light and fluffy for the best texture.
- Coat the marshmallows generously with cornstarch to prevent sticking.
- For extra flavor, add a pinch of sea salt to the marshmallow mixture.
- Experiment with different shapes and sizes for your marshmallows.
- To make vegan marshmallows, substitute the gelatin with agar-agar powder and use a plant-based molasses substitute.
Prep Time:
20 minutes
Cook Time:
20 minutes
Total Time:
40 minutes (plus 3 hours or overnight for setting)
Nutritional Information (per serving, approximate):
Calories:
80
Protein:
1g
Sodium:
5mg
Conclusion
These homemade gingerbread marshmallows are a delightful treat that brings the warmth and spice of the holidays to your kitchen. With their light, fluffy texture and rich gingerbread flavor, they’re sure to impress your friends and family. While the process requires some attention to detail, the end result is well worth the effort. Whether you’re adding them to your favorite hot beverage, using them in a festive dessert, or giving them as gifts, these marshmallows are a guaranteed crowd-pleaser. So gather your ingredients, put on some holiday music, and get ready to create some marshmallow magic!
Questions and Answers:
Q1: Can I use a different type of spice blend instead of gingerbread spice?
A: Absolutely! While gingerbread spice provides the classic flavor profile, you can easily customize the recipe with your favorite spices. Try using a combination of cinnamon, nutmeg, cloves, and allspice. Adjust the amounts to suit your taste preferences.
Q2: What if I don’t have a stand mixer? Can I use a hand mixer?
A: Yes, you can use a hand mixer, but be prepared for a longer mixing time. It’s crucial to whip the marshmallow mixture until it’s very light and fluffy, which may take longer with a hand mixer. Also, holding a hand mixer for an extended period can be tiring, so take breaks as needed.
Q3: How do I prevent the marshmallows from sticking to the pan, even if I grease it well?
A: In addition to greasing the pan generously with butter, you can also line it with parchment paper, leaving an overhang on the sides. This makes it incredibly easy to lift the marshmallow slab out of the pan without any sticking.
Q4: Can I add other ingredients to the marshmallow mixture, like chocolate chips or nuts?
A: Yes, you can definitely add other ingredients to customize your marshmallows. Chocolate chips, chopped nuts, dried cranberries, or even sprinkles would be great additions. Fold them into the marshmallow mixture gently after it has been whipped to prevent them from sinking to the bottom of the pan.
Q5: How do I know when the sugar syrup has boiled for the right amount of time?
A: The key is to boil the sugar syrup for 15 minutes without stirring. The mixture should thicken slightly, but it will still be liquid. If you have a candy thermometer, you can check the temperature – it should reach around 240°F (115°C), which is the soft-ball stage. However, following the time guidelines should be sufficient if you don’t have a thermometer.