Description of this Recipe
This recipe provides a foolproof guide to making classic simple syrup, a fundamental ingredient that elevates everything from cocktails and iced coffee to lemonade and even baked goods. It’s a versatile sweetener that dissolves easily, ensuring a smooth and consistent flavor in all your creations. This simple syrup recipe yields a perfectly balanced and consistently sweet syrup, ready to enhance all your culinary adventures.
Why You Will Love This Recipe
- Effortless Simplicity: The name says it all. With just two ingredients and a few minutes, you can create a kitchen staple.
- Ultimate Versatility: From cocktails and coffee to desserts and marinades, simple syrup is a culinary chameleon.
- Cost-Effective: Ditch the store-bought stuff! Making your own simple syrup is incredibly affordable and lets you control the ingredients.
- Pure and Natural: You know exactly what’s going into your syrup – no preservatives or artificial flavors.
- Consistent Sweetness: Unlike granulated sugar, simple syrup dissolves instantly, ensuring a perfectly balanced sweetness in every sip and bite.
Introduction
Simple syrup is a cornerstone of countless recipes, yet many cooks overlook its simplicity and opt for store-bought versions. But why settle for less when you can easily craft your own superior simple syrup at home? This recipe demystifies the process, providing a step-by-step guide to creating a smooth, clear, and perfectly sweet syrup that will elevate your culinary creations to new heights.
Think of simple syrup as the culinary equivalent of a blank canvas. Its neutral flavor profile allows it to seamlessly integrate into a vast array of dishes and drinks without overpowering the other ingredients. In cocktails, it replaces granulated sugar, eliminating any gritty texture and ensuring a flawlessly smooth sip. In iced coffee, it dissolves instantly, creating a perfectly sweet beverage without the lingering sugar crystals at the bottom of your glass. In baking, it can be brushed onto cakes to keep them moist or used to create a glossy glaze.
The beauty of homemade simple syrup lies not only in its versatility but also in its purity. You have complete control over the ingredients, ensuring a clean, natural flavor that surpasses any commercially produced alternative. Say goodbye to unwanted preservatives and artificial flavors – with this recipe, you’ll have a simple syrup that’s as wholesome as it is delicious.
So, whether you’re a seasoned mixologist, a passionate baker, or simply someone who appreciates a perfectly sweetened beverage, this homemade simple syrup recipe is an essential addition to your culinary repertoire. It’s a simple yet transformative ingredient that will elevate your creations and bring a touch of sweetness to every sip and bite.
Ingredients:
- 300g Caster Sugar (Superfine Sugar)
- 150ml Water
- 1 Sterilized Glass Bottle or Jar (for storage)
Preparation:
Step 1: Combine Sugar and Water
In a medium-sized saucepan, combine the caster sugar and water. Using a heavy-bottomed saucepan is ideal, as it will distribute heat more evenly and prevent scorching. Make sure the saucepan is clean and dry before adding the ingredients.
Step 2: Dissolve the Sugar over Low Heat
Place the saucepan over low heat. Gently stir the mixture constantly with a whisk or wooden spoon. The key here is patience. Do not increase the heat in an attempt to speed up the process. High heat can cause the sugar to caramelize or burn, resulting in a discolored syrup with an undesirable flavor. Continue stirring until all the sugar crystals have completely dissolved and the mixture is clear. This process should take about 5-10 minutes. Ensure there are no undissolved sugar crystals clinging to the sides or bottom of the pan.
Step 3: Bring to a Gentle Simmer (Optional)
Once the sugar is fully dissolved, you can optionally bring the syrup to a gentle simmer for 1-2 minutes. This step helps to create a slightly thicker syrup and can also help to extend its shelf life. However, be careful not to over-simmer, as this can lead to crystallization. If you choose to simmer, watch the syrup closely and remove it from the heat as soon as it starts to gently bubble around the edges.
Step 4: Cool the Syrup Completely
Remove the saucepan from the heat and allow the syrup to cool completely. Do not rush this process, as bottling hot syrup can create condensation inside the jar, which can promote the growth of mold or bacteria. The syrup will thicken slightly as it cools. Letting the syrup cool completely ensures that the bottle or jar you use won’t crack from temperature shock.
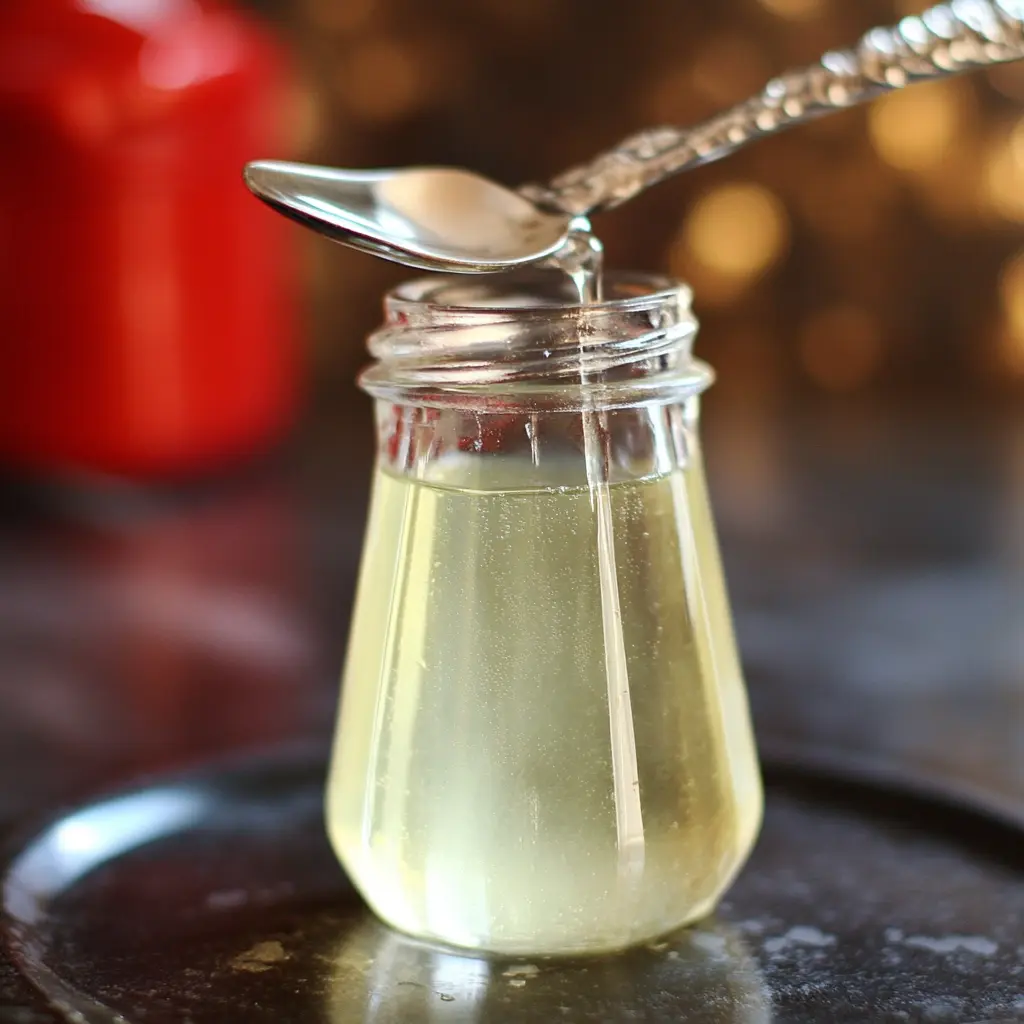
Step 5: Bottle and Store
Once the syrup has cooled completely, carefully pour it into a sterilized glass bottle or jar. Use a funnel to avoid spills. Ensure the bottle or jar is airtight to prevent contamination and extend the shelf life of the syrup. Label the bottle with the date of preparation. Store the simple syrup in the refrigerator for up to 2-3 weeks. Properly stored, the syrup should remain clear and free of cloudiness or crystallization. If you notice any signs of spoilage, discard the syrup.
COOKING Rating:
Easy
Serving Suggestions:
- Cocktails: Use in classic cocktails like Mojitos, Daiquiris, and Old Fashioneds.
- Iced Coffee and Tea: Sweeten your favorite cold beverages without any gritty residue.
- Lemonade and Other Drinks: Add a touch of sweetness to homemade lemonade, iced tea, or fruit punches.
- Baking: Brush on cakes to keep them moist, or use in glazes and sauces.
- Fruit Salads: Drizzle over fruit salads to enhance their sweetness and create a light glaze.
- Marinades: Incorporate into marinades for meats and vegetables to add a subtle sweetness and caramelization.
Tips:
- Use Caster Sugar: Caster sugar (also known as superfine sugar) dissolves more quickly and easily than granulated sugar, resulting in a smoother syrup.
- Sterilize Your Jar: Sterilizing the jar or bottle will help to extend the shelf life of the syrup. You can do this by boiling the jar and lid in water for 10 minutes.
- Adjust the Ratio: For a richer, thicker syrup, use a 2:1 ratio of sugar to water.
- Infuse Flavors: Get creative and infuse your simple syrup with herbs, spices, or fruits. Add a few sprigs of rosemary, a cinnamon stick, or some berries to the saucepan while the syrup is simmering.
- Remove Impurities: If you notice any foam or impurities on the surface of the syrup while it’s simmering, skim it off with a spoon.
- Prevent Crystallization: To prevent crystallization, add a small amount of acid, such as lemon juice or citric acid, to the syrup while it’s simmering.
- Watch for Cloudiness: If your simple syrup looks cloudy after cooling, it may be a sign that it has started to crystallize or spoil. Discard it.
Prep Time:
2 Minutes
Cook Time:
5-10 Minutes
Total Time:
7-12 Minutes (plus cooling time)
Nutritional Information:
(Approximate, per tablespoon)
- Calories: 60
- Protein: 0g
- Sodium: 0mg
Conclusion
Homemade simple syrup is a kitchen essential that every home cook should have in their arsenal. Its simplicity, versatility, and cost-effectiveness make it a superior alternative to store-bought options. With just a few ingredients and a few minutes of your time, you can create a perfectly balanced and consistently sweet syrup that will elevate your cocktails, coffee, desserts, and so much more. So, ditch the store-bought stuff and embrace the magic of homemade simple syrup – your taste buds will thank you. This recipe is truly the foundation for so many delicious treats.
Frequently Asked Questions:
Q1: Can I use granulated sugar instead of caster sugar?
A: While caster sugar is recommended for its quick dissolving properties, you can use granulated sugar. However, you may need to stir the mixture for a longer period to ensure that all the sugar crystals are completely dissolved. Be vigilant about the potential for crystals that may cause the syrup to be grainy.
Q2: How long does simple syrup last in the refrigerator?
A: Properly stored in an airtight, sterilized container, simple syrup can last for up to 2-3 weeks in the refrigerator. Be sure to label the bottle with the date of preparation to keep track of its freshness.
Q3: Can I freeze simple syrup?
A: Yes, you can freeze simple syrup for longer storage. Pour the cooled syrup into an airtight, freezer-safe container, leaving some headspace for expansion. Frozen simple syrup can last for several months. Thaw it in the refrigerator before use.
Q4: My simple syrup looks cloudy. Is it still safe to use?
A: Cloudy simple syrup may indicate the presence of impurities, crystallization, or spoilage. It’s best to discard cloudy syrup to avoid any potential health risks. Clear, properly stored syrup is the best indicator of safe use.
Q5: Can I infuse my simple syrup with other flavors?
A: Absolutely! Infusing simple syrup with herbs, spices, or fruits is a fantastic way to add depth and complexity to your cocktails, desserts, and other culinary creations. Simply add your desired flavorings to the saucepan while the syrup is simmering and strain them out before bottling. Some popular choices include vanilla beans, citrus zest, ginger, rosemary, and berries.