Description of this recipe:
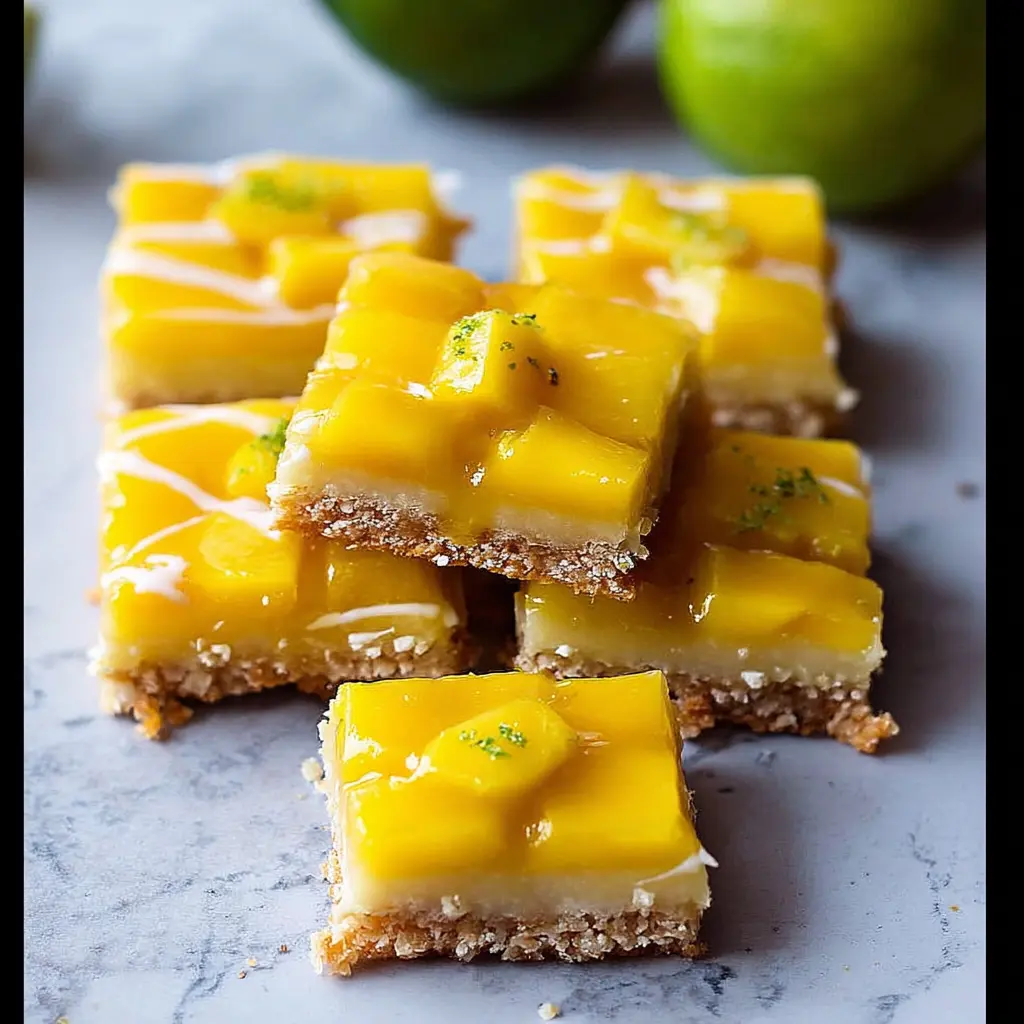
These Juicy Mango Bars are a tropical delight that combines the sweetness of ripe mangoes with a buttery coconut crumble and a tangy lime glaze. This recipe is a symphony of textures and flavors, where the soft, juicy mangoes meld perfectly with the crispy, golden crumble topping, all enhanced by the bright, zesty glaze. Each bite is an explosion of sunshine, making it an ideal dessert for summer gatherings, afternoon tea, or simply when you crave a taste of the tropics.
Why you will love this recipe:
You’ll fall in love with these mango bars because they offer a harmonious balance of sweet, tart, and buttery flavors. The coconut crumble provides a delightful crunch that contrasts beautifully with the tender mango filling. The lime glaze adds a refreshing zing that cuts through the richness, preventing the bars from being overly sweet. These bars are also incredibly easy to make, requiring simple ingredients and straightforward steps. Moreover, they’re a crowd-pleaser, perfect for sharing with friends and family or enjoying as a personal indulgence. The tropical twist makes them a unique and memorable treat that stands out from ordinary desserts.
Ingredients:
Coconut Crumble Base & Topping:
- 125g / 1 stick unsalted butter, melted
- 1/2 cup white sugar
- 1 large egg
- 1 1/2 cups all-purpose flour
- 1 cup rolled oats
- 3/4 cup unsweetened desiccated coconut
- 1/2 tsp baking powder
- 1/4 tsp kosher salt
Mango Filling:
- 2 1/2 cups (400g) ripe mango slices (5mm thick)
- 1 1/2 tsp cornflour / cornstarch
- 2 tbsp white sugar
Lime Glaze (Highly Recommended!):
- 3/4 cup powdered sugar
- 1 tsp lime zest
- 3 tsp fresh lime juice (plus more, 1/4 tsp at a time, if needed)
- 1/4 tsp vanilla extract
Preparation:
Step 1: Preheat your oven to 350°F (180°C). Prepare an 8” square baking pan by lining it with parchment paper. Ensure the parchment paper overhangs the sides of the pan; this will make it easy to remove the bars later. Having the right pan size is crucial for the correct thickness and baking time of the bars. A pan that is too large will result in thin, overcooked bars, while a pan that is too small may lead to uneven baking and a soggy center.
Step 2: In a mixing bowl, melt the unsalted butter. You can do this in the microwave in short intervals (about 20-30 seconds), stirring in between to prevent splattering, or you can melt it gently in a saucepan on the stovetop. Once melted, stir in the white sugar until well combined. The sugar should dissolve partially into the butter, creating a smooth mixture. Add the large egg and mix thoroughly until the mixture is uniform and slightly creamy.
Step 3: Add the dry ingredients to the wet ingredients. In the same bowl, add the all-purpose flour, rolled oats, unsweetened desiccated coconut, baking powder, and kosher salt. Stir until everything is just combined. Be careful not to overmix, as this can lead to a tough crumble. The mixture should be crumbly, with no visible dry flour. The combination of flour, oats, and coconut gives the crumble its signature texture, offering a delightful contrast to the soft mango filling.
Step 4: Measure out 1 3/4 cups of the crumble mixture. Press this portion firmly and evenly into the bottom of the prepared pan to form the base. Using the bottom of a measuring cup or your fingers, press the mixture down to create a compact and stable base for the mango filling. This base is crucial as it provides the structural foundation for the bars, preventing them from falling apart.
Step 5: Prepare the mango filling by gently tossing the mango slices with cornflour and white sugar in a separate bowl just before using. The cornflour helps to thicken the mango juices during baking, preventing the bars from becoming too watery. The sugar enhances the natural sweetness of the mangoes and creates a syrupy consistency. Ensure the mango slices are uniformly coated with the cornflour and sugar mixture. Spread the mango mixture evenly over the crumble base, ensuring that it covers the entire surface.
Step 6: Crumble the remaining dough over the top of the mango layer. Leave some of the fruit exposed for texture and color contrast. This not only adds visual appeal but also allows the mangoes to caramelize slightly during baking, enhancing their flavor. Distribute the crumble evenly over the mangoes, creating a textured topping that will turn golden brown in the oven.
Step 7: Bake in the preheated oven for 30 minutes, or until the crumble is golden brown and the mangoes are bubbling. Keep a close eye on the bars during the last few minutes of baking to prevent the crumble from burning. The baking time may vary slightly depending on your oven, so it’s essential to monitor the color and consistency. Once baked, remove the pan from the oven and let the bars cool in the pan for at least 2 hours at room temperature, or 30 minutes on the counter followed by 30 minutes in the refrigerator. This cooling period is crucial, as it allows the mango filling to set and the flavors to meld together.
Step 8: While the bars are cooling, prepare the lime glaze. In a small bowl, whisk together the powdered sugar, lime zest, lime juice, and vanilla extract until smooth and honey-like in consistency. The lime zest adds a burst of aromatic citrus flavor, while the lime juice provides a tangy counterpoint to the sweetness of the powdered sugar. Add the lime juice gradually, adjusting the amount to achieve the desired consistency. If the glaze is too thick, add a few drops of lime juice at a time until it reaches a drizzling consistency.
Step 9: Once the bars are completely cooled, drizzle the lime glaze evenly over the top. Let the glaze set for about 10 minutes before slicing. The glaze will harden slightly, creating a smooth, glossy finish. This adds not only flavor but also visual appeal to the bars.
Step 10: Using the parchment paper overhang, carefully lift the bars out of the pan. Place them on a cutting board and slice into 12 regular squares or 9 large ones. A sharp knife is essential for clean slices. Serve and enjoy the delightful combination of mango, coconut, and lime!
COOKING Rating:
Easy
Serving Suggestions:
These Juicy Mango Bars are delicious on their own, but they can also be served with a scoop of vanilla ice cream or a dollop of whipped cream. A sprinkle of toasted coconut flakes or a few fresh mint leaves can add a touch of elegance. These bars are perfect for brunch, dessert, or a sweet snack any time of day. They also pair well with a cup of coffee, tea, or a refreshing glass of lemonade.
Tips:
- Use Ripe Mangoes: The key to great mango bars is using ripe, juicy mangoes. They should be slightly soft to the touch and have a sweet aroma. If your mangoes are not ripe enough, you can ripen them by placing them in a paper bag with a banana or apple for a few days.
- Don’t Overmix the Crumble: Overmixing the crumble can result in a tough texture. Mix the ingredients until just combined, and don’t worry about small lumps.
- Adjust the Sweetness: If you prefer a less sweet dessert, you can reduce the amount of sugar in the crumble and the mango filling.
- Make Ahead: These bars can be made ahead of time and stored in the refrigerator for up to 3 days. The flavors will meld together even more as they sit.
- Variations: Feel free to experiment with different fruits. Pineapple, peaches, or berries would also work well in this recipe.
Prep Time: 20 minutes Cook Time: 30 minutes Total Time: 2 hours 50 minutes (including cooling time)
Nutritional Information: (per serving, approximate)
- Calories: 350
- Protein: 4g
- Sodium: 150mg
Conclusion:
Juicy Mango Bars with Coconut Crumble and Zesty Lime Glaze are a delightful treat that brings the taste of the tropics to your kitchen. This recipe is simple to follow, requires minimal effort, and delivers maximum flavor. The combination of sweet mangoes, buttery coconut crumble, and tangy lime glaze is a true crowd-pleaser, making it perfect for any occasion. Whether you’re looking for a refreshing summer dessert or a sweet treat to brighten your day, these mango bars are sure to satisfy your cravings. Enjoy the symphony of flavors and textures in every bite!
5 Questions and Answers about this recipe:
- Can I use frozen mangoes for this recipe? Yes, you can use frozen mangoes if fresh mangoes are not available. Make sure to thaw them completely and drain any excess liquid before using. Pat them dry to prevent the filling from becoming too watery. Keep in mind that the texture of frozen mangoes might be slightly softer than fresh mangoes, but they will still work well in this recipe.
- Can I make this recipe gluten-free? Absolutely! To make these mango bars gluten-free, simply substitute the all-purpose flour with a gluten-free all-purpose flour blend. Ensure the blend contains xanthan gum or add about 1/2 teaspoon of xanthan gum to the dry ingredients for better binding. Also, check that the rolled oats are certified gluten-free, as some oats can be cross-contaminated during processing.
- How do I store these mango bars? Store the mango bars in an airtight container in the refrigerator for up to 3 days. The coolness will help maintain the freshness of the mangoes and prevent the crumble from becoming soggy. Before serving, you can let them sit at room temperature for about 15-20 minutes to soften slightly.
- Can I make this recipe vegan? Yes, with a few substitutions, you can easily make these mango bars vegan. Replace the butter with a vegan butter alternative, the egg with a flax egg (1 tablespoon of flaxseed meal mixed with 3 tablespoons of water, let sit for 5 minutes to thicken), and ensure your powdered sugar is vegan-friendly (some brands use bone char in the refining process).
- What other fruits can I use instead of mangoes? While mangoes are the star of this recipe, you can certainly experiment with other fruits. Peaches, pineapples, berries (such as blueberries or raspberries), or a combination of fruits would all work beautifully. Just make sure to adjust the amount of sugar and cornflour depending on the sweetness and moisture content of the fruit you choose. For example, if using berries, you might need to add a bit more cornflour to absorb the juices.