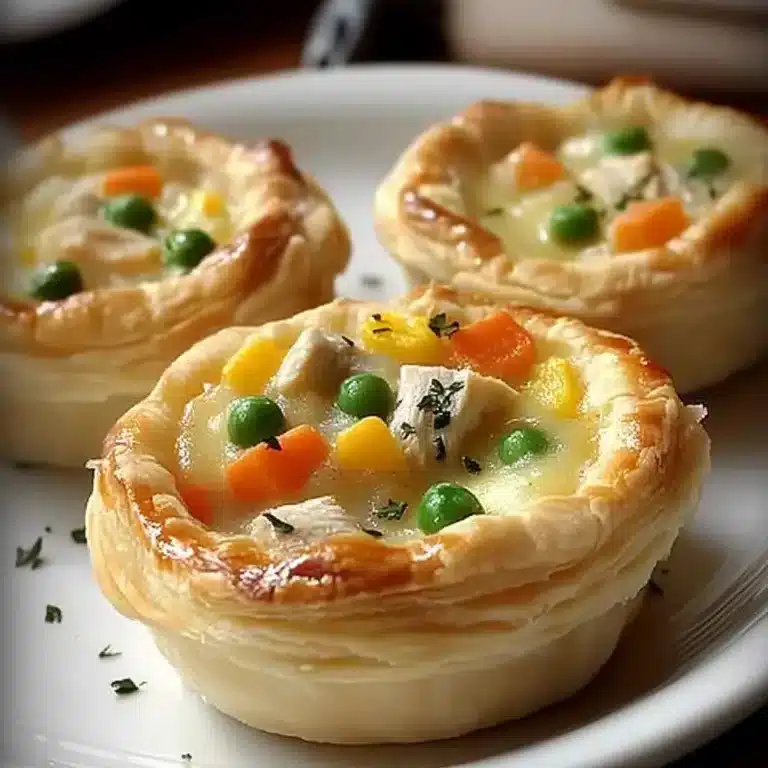
Description of this recipe
These Mini Chicken Pot Pies are individual servings of comfort food, perfect for a weeknight dinner or a cozy weekend lunch. They feature a creamy, savory filling of chicken, mixed vegetables, and a luscious cream of chicken soup base, all nestled inside flaky, golden-brown crescent roll crusts. They’re easy to make, customizable to your liking, and irresistibly delicious!
Why you will love this recipe
Who doesn’t love a good pot pie? These Mini Chicken Pot Pies take all the best parts of the classic dish and shrink them down into adorable, single-serving portions. They’re a breeze to put together thanks to the use of pre-made crescent roll dough, and they’re a fantastic way to use up leftover cooked chicken. Plus, they’re endlessly versatile – feel free to swap out the vegetables, add your favorite herbs, or experiment with different cheeses. But the best part? The satisfying crunch of the flaky crust combined with the creamy, flavorful filling. It’s pure comfort in every bite!
Ingredients:
- Cream of Chicken Soup: 14 ounces (approximately 400g)
- Chicken Stock: ¼ cup (60ml)
- Crescent Rolls: 3 packages (each package typically contains 8 crescent rolls)
- Frozen mixed vegetables, thawed: 9 ounces (approximately 255g)
- Cooked chicken, shredded: 1 cup (approximately 150g)
- Optional: 1 egg, beaten (for egg wash)
- Optional: Fresh parsley, chopped (for garnish)
- Optional: Salt and pepper to taste
Preparation:
Step 1: Preheat & Prep
Begin by preheating your oven to 400°F (200°C). While the oven is heating up, take a standard 12-cup muffin tin and lightly spray each cup with a non-stick cooking spray. This crucial step prevents the mini pot pies from sticking to the pan, ensuring they release easily once baked. If you don’t have cooking spray, you can lightly grease the muffin tin with butter or oil.
Step 2: Prepare Dough Crusts
Unroll all three packages of crescent roll dough onto a clean, lightly floured surface. Carefully pinch the seams of the dough together to create a single, large sheet. This will give you a more uniform surface to work with when cutting out the crusts. Using a biscuit cutter (approximately 3-inch diameter) or a knife, cut out 12 rounds from the dough. If you don’t have a biscuit cutter, you can use a drinking glass or any other round object of a similar size.
Gently press one round of dough into each prepared muffin cup. Use your fingers to carefully push the dough up the sides of the cup, forming a small bowl or cup shape. Ensure the dough is evenly distributed along the sides to prevent any thin spots that might break during baking.
Step 3: Make the Filling
In a large mixing bowl, combine the cream of chicken soup, chicken stock, thawed mixed vegetables, and the shredded cooked chicken. Mix all ingredients thoroughly until well combined. At this stage, you can taste the filling and adjust the seasoning to your liking. Add a pinch of salt and pepper, or other herbs and spices, to enhance the flavor.
Step 4: Fill & Top
Spoon the prepared chicken and vegetable filling into each dough-lined muffin cup, filling them almost to the top. Be careful not to overfill the cups, as the filling may bubble over during baking.
Using a pizza cutter or a sharp knife, slice the remaining crescent roll dough into thin strips. These strips will be used to create a decorative lattice or simple pattern on top of each mini pot pie. Lay the strips of dough across the tops of the filled cups, creating a visually appealing design. For a lattice pattern, lay strips in one direction, then weave strips perpendicular to the first set. Alternatively, you can simply lay a few strips across the top of each pie in a random pattern.
For an extra golden-brown finish, lightly brush the tops of the dough strips with a beaten egg (egg wash). This will give the crust a beautiful sheen and help it brown evenly.
Step 5: Bake
Carefully place the muffin tin into the preheated oven. Bake for approximately 18-20 minutes, or until the crust is golden brown and the filling is bubbly and heated through. Keep a close eye on the mini pot pies during baking, as baking times may vary depending on your oven. If the tops begin to brown too quickly, you can loosely cover the muffin tin with a sheet of aluminum foil to prevent burning.
Step 6: Cool & Serve
Once the mini pot pies are baked to a golden-brown perfection, remove the muffin tin from the oven and place it on a wire rack to cool for a few minutes. This will allow the filling to set slightly and make it easier to remove the pot pies from the tin.
After a few minutes of cooling, use a thin knife or spatula to gently loosen the edges of each mini pot pie from the muffin tin. Carefully lift each pot pie out of the tin and transfer it to a serving plate.
Garnish with fresh parsley or other herbs for an added touch of freshness and visual appeal. Serve the Mini Chicken Pot Pies warm for the best flavor and texture.
COOKING Rating:
Easy
Serving Suggestions:
- Serve as a main course for lunch or dinner.
- Pair with a side salad for a complete meal.
- Perfect for potlucks, parties, or casual gatherings.
- Serve with a dollop of sour cream or plain yogurt for extra creaminess.
- Serve alongside steamed green beans or roasted carrots for a balanced meal.
Tips:
- For a richer flavor, use homemade chicken stock instead of store-bought.
- Add a splash of dry sherry or white wine to the filling for added depth of flavor.
- Experiment with different vegetables, such as peas, corn, or diced potatoes.
- For a vegetarian option, substitute the chicken with diced mushrooms or tofu.
- Make a large batch and freeze the unbaked pot pies for a quick and easy meal later. Simply thaw overnight in the refrigerator and bake as directed.
- If you don’t have crescent roll dough, you can use puff pastry or pie crust instead.
- To prevent the bottom crust from becoming soggy, pre-bake the crusts for a few minutes before adding the filling.
- Use rotisserie chicken for a quick and convenient way to add cooked chicken to the filling.
- For a spicier flavor, add a pinch of cayenne pepper or a dash of hot sauce to the filling.
- Store leftover mini pot pies in an airtight container in the refrigerator for up to 3 days. Reheat in the oven or microwave until heated through.
Prep Time:
20 minutes
Cook Time:
18-20 minutes
Total Time:
38-40 minutes
Nutritional Information:
(Note: Nutritional information is approximate and may vary depending on specific ingredients and portion sizes.)
Calories: Approximately 250-300 per mini pot pie
Protein: Approximately 10-15 grams per mini pot pie
Sodium: Approximately 400-500mg per mini pot pie
Conclusion
These Mini Chicken Pot Pies are the ultimate comfort food, offering a delightful combination of flaky crust and creamy filling in every bite. They’re incredibly easy to make, customizable to your preferences, and perfect for any occasion. Whether you’re looking for a quick weeknight dinner or a crowd-pleasing appetizer, these mini pot pies are sure to be a hit. So gather your ingredients, preheat your oven, and get ready to enjoy a warm, comforting, and absolutely delicious treat!
5 Questions and Answers about this recipe
Q1: Can I use a different type of dough for the crust?
A: Absolutely! While this recipe calls for crescent roll dough for its convenience and flaky texture, you can definitely substitute it with other types of dough. Puff pastry is an excellent alternative, providing an even richer and flakier crust. Pie crust also works well, offering a more traditional pot pie experience. Keep in mind that baking times may need to be adjusted depending on the type of dough you choose.
Q2: I don’t have cream of chicken soup. Can I use something else?
A: Yes, you can substitute the cream of chicken soup with other cream-based soups or sauces. Cream of mushroom soup is a popular choice, adding a different but equally delicious flavor profile. You could also create your own creamy sauce by combining chicken stock with heavy cream and a thickening agent like flour or cornstarch. Season the sauce with herbs and spices to your liking.
Q3: Can I add other vegetables to the filling?
A: Definitely! One of the great things about this recipe is its versatility. Feel free to add any vegetables you enjoy. Peas, corn, diced potatoes, carrots, green beans, and mushrooms are all excellent additions. You can use fresh, frozen, or canned vegetables, depending on your preference and what you have on hand. Just be sure to thaw frozen vegetables before adding them to the filling.
Q4: How can I prevent the crust from getting soggy?
A: Soggy crust can be a common problem with pot pies, but there are a few tricks to prevent it. First, make sure to lightly spray the muffin tin with non-stick cooking spray to create a barrier between the dough and the pan. You can also pre-bake the crusts for a few minutes before adding the filling. This will help to set the dough and prevent it from absorbing too much moisture from the filling. Finally, avoid overfilling the cups, as this can also lead to a soggy crust.
Q5: Can I freeze these mini pot pies?
A: Yes, these mini pot pies freeze beautifully, making them a great option for meal prepping. To freeze them, prepare the pot pies as directed, but do not bake them. Place the unbaked pot pies in the muffin tin in the freezer until they are solid. Once frozen, remove them from the muffin tin and transfer them to a freezer-safe bag or container. They can be stored in the freezer for up to 2-3 months. When you’re ready to bake them, simply thaw them overnight in the refrigerator and bake as directed. You may need to add a few extra minutes to the baking time to ensure they are heated through.