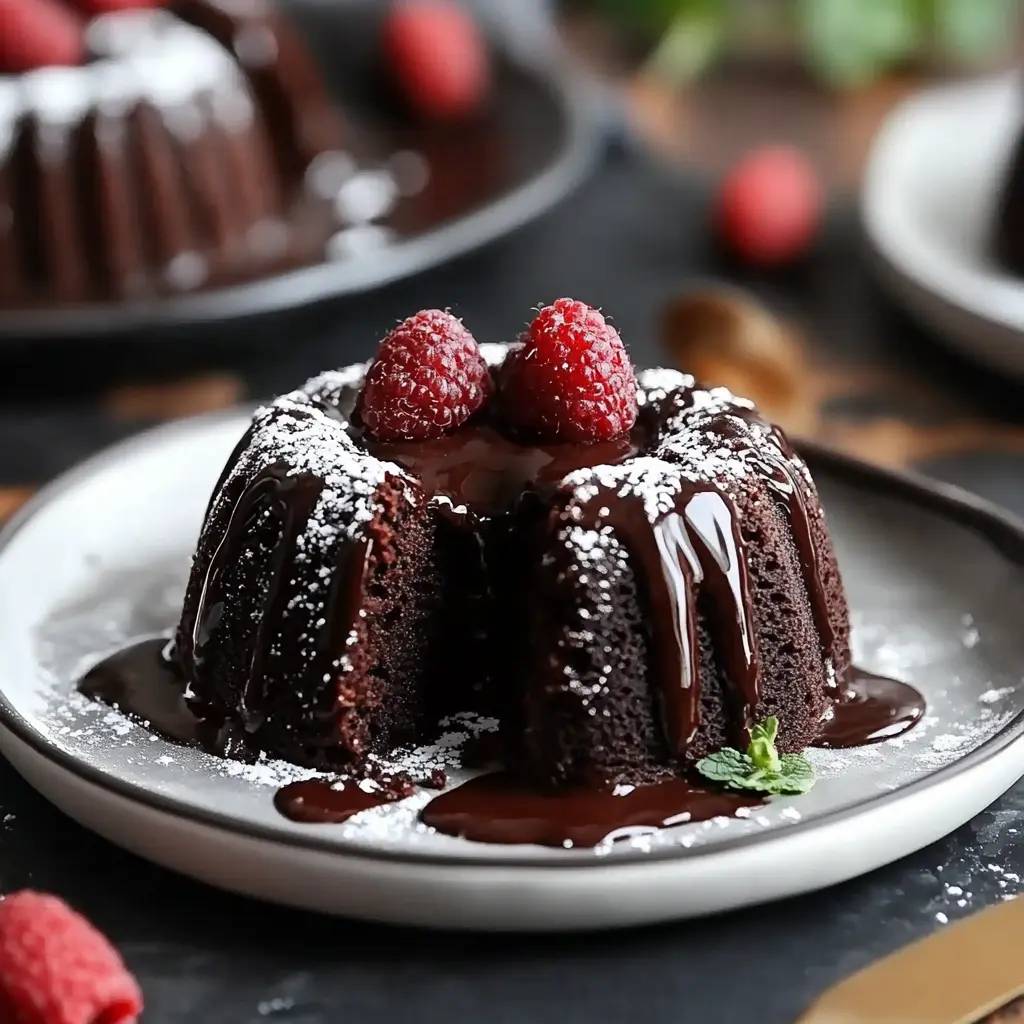
Description of this recipe: These decadent Mini Chocolate Lava Bundt Cakes are a chocolate lover’s dream come true. Rich, intensely chocolatey, and boasting a molten center that oozes with every bite, they’re the perfect individual-sized dessert to impress guests or simply indulge in a little self-care. The elegant bundt shape elevates them from a simple lava cake to a sophisticated treat that’s as beautiful as it is delicious.
Why you will love this recipe:
- Indulgent and Rich: These cakes are intensely chocolatey, delivering a deep and satisfying flavor that will satisfy even the most intense chocolate cravings.
- Molten Center Magic: The warm, flowing molten center is the star of the show, creating a textural contrast that’s simply irresistible.
- Elegant Presentation: The mini bundt cake molds add a touch of sophistication, making these cakes perfect for special occasions or dinner parties.
- Easy to Make: Despite their impressive presentation, these cakes are surprisingly easy to prepare with just a few simple ingredients and straightforward steps.
- Customizable: You can easily customize these cakes with different toppings, such as fresh berries, whipped cream, ice cream, or even a drizzle of chocolate sauce.
Introduction
There’s something undeniably magical about a chocolate lava cake. The contrast between the warm, solid exterior and the flowing, molten interior is pure sensory delight. But let’s face it, sometimes sharing a single lava cake feels… inadequate. That’s where these Mini Chocolate Lava Bundt Cakes come in. They offer the same intensely chocolatey experience with the added benefit of individual portions and a stunning presentation, thanks to the charming bundt cake molds.
This recipe is perfect for both novice and experienced bakers. It requires no fancy equipment or complicated techniques. The key is to find that sweet spot in the baking time – just long enough to set the edges and create a stable structure, but short enough to leave the center gloriously molten. Mastering this, and you’ll have a dessert that will consistently wow your friends and family.
The use of high-quality dark chocolate is crucial for the best flavor. I recommend using chocolate with a cocoa content between 60% and 70% for a balanced flavor profile that’s both rich and slightly bittersweet. Don’t skimp on the butter either! It contributes to the cake’s moistness and luxurious texture.
Beyond the basic recipe, feel free to experiment with different variations. Try adding a pinch of espresso powder to enhance the chocolate flavor, or a hint of chili powder for a subtle kick. You can also incorporate chopped nuts, chocolate chips, or even a swirl of caramel into the batter. The possibilities are endless!
These Mini Chocolate Lava Bundt Cakes are more than just a dessert; they’re an experience. They’re a moment of pure indulgence, a celebration of chocolate, and a testament to the power of simple ingredients combined in the right way. So, gather your ingredients, preheat your oven, and get ready to create some molten magic!
Ingredients:
- 1/2 cup (1 stick) unsalted butter, plus extra for greasing
- 4 oz dark chocolate (60-70% cocoa), chopped
- 2 large eggs
- 2 large egg yolks
- 1/2 cup granulated sugar
- 1/4 teaspoon salt
- 1/4 cup all-purpose flour
- 1 teaspoon vanilla extract
- 1 tablespoon cocoa powder (for dusting molds)
- Powdered sugar (for garnish)
- Fresh berries or whipped cream (optional)
Preparation:
Step 1: Preheat your oven to 425°F (220°C). This high temperature is essential for creating the desired contrast between the set edges and the molten center. Make sure your oven is properly calibrated for accurate results. Don’t just rely on the dial; use an oven thermometer to double-check the temperature. Thorough preheating is key to success.
Step 2: Prepare your mini bundt cake molds. Generously grease each mold with softened butter, ensuring you reach every nook and cranny. This will prevent the cakes from sticking and allow them to release cleanly. After greasing, dust the molds with cocoa powder. The cocoa powder adds a subtle chocolatey flavor and helps to create a beautiful, slightly textured surface on the baked cakes. Tap out any excess cocoa powder. If you don’t have mini bundt cake molds, you can use ramekins, but the baking time may need to be adjusted.
Step 3: Melt the butter and chopped chocolate together. You can do this in a microwave-safe bowl in 30-second intervals, stirring in between, until smooth. Alternatively, use a double boiler over simmering water. Ensure the bottom of the bowl doesn’t touch the water. Stir the mixture constantly until the chocolate is fully melted and the butter is incorporated. Allow the melted chocolate mixture to cool slightly before proceeding. This prevents the eggs from scrambling when you add them later.
Step 4: In a separate bowl, whisk the eggs, egg yolks, sugar, and salt together until the mixture is pale, thickened, and slightly ribbon-like. This process incorporates air into the batter, which contributes to the cake’s light and airy texture. Whisk for several minutes until the mixture doubles in volume. The egg yolks add richness and intensify the chocolate flavor. The salt enhances the sweetness of the sugar and balances the overall flavor profile.
Step 5: Gently stir the cooled melted chocolate mixture and vanilla extract into the egg mixture. Combine until just well combined. Be careful not to overmix at this stage, as it can develop the gluten in the flour and result in a tough cake. The vanilla extract adds a touch of warmth and complexity to the chocolate flavor. Use a high-quality vanilla extract for the best results.
Step 6: Carefully fold in the flour until just incorporated. Again, avoid overmixing. Overmixing develops the gluten in the flour, leading to a dense and chewy cake, which is not what we want for this recipe. Use a spatula or a large spoon and gently fold the flour into the batter until no streaks of flour remain.
Step 7: Divide the batter evenly among the prepared mini bundt molds. Fill each mold about three-quarters full, leaving some space for the cakes to rise during baking. Using an ice cream scoop can help ensure that each mold receives an equal amount of batter.
Step 8: Bake for 10-12 minutes, or until the edges are set and the centers remain soft. The baking time may vary depending on your oven and the size of your bundt cake molds. To test for doneness, gently insert a toothpick into the edge of one of the cakes. The toothpick should come out clean, but the center should still look slightly soft and underbaked. This is crucial for achieving the molten lava effect.
Step 9: Let the cakes rest in the molds for 1-2 minutes before inverting them onto serving plates. This allows the cakes to set slightly, making them easier to handle. Gently run a thin knife or spatula around the edges of each cake to loosen it from the mold before inverting.
Step 10: Dust the warm cakes with powdered sugar. This adds a touch of sweetness and creates a beautiful, elegant finish. You can also garnish with fresh berries, such as raspberries or strawberries, or a dollop of whipped cream. Other topping options include chocolate shavings, a drizzle of chocolate sauce, or a scoop of vanilla ice cream. Serve immediately for the best molten lava experience.
COOKING Rating:
- Difficulty: Easy
- Skill Level: Beginner
Serving Suggestions:
- Serve warm, immediately after baking, for the ultimate molten lava experience.
- Garnish with powdered sugar, fresh berries, whipped cream, ice cream, or chocolate sauce.
- Pair with a scoop of vanilla ice cream or a dollop of freshly whipped cream to complement the rich chocolate flavor.
- Serve with a glass of dessert wine, such as port or sherry, to enhance the flavors.
- Present the cakes on individual dessert plates for an elegant and sophisticated presentation.
Tips:
- Use high-quality dark chocolate (60-70% cocoa) for the best flavor.
- Do not overmix the batter, as this will result in a tough cake.
- Be careful not to overbake the cakes, as this will prevent the centers from being molten.
- Grease and dust the mini bundt cake molds thoroughly to prevent sticking.
- Allow the melted chocolate mixture to cool slightly before adding the eggs.
- Serve the cakes immediately for the best molten lava experience.
Prep Time:
- 15 minutes
Cook Time:
- 10-12 minutes
Total Time:
- 25-27 minutes
Nutritional Information:
(Note: Nutritional information is an estimate and may vary based on specific ingredients and serving sizes.)
- Calories: Approximately 350-400 per cake
- Protein: Approximately 5-7 grams per cake
- Sodium: Approximately 50-75 mg per cake
Conclusion
These Mini Chocolate Lava Bundt Cakes are a truly decadent and delightful treat that’s perfect for any occasion. Their rich chocolate flavor, molten center, and elegant presentation make them a crowd-pleaser that’s sure to impress. With their ease of preparation and customizable toppings, these cakes are a versatile dessert that you’ll find yourself making again and again. So, go ahead and indulge in a little chocolatey goodness and experience the magic of these Mini Chocolate Lava Bundt Cakes!
Questions and Answers:
Q1: Can I make these cakes ahead of time?
A: While these cakes are best served warm and fresh, you can prepare the batter ahead of time and store it in the refrigerator for up to 24 hours. When you’re ready to bake, let the batter come to room temperature for about 30 minutes before dividing it among the molds and baking as directed. Keep in mind that the baking time might need to be adjusted slightly if the batter is very cold. Do not pre-bake the cakes, as they will lose their molten centers.
Q2: What if I don’t have mini bundt cake molds? Can I use something else?
A: Yes, you can definitely use ramekins or muffin tins instead of mini bundt cake molds. If using ramekins, grease and flour them well to prevent sticking. If using muffin tins, line them with paper liners for easy removal. The baking time may need to be adjusted depending on the size of the ramekins or muffin tins. Start checking for doneness a few minutes earlier than the recipe suggests.
Q3: My cakes didn’t have a molten center. What did I do wrong?
A: There are a few reasons why your cakes might not have had a molten center. The most common cause is overbaking. Make sure you’re not baking the cakes for too long. They should be removed from the oven when the edges are set, but the centers still look slightly soft and underbaked. Another possibility is that your oven temperature is too low. Use an oven thermometer to ensure your oven is properly calibrated. Finally, make sure you’re using the correct ratio of ingredients, especially the amount of chocolate and butter.
Q4: Can I use milk chocolate instead of dark chocolate?
A: While you can use milk chocolate, the resulting cakes will be much sweeter and less intensely chocolatey. The dark chocolate provides a richer and more complex flavor that balances the sweetness of the sugar. If you do use milk chocolate, you might want to reduce the amount of sugar in the recipe slightly to compensate for the extra sweetness.
Q5: How do I store leftover cakes?
A: While these cakes are best enjoyed immediately, you can store any leftovers in an airtight container in the refrigerator for up to 2 days. However, the molten centers will solidify upon refrigeration. To reheat, you can microwave the cakes for a few seconds until warmed through, but be careful not to overheat them, as they can become dry. Alternatively, you can gently reheat them in a preheated oven at 300°F (150°C) for a few minutes until warmed through.