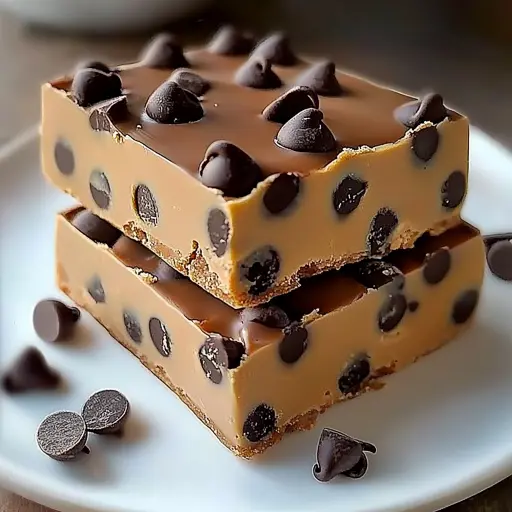
Description: Indulge in the irresistible taste of chocolate chip cookie dough without ever turning on your oven! These No-Bake Chocolate Chip Cookie Dough Bars are a dream come true for cookie dough lovers. A rich, buttery, and perfectly sweet cookie dough base, studded with generous amounts of chocolate chips, is topped with a decadent chocolate ganache. Easy to make, utterly delicious, and requiring no baking, these bars are the ultimate treat for any occasion. Perfect for a quick dessert, a potluck, or simply satisfying your sweet tooth, these bars are sure to become a new favorite.
Ingredients:
For the Cookie Dough:
- ½ cup (1 stick or 113g) unsalted butter, softened to room temperature (crucial for proper creaming)
- ½ cup (100g) packed light brown sugar (provides a depth of flavor and chewiness)
- ¼ cup (50g) granulated sugar (adds sweetness and helps with the dough’s texture)
- 2 tablespoons milk (helps bind the ingredients and adds moisture)
- 1 teaspoon pure vanilla extract (enhances the flavor profile and complements the chocolate)
- 1 ½ cups (180g) all-purpose flour (heat-treated) (provides structure; heat-treating is essential for food safety)
- ½ teaspoon fine sea salt (balances the sweetness and enhances the other flavors)
- 1 cup (170g) semi-sweet chocolate chips (the star of the show, providing delicious bursts of chocolatey goodness)
For the Chocolate Topping:
- 1 ½ cups (255g) semi-sweet chocolate chips (creates the rich and decadent ganache)
- ½ cup (120ml) heavy cream (provides the liquid base for the ganache, making it smooth and glossy)
- Extra chocolate chips, for garnish (adds visual appeal and an extra dose of chocolate)
Preparation:
Step 1: Heat-Treat the Flour
Before you begin making the cookie dough, it’s absolutely crucial to heat-treat the flour. Raw flour can contain harmful bacteria, and since this is a no-bake recipe, we need to eliminate that risk.
- Option 1: Microwave Method: Place the flour in a microwave-safe bowl. Microwave on high in 30-second intervals, stirring well between each interval. Continue until the flour reaches an internal temperature of 165°F (74°C). Use a food thermometer to check. This typically takes 1-2 minutes total, but be sure to test as microwaves can vary in power.
- Option 2: Oven Method: Preheat your oven to 350°F (175°C). Spread the flour in a thin, even layer on a baking sheet lined with parchment paper. Bake for 5-7 minutes, stirring halfway through, until the flour reaches an internal temperature of 165°F (74°C). Again, use a food thermometer to ensure accuracy.
Let the heat-treated flour cool completely before using it in the recipe.
Step 2: Cream the Butter and Sugars
In a large mixing bowl (or the bowl of a stand mixer fitted with the paddle attachment), beat the softened butter, brown sugar, and granulated sugar together until light and fluffy. This process is known as “creaming,” and it’s essential for creating a smooth and airy base for the cookie dough. Creaming incorporates air into the mixture, resulting in a lighter and more tender final product. Beat for 3-5 minutes on medium speed, scraping down the sides of the bowl as needed, until the mixture is noticeably lighter in color and texture.
Step 3: Add the Wet Ingredients
Add the milk and vanilla extract to the creamed butter and sugar mixture. Mix on low speed until well combined. Be careful not to overmix at this stage, as overmixing can develop gluten in the flour later, leading to a tougher cookie dough.
Step 4: Incorporate the Dry Ingredients
Gradually add the cooled, heat-treated flour and salt to the wet ingredients. Mix on low speed until just combined. Be very careful not to overmix. Overmixing will develop the gluten in the flour, resulting in a tough cookie dough. The dough should be soft and slightly sticky.
Step 5: Fold in the Chocolate Chips
Gently fold in the chocolate chips until they are evenly distributed throughout the cookie dough. Use a rubber spatula for this step to avoid overmixing.
Step 6: Press Dough into the Pan
Line a 9×5 inch loaf pan with parchment paper, leaving some overhang on the sides. This will make it easy to lift the bars out of the pan later. Press the cookie dough mixture evenly into the prepared pan. Use the back of a spoon or your fingers (lightly dampened to prevent sticking) to smooth out the top of the dough.
Step 7: Chill the Dough
Refrigerate the cookie dough for at least 20 minutes to firm up. This will make it easier to spread the chocolate ganache evenly on top.
Step 8: Make the Chocolate Ganache
While the cookie dough is chilling, prepare the chocolate ganache. In a small saucepan, heat the heavy cream over medium heat until it is just warm and begins to simmer around the edges. Do not boil the cream, as this can cause it to separate.
Step 9: Melt the Chocolate
Remove the saucepan from the heat and immediately pour the warm heavy cream over the chocolate chips in a heat-safe bowl. Let the mixture sit for 1 minute to allow the heat from the cream to melt the chocolate.
Step 10: Stir the Ganache Until Smooth
After 1 minute, gently stir the chocolate and cream together with a whisk or spatula until smooth, glossy, and completely combined. If the chocolate doesn’t fully melt, you can microwave the mixture in 15-second intervals, stirring in between, until smooth.
Step 11: Pour Ganache over Dough & Chill
Remove the cookie dough from the refrigerator and pour the chocolate ganache evenly over the top. Spread the ganache to the edges of the pan with a spatula. Sprinkle extra chocolate chips on top for garnish, if desired.
Step 12: Chill and Serve
Refrigerate the bars for at least 1 hour, or preferably longer (2-3 hours), to allow the ganache to set completely. Once the bars are firm, lift them out of the pan using the parchment paper overhang. Cut the bars into squares or rectangles using a sharp knife. Store any leftover bars in an airtight container in the refrigerator.
Why You Will Love This Recipe:
- No-Bake Convenience: Say goodbye to heating up your kitchen! These bars require absolutely no baking, making them perfect for hot summer days or when you’re short on time.
- Irresistible Flavor: The combination of rich, buttery cookie dough and decadent chocolate ganache is simply divine. Every bite is a burst of chocolatey goodness.
- Easy to Make: With simple ingredients and straightforward instructions, even novice bakers can whip up these bars with ease.
- Customizable: Feel free to get creative and add your favorite mix-ins to the cookie dough, such as chopped nuts, sprinkles, or different types of chocolate chips.
- Crowd-Pleasing: These bars are always a hit at parties, potlucks, or any gathering. They’re guaranteed to disappear quickly!
Serving Suggestions:
- Serve the bars chilled, straight from the refrigerator.
- Pair them with a glass of cold milk or a scoop of vanilla ice cream for an extra indulgent treat.
- Cut the bars into smaller squares for a bite-sized snack.
- Drizzle with caramel sauce or sprinkle with sea salt for added flavor and texture.
- Package them in cellophane bags and tie with a ribbon for a thoughtful homemade gift.
Tips:
- Use high-quality chocolate chips: The quality of the chocolate chips will significantly impact the overall flavor of the bars.
- Don’t overmix the dough: Overmixing will develop gluten, resulting in a tough cookie dough.
- Chill the dough before adding the ganache: This will prevent the ganache from melting the cookie dough.
- Use a sharp knife to cut the bars: This will ensure clean, even cuts.
- Store the bars in the refrigerator: This will keep them fresh and prevent the ganache from melting.
Prep Time: 15 minutes Cook Time: 5 minutes (for heat-treating flour; zero baking time) Total Time: 1 hour 20 minutes (includes chilling time)
Nutritional Information:
- Calories: Approximately 350 per serving (Note: This is an estimate and can vary depending on specific ingredients and portion sizes.)
- Protein: Approximately 4g per serving (estimate)
- Sodium: Approximately 150mg per serving (estimate)
Conclusion:
These No-Bake Chocolate Chip Cookie Dough Bars are a truly delightful treat that’s easy to make and impossible to resist. With their rich, buttery flavor, decadent chocolate ganache, and no-bake convenience, they’re the perfect dessert for any occasion. So, ditch the oven and whip up a batch of these bars today! Your taste buds will thank you.
Questions and Answers About This Recipe:
- Can I use a different type of chocolate in the ganache? Absolutely! While semi-sweet chocolate is used in the recipe, you can definitely substitute it with milk chocolate, dark chocolate, or even white chocolate, depending on your preference. Keep in mind that the sweetness level will change with different types of chocolate. For a less sweet ganache, use dark chocolate with a higher percentage of cacao. For a sweeter ganache, opt for milk chocolate.
- Is it really necessary to heat-treat the flour? Yes, it is! Heat-treating the flour is absolutely crucial for this no-bake recipe to ensure food safety. Raw flour can contain harmful bacteria, such as E. coli, that can cause illness. Heat-treating eliminates this risk. Don’t skip this step!
- Can I freeze these cookie dough bars? Yes, you can freeze these bars for longer storage. Wrap the bars tightly in plastic wrap, then place them in a freezer-safe container or bag. They can be frozen for up to 2-3 months. When ready to serve, thaw them in the refrigerator overnight or at room temperature for a few hours. Keep in mind that freezing may slightly alter the texture of the ganache.
- Can I add nuts to the cookie dough? Definitely! Adding chopped nuts to the cookie dough is a great way to add texture and flavor. Walnuts, pecans, or almonds would all be delicious additions. Simply fold in about ½ cup of chopped nuts along with the chocolate chips.
- What if I don’t have heavy cream for the ganache? Can I use something else? While heavy cream is ideal for creating a rich and smooth ganache, you can substitute it with half-and-half or whole milk in a pinch. However, the ganache will be slightly less thick and decadent. You may need to adjust the amount of chocolate chips to achieve the desired consistency. For a richer substitute, consider using full-fat coconut milk (the thick cream that separates at the top of the can when refrigerated) – this will also add a subtle coconut flavor.