This No-Bake Cream Cheese Lemonade Pie is a refreshing and effortless dessert, perfect for hot summer days or anytime you crave a burst of citrusy delight. Combining the creamy tang of cream cheese with the zesty punch of lemonade, this pie requires no baking and comes together in minutes. The simple graham cracker crust complements the creamy filling, creating a delightful textural contrast.
Why You Will Love This Recipe
This recipe is a winner for several reasons. First and foremost, it’s incredibly easy and requires no baking, making it ideal for those who are short on time or intimidated by traditional baking methods. The bright, tangy flavor of lemonade combined with the richness of cream cheese is simply irresistible, creating a perfectly balanced dessert that isn’t overly sweet. This pie is also highly customizable – you can easily adjust the sweetness or tanginess to suit your personal preferences, and the garnishes can be tailored to your liking. Finally, it’s a crowd-pleaser that’s sure to impress at any gathering!
Ingredients:
→ Crust:
- 1 1/2 cups graham cracker crumbs
- 1/4 cup granulated sugar
- 6 tablespoons (3 ounces) unsalted butter, melted
→ Filling:
- 1 can (5 ounces) evaporated milk
- 1 package (3.4 ounces) instant lemon pudding mix
- 1 package (8 ounces) cream cheese, softened
- 1 can (6 ounces) frozen lemonade concentrate, thawed
Preparation:
Step 1: Prepare the graham cracker crust. In a medium-sized bowl, combine the graham cracker crumbs, granulated sugar, and melted unsalted butter. Mix thoroughly until all the crumbs are moistened and the mixture resembles wet sand. Ensure there are no large clumps of butter, and the sugar is evenly distributed throughout the crumbs. This even distribution is crucial for a crust that holds together well.
Step 2: Press the crust mixture into the pie plate. Firmly press the crumb mixture evenly into a 9-inch deep-dish pie plate. Use the bottom of a measuring cup or your fingers to compact the crumbs tightly against the bottom and up the sides of the pie plate. Pay special attention to the edges to ensure they are uniform in thickness to prevent them from crumbling later.
Step 3: Chill or bake the crust (optional). For a no-bake option, cover the crust with plastic wrap and chill it in the refrigerator for at least 30 minutes. This allows the butter to solidify, creating a firm base. Alternatively, for a firmer and more stable crust, bake it in a preheated oven at 350°F (175°C) for 10 to 12 minutes. Then, remove it from the oven and let it cool completely before adding the filling. Baking the crust adds a slight toasted flavor and extra stability, but chilling it is perfectly acceptable for a truly no-bake dessert.
Step 4: Prepare the lemon pudding mixture. In a separate medium bowl, whisk together the can of evaporated milk and the instant lemon pudding mix. Whisk vigorously for about 2 minutes until the mixture thickens and becomes creamy. The evaporated milk provides a richer, creamier base than regular milk, and the instant pudding mix helps to set the filling quickly. Make sure there are no lumps in the pudding mixture.
Step 5: Beat the cream cheese. In a large mixing bowl, using an electric mixer, beat the softened cream cheese until it is light and smooth. This is an essential step to ensure a creamy, lump-free filling. If the cream cheese is not sufficiently softened, it will be difficult to beat smoothly, resulting in a grainy texture. You can also use a stand mixer with the paddle attachment for this step.
Step 6: Blend in the lemonade concentrate. Gradually blend the thawed frozen lemonade concentrate into the beaten cream cheese. Mix on low speed until the concentrate is thoroughly combined and the mixture is smooth. The lemonade concentrate adds the signature tangy flavor to the pie. Be sure to use thawed concentrate to prevent the mixture from becoming too cold and stiff.
Step 7: Fold in the lemon pudding mixture. Gently fold the lemon pudding mixture into the cream cheese and lemonade blend. Continue mixing until the filling is uniform and smooth. Be careful not to overmix at this stage, as overmixing can deflate the filling and affect its texture. Use a spatula to scrape the sides and bottom of the bowl to ensure everything is fully incorporated.
Step 8: Pour the filling into the crust. Pour the prepared filling into the cooled graham cracker crust. Smooth the top of the filling with a spatula to create an even surface. This will make the finished pie look more appealing.
Step 9: Refrigerate the pie. Cover the pie with plastic wrap, pressing it gently against the surface of the filling to prevent a skin from forming. Refrigerate for a minimum of 4 hours, or preferably overnight, until the filling is fully set. This allows the flavors to meld together and the pie to achieve the perfect consistency.
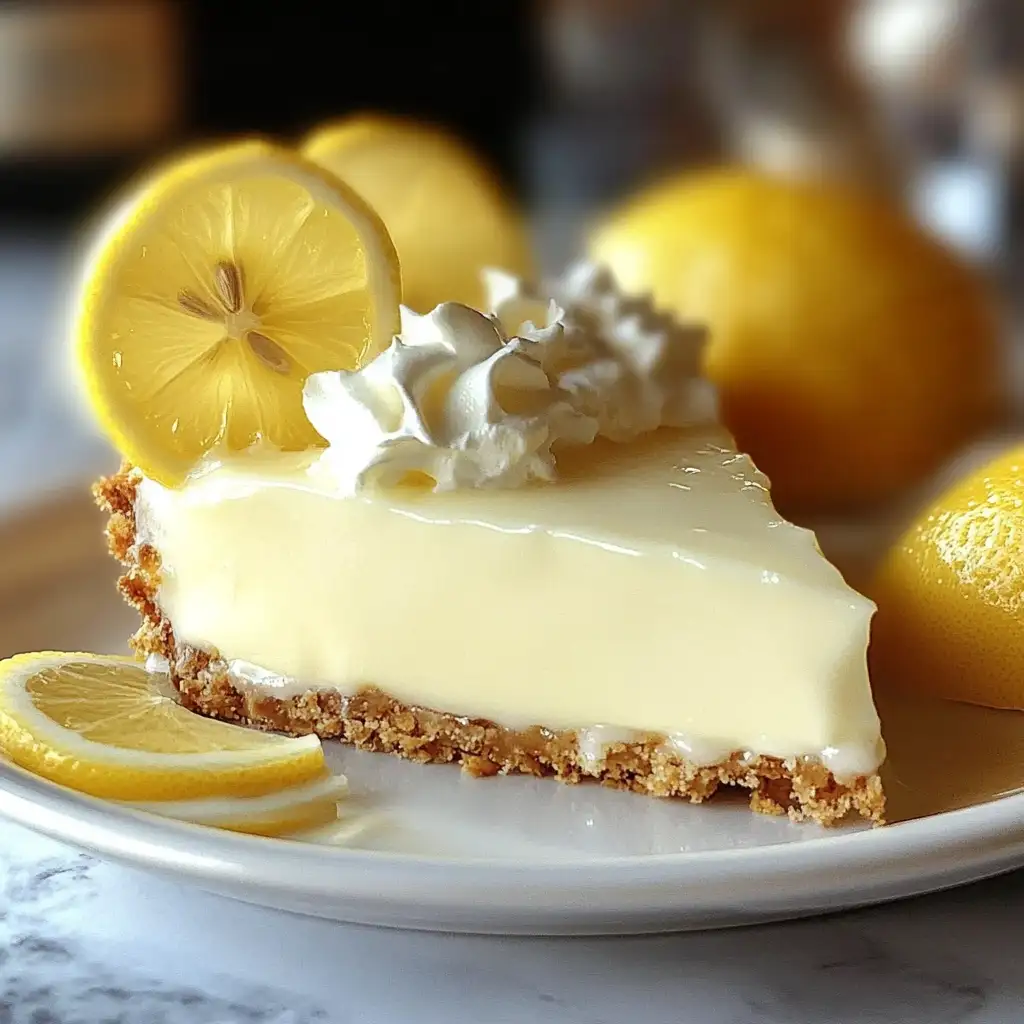
Step 10: Garnish and serve. Before serving, garnish the pie as desired with whipped cream, lemon zest, lemon slices, or fresh berries. These garnishes add visual appeal and enhance the overall flavor profile. Slice the pie into wedges and serve chilled.
COOKING Rating: Easy
Serving Suggestions: Serve chilled as a refreshing dessert on a warm day. Pair with a scoop of vanilla ice cream or a dollop of whipped cream for an extra indulgent treat. This pie is also a great addition to potlucks, picnics, and summer barbecues.
Tips:
- Make sure the cream cheese is fully softened before beating it to avoid lumps in the filling.
- For a more intense lemon flavor, add a teaspoon of lemon zest to the filling.
- If you prefer a less sweet pie, you can reduce the amount of sugar in the graham cracker crust or use a sugar-free lemonade concentrate.
- To prevent the crust from becoming soggy, brush it with melted white chocolate before adding the filling.
- Store leftover pie in the refrigerator for up to 3 days.
Prep Time: 20 minutes
Cook Time: 0 minutes (if no-bake crust), 10-12 minutes (if baking crust)
Total Time: 4 hours 20 minutes (including chilling time)
Nutritional Information (per slice, approximate):
Calories: 350
Protein: 5g
Sodium: 250mg
Conclusion
This No-Bake Cream Cheese Lemonade Pie is a testament to the fact that delicious desserts don’t always require hours in the kitchen. With its creamy, tangy filling and simple graham cracker crust, this pie is a guaranteed crowd-pleaser. It’s perfect for any occasion, from casual weeknight dinners to festive gatherings. The ease of preparation makes it an ideal recipe for beginner bakers, while the customizable flavors allow even experienced cooks to put their own spin on this classic dessert. So, gather your ingredients and get ready to enjoy a slice of sunshine with every bite!
Questions and Answers
Q1: Can I use a different type of crust?
A: Absolutely! While the graham cracker crust is a classic pairing for this pie, you can certainly experiment with other types of crust. A shortbread crust, vanilla wafer crust, or even a chocolate cookie crust would all work well. Just be sure to adjust the baking time accordingly if you choose to bake the crust.
Q2: Can I make this pie ahead of time?
A: Yes, this pie is an excellent make-ahead dessert. In fact, it’s recommended to refrigerate it for at least 4 hours, or preferably overnight, to allow the filling to fully set and the flavors to meld together. This makes it a perfect option for entertaining, as you can prepare it well in advance and simply pull it out of the refrigerator when you’re ready to serve.
Q3: Can I use regular milk instead of evaporated milk?
A: While you can substitute regular milk for evaporated milk, the texture of the filling may be slightly different. Evaporated milk has a higher fat content, which contributes to a richer, creamier filling. If you do use regular milk, consider adding a tablespoon of heavy cream to compensate for the lack of fat.
Q4: Can I freeze this pie?
A: While it’s not recommended to freeze the entire pie, you can freeze individual slices. Wrap each slice tightly in plastic wrap and then place them in a freezer-safe bag or container. Frozen slices can be stored for up to 2 months. Thaw them in the refrigerator before serving. Keep in mind that the texture of the crust and filling may change slightly after freezing.
Q5: Can I add fruit to the filling?
A: Yes, adding fruit to the filling is a great way to customize this pie. Fresh berries, such as blueberries, raspberries, or strawberries, would be delicious additions. You can also add chopped peaches or mangoes. Simply fold the fruit into the filling before pouring it into the crust. Be sure to use ripe but firm fruit to prevent it from becoming mushy.