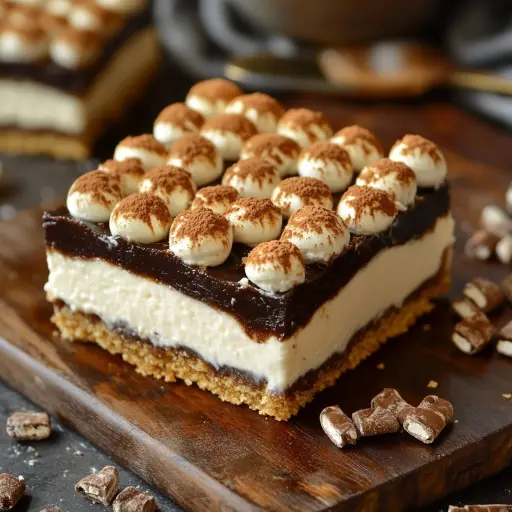
Description: Indulge in the irresistible flavors of s’mores combined with the creamy decadence of cheesecake, all in an easy-to-make, no-bake dessert. These No Bake S’mores Cheesecake Bars are a delightful treat that requires no oven time, making them perfect for warm weather gatherings, potlucks, or simply satisfying your sweet tooth. Featuring a buttery graham cracker crust, a luscious cheesecake filling infused with marshmallow creme, and a topping of toasted marshmallows, chocolate chips, and graham cracker crumbles, these bars are a guaranteed crowd-pleaser. Get ready to experience a delightful explosion of flavors and textures in every bite!
Ingredients:
Crust:
- 2 cups graham cracker crumbs
- 1/4 cup granulated sugar
- 1/2 cup unsalted butter, melted
Cheesecake Filling:
- 16 oz (2 packages) cream cheese, softened
- 1/2 cup powdered sugar
- 1 teaspoon vanilla extract
- 1 cup marshmallow creme (fluff)
- 1 container (8 oz) whipped topping, thawed
Topping:
- 1 1/2 cups mini marshmallows
- 1/2 cup semi-sweet chocolate chips
- 2 graham crackers, crushed (for sprinkling)
Preparation:
step 1: Prepare the Crust
In a medium-sized bowl, whisk together the graham cracker crumbs and granulated sugar until well combined. This ensures that the sweetness is evenly distributed throughout the crust.
Step 2: Add Melted Butter
Pour the melted unsalted butter into the graham cracker crumb mixture. Use a fork or spatula to thoroughly mix until all the crumbs are moistened and the mixture resembles wet sand. This step is crucial for creating a crust that will hold its shape and not crumble easily.
Step 3: Press into Baking Dish
Line a 9×9 inch baking dish with parchment paper, leaving an overhang on the sides for easy removal of the bars later. This parchment paper sling will make it simple to lift the entire cheesecake out of the pan once it’s set.
Transfer the graham cracker crumb mixture into the prepared baking dish. Use your fingers or the bottom of a measuring cup or glass to firmly and evenly press the mixture into the bottom of the dish. Ensure the crust is compact and uniform for a sturdy base.
Step 4: Chill the Crust
Place the baking dish with the prepared crust in the refrigerator to chill for at least 30 minutes while you prepare the cheesecake filling. Chilling the crust helps it to firm up and prevents it from becoming soggy when the filling is added.
Step 5: Make the Cheesecake Filling
In a large mixing bowl, add the softened cream cheese. Using an electric mixer, beat the cream cheese on medium speed until smooth and creamy. Make sure there are no lumps for a perfectly smooth cheesecake filling.
Step 6: Add Sweeteners and Vanilla
Add the powdered sugar and vanilla extract to the cream cheese. Continue to beat until fully incorporated and the mixture is smooth and well combined. Powdered sugar blends seamlessly into the cream cheese, creating a velvety texture.
Step 7: Incorporate Marshmallow Creme
Add the marshmallow creme (fluff) to the cream cheese mixture. Beat until smooth and evenly distributed. Marshmallow creme adds a delightful sweetness and a hint of marshmallow flavor that enhances the s’mores experience.
Step 8: Fold in Whipped Topping
Gently fold in the thawed whipped topping using a spatula until the mixture is light and fluffy. Be careful not to overmix, as this can deflate the whipped topping and result in a dense filling.
Step 9: Assemble the Bars
Remove the chilled graham cracker crust from the refrigerator. Pour the cheesecake filling evenly over the crust. Use a spatula to smooth the top, ensuring it is uniform and visually appealing.
Step 10: Add Toppings
Sprinkle the mini marshmallows evenly over the cheesecake filling. Follow with the semi-sweet chocolate chips, distributing them generously across the surface. Finally, sprinkle the crushed graham crackers over the top for added texture and flavor.
Step 11: Chill and Set
Cover the pan with plastic wrap or foil, ensuring it doesn’t touch the topping to prevent sticking. Refrigerate for at least 4 hours, or preferably overnight, to allow the cheesecake layer to firm up and set completely.
Step 12: Torch the Top (Optional)
For an authentic s’mores look and flavor, use a kitchen torch to lightly toast the marshmallows on top just before serving. Be cautious and keep the flame moving to prevent burning.
Alternatively, place the bars under the broiler for 1–2 minutes, watching carefully to prevent burning. The goal is to achieve a golden-brown, slightly melted appearance on the marshmallows.
Step 13: Serve
Lift the bars out of the pan using the parchment paper overhang. Place them on a cutting board and use a sharp knife to cut them into squares. Serve cold for the best taste and texture.
Why You Will Love This Recipe:
These No Bake S’mores Cheesecake Bars are a fantastic dessert for numerous reasons:
- No Baking Required: Perfect for hot summer days or when you simply don’t want to turn on the oven.
- Easy to Make: The recipe is straightforward and requires minimal effort, making it suitable for novice bakers.
- Crowd-Pleasing Flavors: The combination of graham crackers, marshmallows, chocolate, and cheesecake is universally loved.
- Customizable: Easily adaptable to suit your preferences; you can use different types of chocolate, add nuts, or experiment with other toppings.
- Make-Ahead Dessert: Can be prepared well in advance, making it ideal for parties and gatherings.
Serving Suggestions:
- Serve the bars cold, straight from the refrigerator.
- Garnish with additional crushed graham crackers, chocolate shavings, or a drizzle of chocolate sauce.
- Pair with a scoop of vanilla ice cream for an extra indulgent treat.
- Serve alongside fresh berries or a fruit salad to balance the richness.
- Enjoy with a cup of hot coffee or a glass of cold milk.
Tips:
- Ensure the cream cheese is fully softened to avoid lumps in the filling.
- Use high-quality chocolate chips for the best flavor.
- Avoid overmixing the cheesecake filling to maintain a light and fluffy texture.
- Chill the bars for the recommended time to ensure they are firm enough to cut neatly.
- If using a kitchen torch, keep the flame moving to prevent burning the marshmallows.
- For easier cutting, use a warm, damp knife and wipe it clean between each slice.
Prep Time: 20 minutes
Cook Time: 0 minutes
Total Time: 20 minutes (plus 4 hours chilling)
Nutritional Information:
(Note: Nutritional information is approximate and may vary based on specific ingredients and serving sizes.)
Calories: ~380 kcal per bar
Protein: 5g
Sodium: 200mg
Conclusion:
These No Bake S’mores Cheesecake Bars are a delightful twist on the classic s’mores treat, offering a creamy, decadent dessert that’s perfect for any occasion. With their easy preparation and irresistible flavors, they are sure to become a favorite in your dessert repertoire. Whether you’re hosting a summer barbecue, attending a potluck, or simply craving something sweet, these bars are a guaranteed hit. So gather your ingredients, follow the steps, and get ready to enjoy a slice of s’mores heaven!
Questions and Answers:
- Can I use a different type of crust? Yes, you can substitute the graham cracker crust with an Oreo cookie crust or a chocolate cookie crust for a different flavor profile.
- Can I make these bars gluten-free? Yes, you can make these bars gluten-free by using gluten-free graham crackers for the crust. Ensure all other ingredients are also gluten-free.
- Can I freeze these cheesecake bars? Yes, these bars can be frozen for up to 2-3 months. Wrap them tightly in plastic wrap and then in foil to prevent freezer burn. Thaw in the refrigerator before serving.
- What can I use if I don’t have marshmallow creme? If you don’t have marshmallow creme, you can use melted marshmallows instead. Melt about 1 1/2 cups of marshmallows with a tablespoon of milk in the microwave or on the stovetop until smooth, then let it cool slightly before adding it to the cheesecake filling.
- How do I prevent the marshmallows from burning when toasting? To prevent the marshmallows from burning, keep the kitchen torch flame moving and maintain a safe distance. If using a broiler, watch the bars closely and remove them as soon as the marshmallows are golden brown.