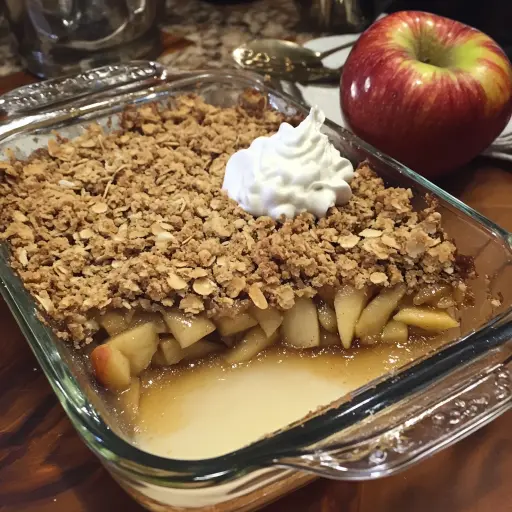
Description: This Old Fashioned Apple Crisp recipe is a warm, comforting dessert that’s perfect for any occasion. With tender, spiced apples and a crunchy oat topping, it’s a classic treat that’s easy to make and always a crowd-pleaser. This recipe combines the best of both worlds, offering a delightful balance of sweetness and spice that will leave you craving more. Whether you’re enjoying it on a chilly autumn evening or as a sweet ending to a family dinner, this apple crisp is sure to become a favorite.
Ingredients:
For the Apple Filling:
- 6 medium apples, peeled, cored, and sliced (such as Granny Smith, Honeycrisp, or a mix for balanced flavor)
- 1/4 cup granulated sugar
- 1/4 cup light brown sugar, packed
- 1 teaspoon ground cinnamon
- 1/4 teaspoon ground nutmeg
- 1 teaspoon vanilla extract
- 1 tablespoon lemon juice
For the Oat Topping:
- 3/4 cup all-purpose flour
- 3/4 cup old-fashioned oats
- 1/2 cup light brown sugar, packed
- 1/2 teaspoon ground cinnamon
- 1/4 teaspoon salt
- 1/2 cup unsalted butter, melted
Preparation:
Step 1: Preheat the Oven and Prepare the Baking Dish
Start by preheating your oven to 350°F (175°C). While the oven is heating up, lightly grease an 8×8-inch baking dish. This will prevent the apple crisp from sticking to the dish and make it easier to serve. You can use butter, cooking spray, or even line the dish with parchment paper for easy cleanup.
Step 2: Prepare the Apple Filling
In a large mixing bowl, combine the sliced apples, granulated sugar, brown sugar, cinnamon, nutmeg, vanilla extract, and lemon juice. Toss the mixture gently until all the apple slices are evenly coated with the sugars and spices. The lemon juice not only adds a touch of brightness but also helps prevent the apples from browning. This step is crucial for infusing the apples with flavor and ensuring they cook evenly in the oven.
Step 3: Transfer Apple Filling to Baking Dish
Once the apple slices are well coated, spread the apple mixture evenly in the prepared baking dish. Make sure the apples are distributed uniformly so that each bite of the crisp is filled with tender, spiced apples. This even distribution will also help the apple crisp bake evenly, ensuring that no area is overly or undercooked.
Step 4: Make the Oat Topping
In a separate, medium-sized bowl, combine the flour, oats, brown sugar, cinnamon, and salt. Mix these dry ingredients together to ensure they are evenly distributed. This step is important because it creates the base for the crumbly oat topping that adds texture and flavor to the crisp.
Step 5: Add Melted Butter to Topping
Pour the melted butter into the bowl with the dry ingredients. Use a fork or your fingers to mix the butter into the dry ingredients until the mixture becomes crumbly. The mixture should resemble coarse crumbs, with no large clumps of flour or butter. This crumbly texture is what gives the oat topping its signature crunch when baked.
Step 6: Assemble and Bake
Sprinkle the oat topping evenly over the apple mixture in the baking dish. Make sure to cover the entire surface of the apples with the topping. This layer of oat topping will bake into a golden-brown, crunchy crust that complements the soft, spiced apples underneath.
Place the baking dish in the preheated oven and bake for 40-45 minutes. The apple crisp is ready when the topping is golden brown and the apples are tender and bubbly. You can test the tenderness of the apples by inserting a fork into the center of the crisp; it should slide in easily.
Step 7: Cool and Serve
Once the apple crisp is done baking, remove it from the oven and let it cool slightly before serving. This will allow the filling to set a bit and prevent it from being too runny. Serve the apple crisp warm, either on its own or with a scoop of vanilla ice cream or a dollop of whipped cream. The contrast between the warm crisp and the cold ice cream is a classic combination that’s hard to resist.
Why You Will Love This Recipe
This Old Fashioned Apple Crisp is more than just a dessert; it’s a comforting experience. You’ll love this recipe because it’s incredibly easy to make, requiring minimal effort and ingredients. The combination of tart apples, warm spices, and a crunchy oat topping creates a symphony of flavors and textures that is both satisfying and nostalgic. It’s the perfect dessert for any occasion, from casual family dinners to festive holiday gatherings. Plus, it’s a great way to use up those extra apples you have lying around. The aroma of cinnamon and baked apples filling your kitchen is an added bonus that will make your home feel warm and inviting. It’s a dessert that everyone will love, regardless of age, making it a guaranteed crowd-pleaser.
Serving Suggestions:
- Serve warm with a scoop of vanilla ice cream or a dollop of whipped cream.
- Drizzle with caramel sauce for an extra touch of sweetness.
- Sprinkle with chopped nuts for added crunch and flavor.
- Pair with a warm beverage like coffee, tea, or hot cider.
- Serve as a dessert after a hearty meal or as a sweet treat any time of day.
Tips:
- Use a mix of tart and sweet apples, such as Granny Smith and Honeycrisp, for a balanced flavor.
- Add 1/4 cup of chopped pecans or walnuts to the topping for added crunch.
- Adjust the amount of sugar to your liking, depending on the sweetness of the apples.
- If the topping starts to brown too quickly, cover the baking dish loosely with foil.
- For a richer flavor, use brown butter in the topping instead of melted butter.
- Feel free to add other fruits to the apple filling, such as blueberries or cranberries.
- Make sure to use old-fashioned oats, not instant oats, for the topping.
- Store leftover apple crisp in the refrigerator for up to 3 days. Reheat in the oven or microwave before serving.
Prep Time:
15 minutes
Cook Time:
45 minutes
Total Time:
1 hour
Nutritional Information:
(Per serving, estimated)
Calories: 280 kcal Protein: 3g Sodium: 150mg
Conclusion
This Old Fashioned Apple Crisp recipe is a timeless classic that’s sure to become a staple in your dessert repertoire. Its simplicity, combined with its comforting flavors and textures, makes it a winner every time. Whether you’re an experienced baker or a novice in the kitchen, you’ll find this recipe easy to follow and satisfying to make. So go ahead, gather your ingredients, and bake up a batch of this delicious apple crisp today. You won’t be disappointed! It’s a perfect way to end a meal or enjoy a sweet treat with family and friends. Enjoy the warm, comforting flavors of fall with every bite of this delightful apple crisp.
5 Questions and Answers About This Recipe
Q1: Can I use different types of apples for this recipe?
A: Absolutely! Using a mix of different apple varieties can add complexity to the flavor of the apple crisp. Granny Smith apples provide a tartness that balances the sweetness, while Honeycrisp or Fuji apples add a touch of sweetness. Feel free to experiment with your favorite apple varieties to find the perfect combination for your taste.
Q2: Can I make this recipe ahead of time?
A: Yes, you can prepare the apple filling and the oat topping separately ahead of time. Store them in airtight containers in the refrigerator. When you’re ready to bake, simply assemble the crisp and bake as directed. This is a great way to save time when preparing for a party or special occasion.
Q3: What can I do if the topping starts to brown too quickly in the oven?
A: If the topping starts to brown too quickly, you can cover the baking dish loosely with aluminum foil. This will prevent the topping from burning while allowing the apples to continue cooking until they are tender. Remove the foil during the last 10-15 minutes of baking to allow the topping to crisp up.
Q4: Can I freeze this apple crisp?
A: Yes, you can freeze the apple crisp, although the texture of the topping may change slightly. Allow the crisp to cool completely before wrapping it tightly in plastic wrap and then in aluminum foil. Freeze for up to 2-3 months. To reheat, thaw overnight in the refrigerator and then bake in a preheated oven at 350°F (175°C) until warmed through.
Q5: Can I make this recipe gluten-free?
A: Yes, you can easily make this recipe gluten-free by substituting the all-purpose flour in the topping with a gluten-free flour blend. Make sure to choose a blend that is designed for baking and has a good texture. Additionally, ensure that the oats you use are certified gluten-free, as some oats may be processed in facilities that also handle wheat. With these simple substitutions, you can enjoy a delicious gluten-free apple crisp that everyone will love.