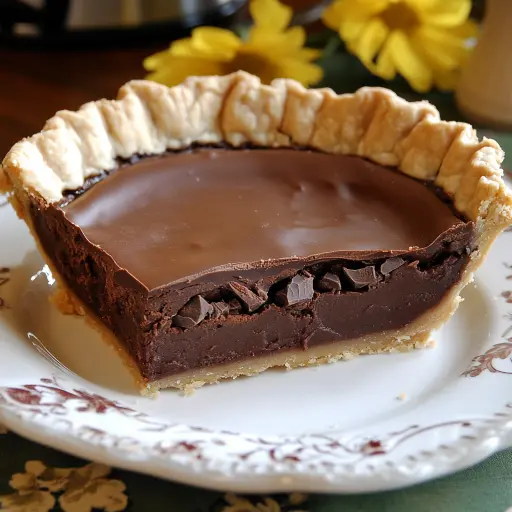
Description: Indulge in a timeless classic with this Old-Fashioned Chocolate Pie recipe. A rich, creamy, and utterly satisfying dessert that brings back nostalgic memories with every bite. This recipe features a luscious chocolate filling made with cocoa powder, cornstarch, and a touch of vanilla, all nestled in a pre-baked pie crust. Topped with a light and airy whipped cream, this pie is the perfect balance of textures and flavors, making it a delightful treat for any occasion. Whether you’re a seasoned baker or a novice in the kitchen, this straightforward recipe ensures a decadent and memorable dessert that your family and friends will adore.
Ingredients:
- 1 pre-baked 9-inch pie crust (store-bought or homemade)
- 1 cup granulated sugar
- ¼ cup unsweetened cocoa powder
- ¼ cup cornstarch
- ¼ teaspoon salt
- 3 large egg yolks
- 2 cups whole milk
- 1 teaspoon vanilla extract
- 2 tablespoons unsalted butter
- ½ cup semi-sweet chocolate chips (optional, for extra richness)
For Topping:
- 1 cup heavy whipping cream
- 2 tablespoons powdered sugar
- ½ teaspoon vanilla extract
Preparation:
Step 1: Prepare the Filling: Begin by gathering all your ingredients. In a medium saucepan (preferably with a heavy bottom to prevent scorching), whisk together the granulated sugar, unsweetened cocoa powder, cornstarch, and salt. Ensure there are no lumps and that the mixture is evenly combined. This is a crucial step to prevent clumping during cooking and ensure a smooth filling.
Step 2: Cook the Pudding: Gradually whisk in the egg yolks and whole milk into the dry ingredients. It’s essential to add the milk slowly, whisking constantly, to avoid the formation of lumps. Place the saucepan over medium heat. Continue stirring constantly with a whisk or a heat-resistant spatula. The mixture will start to thicken gradually. This process usually takes about 8-10 minutes. Do not increase the heat in an attempt to speed up the process, as this can cause the eggs to cook and create a lumpy texture. The mixture is ready when it coats the back of a spoon and leaves a clear line when you run your finger through it.
Step 3: Add Flavor: Remove the saucepan from the heat immediately once the mixture has thickened. Stir in the vanilla extract, butter, and semi-sweet chocolate chips (if using). Continue stirring until the butter and chocolate chips are completely melted and the mixture is smooth and glossy. The butter adds richness and a velvety texture, while the chocolate chips enhance the chocolate flavor, making it even more decadent.
Step 4: Assemble the Pie: Pour the warm chocolate filling into the pre-baked pie crust. Ensure that the filling is evenly distributed across the crust. Smooth the top with a spatula to create an even surface. Let the pie cool at room temperature for about 30 minutes. This allows the filling to slightly set before refrigeration, preventing excessive condensation.
Step 5: Chill: Cover the pie with plastic wrap, pressing it gently onto the surface of the filling to prevent a skin from forming. Refrigerate the pie for at least 3 hours, or preferably overnight, to allow the filling to set completely. Chilling is crucial for achieving the desired firm and sliceable texture.
Step 6: Make the Topping: Just before serving, prepare the whipped cream topping. In a chilled mixing bowl, combine the heavy whipping cream, powdered sugar, and vanilla extract. Beat with an electric mixer on medium-high speed until soft peaks form. Be careful not to overbeat, as this can turn the cream into butter. The whipped cream should be light and fluffy, with a smooth and stable texture.
Step 7: Final Touches: Spread the whipped cream evenly over the chilled pie, or pipe it on using a piping bag for a more decorative presentation. Serve immediately or keep refrigerated until ready to serve.
Why You Will Love This Recipe:
- Classic Comfort: This Old-Fashioned Chocolate Pie is a nostalgic treat that evokes memories of home-baked goodness.
- Rich and Creamy: The combination of cocoa powder, butter, and optional chocolate chips creates a deeply flavorful and velvety smooth filling.
- Simple and Straightforward: The recipe is easy to follow, making it accessible for bakers of all skill levels.
- Perfect Balance: The sweetness of the chocolate filling is perfectly balanced by the light and airy whipped cream topping.
- Crowd-Pleaser: This pie is always a hit at gatherings, parties, and family dinners.
COOKING Rating:
Easy to Medium
Serving Suggestions:
- Serve chilled as a delightful dessert after dinner.
- Pair with a scoop of vanilla ice cream or a dollop of fresh berries for an extra touch of elegance.
- Garnish with shaved chocolate or a sprinkle of cocoa powder for a beautiful presentation.
- Enjoy with a cup of hot coffee or a glass of cold milk for the ultimate comfort food experience.
Tips:
- For a deeper chocolate flavor, use dark cocoa powder instead of regular.
- Let the pie chill overnight for the best texture and flavor.
- Ensure that the egg yolks are fresh for the richest and smoothest filling.
- Do not overcook the chocolate filling, as this can result in a grainy texture.
- Chill the mixing bowl and beaters before making the whipped cream for a more stable and voluminous topping.
- If you don’t have a pre-baked pie crust, you can use a store-bought refrigerated pie crust or make your own from scratch.
- For a decorative touch, use a piping bag with a star tip to pipe the whipped cream onto the pie.
Prep Time: 15 minutes
Cook Time: 10 minutes
Chill Time: 3 hours
Total Time: 3 hours 25 minutes
Nutritional Information: (Approximate values per slice)
Calories: 310 kcal Protein: 5g Sodium: 150mg (values may vary based on specific ingredients used.)
Conclusion:
This Old-Fashioned Chocolate Pie is more than just a dessert; it’s an experience. The rich, creamy filling, the flaky crust, and the light, airy whipped cream come together to create a symphony of flavors and textures that will delight your senses. Whether you’re making it for a special occasion or simply craving a comforting treat, this recipe is sure to become a family favorite. So, gather your ingredients, put on your apron, and get ready to bake a pie that will bring smiles and joy to everyone who tastes it. The simple steps and readily available ingredients make this recipe a perfect choice for both beginner and experienced bakers. Enjoy the process and savor every delicious bite of this timeless classic.
Questions and Answers:
- Can I use a different type of milk in this recipe?
- Yes, you can use different types of milk, but the consistency of the pie filling may vary. Whole milk is recommended for its richness and creaminess, which contributes to the overall texture and flavor of the pie. If you use 2% milk or skim milk, the filling may be slightly less rich. Dairy-free milk alternatives, such as almond milk or soy milk, can also be used, but be aware that they may alter the flavor and texture of the pie. Coconut milk can add a distinct coconut flavor, which may complement the chocolate.
- What can I do if I don’t have a pre-baked pie crust?
- If you don’t have a pre-baked pie crust, you have a few options. You can use a store-bought refrigerated pie crust, which is readily available and easy to work with. Simply unroll the crust and press it into your pie dish. Alternatively, you can make your own pie crust from scratch using a basic recipe that typically includes flour, butter, salt, and water. Once the crust is prepared, pre-bake it according to the recipe instructions to ensure it’s fully cooked and sturdy enough to hold the chocolate filling. Pricking the bottom of the crust with a fork before baking helps prevent it from puffing up.
- How can I prevent a skin from forming on the chocolate filling while it’s chilling?
- To prevent a skin from forming on the chocolate filling while it’s chilling, press a piece of plastic wrap directly onto the surface of the filling. This creates an airtight seal that prevents air from coming into contact with the filling, thus preventing the formation of a skin. Make sure the plastic wrap is smooth and covers the entire surface. Alternatively, you can gently brush the surface of the filling with a thin layer of melted butter or cover the pie with a lid if you have one that fits.
- Can I use dark chocolate instead of semi-sweet chocolate chips?
- Yes, you can use dark chocolate instead of semi-sweet chocolate chips for a richer and more intense chocolate flavor. Adjust the amount of sugar in the recipe accordingly, as dark chocolate is less sweet than semi-sweet chocolate. You can also use different types of chocolate, such as milk chocolate or white chocolate, depending on your preference. However, keep in mind that each type of chocolate will result in a slightly different flavor profile for the pie. Chop the dark chocolate into small pieces before adding it to the filling to ensure it melts evenly.
- What is the best way to store leftover chocolate pie?
- The best way to store leftover chocolate pie is in the refrigerator. Cover the pie tightly with plastic wrap or place it in an airtight container to prevent it from drying out and absorbing odors from the refrigerator. The pie will typically keep for up to 3-4 days in the refrigerator. If you want to store it for a longer period, you can freeze the pie. Wrap it tightly in plastic wrap and then in aluminum foil to prevent freezer burn. Frozen chocolate pie can be stored for up to 2-3 months. Thaw the pie in the refrigerator overnight before serving.