Description: Recreate the iconic, irresistible Olive Garden breadsticks in the comfort of your own kitchen! This recipe delivers warm, soft, and garlicky breadsticks that are perfect alongside your favorite pasta dishes, soups, or simply enjoyed on their own.
Ingredients:
- 3 tablespoons granulated sugar
- 1 tablespoon kosher salt
- 1 3/8 cups warm water (not boiling, approximately 105-115°F)
- 6 tablespoons salted butter, melted and divided (3 tablespoons for the dough, 3 tablespoons for topping)
- 2 1/4 teaspoons active dry yeast (one standard packet)
- 3 1/2 cups bread flour (all-purpose flour can be substituted, but bread flour yields a chewier texture)
- 1 teaspoon kosher salt (added with the flour)
- 2 tablespoons olive oil (for coating the bowl)
- 1 tablespoon garlic salt (for topping, adjust to taste)
Preparation:
Step 1: In the bowl of a standing mixer, whisk together the warm water, sugar, salt, and 3 tablespoons of the melted butter. The water temperature is crucial; too hot, and it will kill the yeast; too cold, and the yeast won’t activate.
Step 2: Sprinkle the active dry yeast over the water mixture. Let it sit for 5-10 minutes to allow the yeast to bloom and become foamy. This step is essential to ensure the yeast is alive and active, which will guarantee the dough rises properly. If the yeast doesn’t foam, it’s likely dead, and you’ll need to start with a fresh batch.
Step 3: Once the yeast is foamy, whisk it gently into the water mixture.
Step 4: In a separate bowl, combine the bread flour and the remaining 1 teaspoon of kosher salt. Gradually add this dry mixture to the wet ingredients in the mixer bowl.
Step 5: Using the dough hook attachment on the mixer, begin combining the ingredients. Start the mixer on a slow speed to prevent the flour from flying everywhere. Once the flour is mostly incorporated, gradually increase the speed to medium-high. Knead the dough for approximately 5 minutes, until it forms a smooth, elastic ball. The dough should pull away from the sides of the bowl and be slightly tacky to the touch. If the dough is too sticky, add a tablespoon of flour at a time until it reaches the right consistency. If the dough is too dry, add a teaspoon of water at a time.
Step 6: Transfer the dough ball to a large bowl that has been lightly coated with olive oil. This will prevent the dough from sticking to the bowl as it rises. Turn the dough to coat it evenly with the oil.
Step 7: Cover the bowl tightly with plastic wrap (or a damp kitchen towel) to prevent the dough from drying out. Place the bowl in a warm, draft-free place to rise. A slightly warmed oven (turned off!) or a sunny spot in your kitchen are ideal locations.
Step 8: Allow the dough to rest and double in size, which typically takes 60-90 minutes. The rising time can vary depending on the temperature of your environment. Don’t rush this step; a properly risen dough will result in light and airy breadsticks.
Step 9: Once the dough has doubled, gently punch it down to release the air. Turn the dough out onto a lightly floured surface.
Step 10: Divide the dough into twelve equally sized pieces. The easiest way to ensure even portions is to use a kitchen scale; each piece should weigh approximately 2 ounces.
Step 11: Roll each piece of dough into a rope, about the width of your thumb and approximately 6-8 inches long.
Step 12: Place the formed breadsticks on parchment-lined baking sheets, spacing them about 2-3 inches apart. This will allow them to rise evenly and prevent them from sticking together during baking.
Step 13: Cover the breadsticks loosely with plastic wrap or a clean kitchen towel and allow them to rise a second time, for about one hour. This second rise is crucial for achieving that light and fluffy texture.
Step 14: Preheat the oven to 400°F (200°C).
Step 15: Bake the breadsticks for 12-15 minutes, or until they are golden brown. Keep a close eye on them, as baking times can vary depending on your oven.
Step 16: While the breadsticks are baking, re-melt the remaining 3 tablespoons of butter if it has solidified.
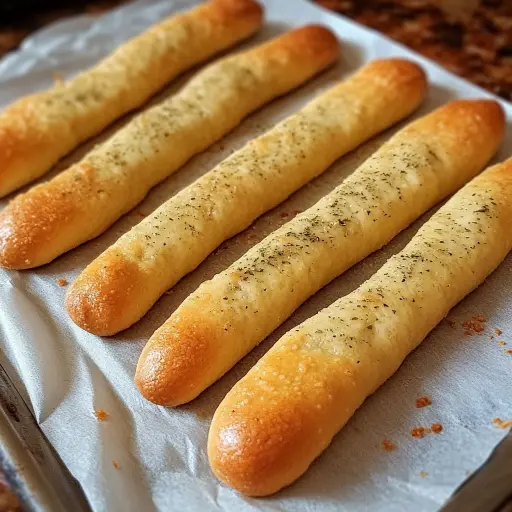
Step 17: As soon as the breadsticks come out of the oven, brush them liberally with the melted butter and sprinkle generously with garlic salt.
Step 18: Serve the breadsticks warm and enjoy!
Why You Will Love This Recipe:
This Olive Garden breadsticks copycat recipe allows you to experience the deliciousness of those warm, garlicky sticks without leaving your house. It’s a relatively simple recipe that yields impressive results, making it perfect for beginner and experienced bakers alike. The aroma that fills your kitchen as these bake is simply divine. The soft, chewy texture combined with the buttery, garlicky flavor is irresistible. They are guaranteed to be a crowd-pleaser! Plus, making them yourself allows you to control the ingredients and adjust the amount of garlic salt to your liking.
COOKING Rating:
Easy to Medium
Serving Suggestions:
- Serve alongside your favorite pasta dishes, such as spaghetti, lasagna, or fettuccine Alfredo.
- Pair them with soups and salads for a complete and satisfying meal.
- Enjoy them as a snack on their own with a side of marinara sauce or cheese dip.
- Bring them to potlucks or gatherings; they’re always a hit!
- Use them to make mini sandwiches or sliders.
Tips:
- Make sure the water is not too hot, or it will kill the yeast. Use a thermometer to ensure it’s between 105-115°F.
- Don’t skip the second rise! This step is crucial for achieving the light and fluffy texture of Olive Garden breadsticks.
- For a richer flavor, use salted butter. If using unsalted butter, add an extra 1/4 teaspoon of salt to the dough.
- Adjust the amount of garlic salt to your taste. Some people prefer a more subtle flavor, while others like a bolder taste.
- For a softer breadstick, brush with extra melted butter after baking.
- If you don’t have bread flour, all-purpose flour will work, but the breadsticks will be slightly less chewy.
- Store leftover breadsticks in an airtight container at room temperature for up to 2 days. Reheat in the oven or microwave before serving.
- For extra soft and chewy breadsticks, add 1 tablespoon of potato flour.
- For a vegan option, substitute the butter with vegan butter.
Prep Time: 30 minutes
Cook Time: 12-15 minutes
Total Time: Approximately 3 hours (including rising time)
Nutritional Information (per breadstick, approximate):
- Calories: 175
- Protein: 4g
- Sodium: 350mg (depending on the amount of garlic salt used)
Conclusion:
This copycat Olive Garden breadsticks recipe is a winner! It’s a relatively simple recipe that delivers delicious, restaurant-quality results. The combination of soft, chewy texture and buttery, garlicky flavor is simply irresistible. Whether you’re serving them alongside pasta, soup, or enjoying them as a snack, these breadsticks are sure to be a hit. So, gather your ingredients, fire up your oven, and get ready to enjoy the taste of Olive Garden in your own home!
Frequently Asked Questions (FAQ):
- Q: Can I use instant yeast instead of active dry yeast? A: Yes, you can! If using instant yeast, you can skip the step of blooming the yeast in the warm water. Simply add the instant yeast directly to the dry ingredients. The rising time may be slightly shorter with instant yeast.
- Q: Can I make the dough ahead of time and refrigerate it? A: Absolutely! This is a great way to save time. After the first rise, punch down the dough, wrap it tightly in plastic wrap, and refrigerate it for up to 24 hours. When ready to bake, remove the dough from the refrigerator and let it come to room temperature for about 30 minutes before dividing and shaping the breadsticks. Allow the shaped breadsticks to rise again before baking.
- Q: What if I don’t have a stand mixer? Can I make this dough by hand? A: Yes, you can definitely make this dough by hand. Follow the same instructions for combining the ingredients, but instead of using a mixer, knead the dough on a lightly floured surface for about 8-10 minutes, until it becomes smooth and elastic. Hand kneading requires a bit more effort, but the result will be just as delicious.
- Q: Can I freeze the baked breadsticks? A: Yes, you can freeze the baked breadsticks. Let them cool completely before wrapping them tightly in plastic wrap or placing them in a freezer-safe bag. To reheat, thaw them at room temperature and then warm them in the oven at 350°F (175°C) for a few minutes.
- Q: Can I add herbs or other flavorings to the dough? A: Absolutely! Feel free to get creative with your breadsticks. You can add herbs such as rosemary, thyme, or oregano to the dough for a more savory flavor. You could also add grated Parmesan cheese or a pinch of red pepper flakes for a little kick. The possibilities are endless!