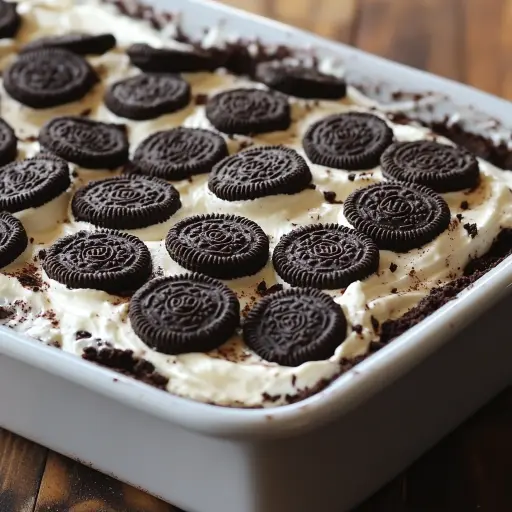
Description: Indulge in this decadent Oreo Lasagna, a no-bake dessert masterpiece that layers crushed Oreo cookies, a creamy cream cheese filling, rich chocolate pudding, and a generous topping of Cool Whip and more Oreos. It’s the perfect make-ahead treat for parties, potlucks, or any occasion that calls for a show-stopping dessert.
Ingredients:
Crust:
- 48 Oreo cookies, finely crushed
- 10 tablespoons (1 ¼ sticks) salted butter, melted
Cream Cheese Layer:
- 12 ounces cream cheese, softened to room temperature (1 ½ standard bricks)
- ¾ cup powdered sugar
- 8 ounces Cool Whip, thawed
- 1 teaspoon vanilla extract
- 6 Oreo cookies, finely crushed
Pudding Layer:
- 3 cups half-and-half or whole milk
- 7.8 ounces (2 x 3.9-ounce boxes) instant chocolate pudding mix
- 6 Oreo cookies, finely crushed
Topping:
- 8 ounces Cool Whip, thawed
- 12 Oreo cookies, finely crushed
Preparation:
Step 1: Prepare the Oreo Crust. In a large bowl, combine the finely crushed Oreo cookies and melted butter. Mix well until the crumbs are evenly moistened and the mixture resembles wet sand.
Step 2: Press the Crust into the Pan. Pour the Oreo mixture into a 9×13 inch baking dish. Using your hands or the bottom of a measuring cup, firmly press the mixture into an even, compact layer across the bottom of the dish. This will form the base of your Oreo Lasagna.
Step 3: Chill the Crust. Cover the baking dish with plastic wrap or aluminum foil and refrigerate for at least 30 minutes, or up to an hour. This chilling period allows the crust to firm up, making it easier to layer the other ingredients on top without it crumbling.
Step 4: Make the Cream Cheese Layer. In a large bowl, using a hand mixer or stand mixer fitted with the whisk attachment, beat the softened cream cheese and powdered sugar together until smooth, creamy, and completely lump-free. It’s crucial to use softened cream cheese to achieve the right consistency.
Step 5: Incorporate Cool Whip and Vanilla. Add the thawed Cool Whip and vanilla extract to the cream cheese mixture. Continue to beat until everything is thoroughly combined, creating a light and airy cream cheese filling.
Step 6: Add Crushed Oreos to the Cream Cheese. Gently fold in the crushed Oreo cookies into the cream cheese mixture. Make sure that you’re folding and not stirring to maintain the light and airy consistency of the cream cheese. This step adds texture and intensifies the Oreo flavor in this layer.
Step 7: Spread the Cream Cheese Layer over the Crust. Remove the chilled Oreo crust from the refrigerator. Spread the cream cheese mixture evenly over the crust, making sure to cover the entire surface. A smooth, even layer will ensure each bite is perfectly balanced.
Step 8: Refrigerate the Cream Cheese Layer. Cover the baking dish again and return it to the refrigerator while you prepare the pudding layer. This helps the cream cheese layer set up slightly, preventing it from mixing with the pudding.
Step 9: Prepare the Chocolate Pudding Layer. In a large bowl, whisk together the half-and-half (or whole milk) and the instant chocolate pudding mix until the pudding begins to thicken. This usually takes about 2-3 minutes of whisking.
Step 10: Add Crushed Oreos to the Pudding. Gently fold the crushed Oreo cookies into the thickened chocolate pudding, distributing them evenly throughout.
Step 11: Layer the Pudding over the Cream Cheese. Remove the baking dish from the refrigerator and carefully spread the chocolate pudding mixture evenly over the cream cheese layer.
Step 12: Chill for 5 Minutes. Return the dish to the refrigerator for 5 minutes.
Step 13: Add the Topping. Spread the thawed Cool Whip evenly over the pudding layer to create the final layer of creamy goodness.
Step 14: Garnish with Crushed Oreos. Sprinkle the crushed Oreo cookies generously over the top of the Cool Whip layer. This adds visual appeal and a satisfying crunch.
Step 15: Chill the Lasagna. Cover the Oreo Lasagna and refrigerate for at least 4 hours, or preferably overnight. This allows the layers to set completely, and the flavors to meld together, resulting in a more cohesive and delicious dessert.
Why You Will Love This Recipe:
This Oreo Lasagna is a crowd-pleaser for so many reasons! First and foremost, it’s incredibly easy to make, requiring absolutely no baking. This makes it a perfect dessert for hot summer days or when you’re short on time. The layers of creamy, chocolatey goodness are irresistible, and the combination of textures – from the crunchy Oreo crust to the smooth pudding and whipped topping – is delightful. Plus, it’s a make-ahead dessert, so you can prepare it in advance and have it ready to go when you need it. It’s also easily customizable – you can use different flavors of Oreos or pudding to create your own unique variations. The layers are also easy to see, which add a nice aesthetic to the dessert.
COOKING Rating:
Easy
Serving Suggestions:
- Serve chilled directly from the refrigerator.
- Cut into squares or rectangles.
- Garnish individual slices with a whole Oreo cookie or a dollop of whipped cream for an extra touch.
- Pair with a glass of cold milk, coffee, or a dessert wine.
- Consider offering a side of fresh berries, like raspberries or strawberries, to cut through the richness of the dessert.
Tips:
- Ensure the cream cheese is softened to room temperature for a smooth, lump-free filling.
- Don’t overmix the cream cheese filling after adding the Cool Whip, as it can deflate the mixture.
- Use a food processor to finely crush the Oreo cookies for a consistent crust and topping. Alternatively, you can place them in a zip-top bag and crush them with a rolling pin.
- For a richer chocolate flavor, use dark chocolate pudding mix.
- To prevent the crust from becoming soggy, you can brush it with a thin layer of melted chocolate before adding the cream cheese layer.
- If you’re short on time, you can use store-bought Oreo pie crust instead of making your own.
- To cut clean slices, use a sharp knife dipped in warm water and wipe it clean between cuts.
- To make mini Oreo Lasagnas, assemble the layers in individual dessert cups or jars.
Prep Time:
30 minutes
Cook Time:
0 minutes (No-Bake)
Total Time:
30 minutes prep + 4 hours (minimum) chilling
Nutritional Information: (approximate, per serving – will vary depending on ingredients used and serving size)
Calories: 450-550 Protein: 5-7g Sodium: 250-350mg
Conclusion:
This Oreo Lasagna is more than just a dessert; it’s an experience. It’s a celebration of simple ingredients transformed into something truly special. Whether you’re making it for a party, a potluck, or just a sweet treat for yourself, it’s sure to be a hit. Its ease, adaptability, and deliciousness make it a recipe you’ll want to make again and again. Enjoy every decadent layer!
Questions and Answers:
Q1: Can I use a different type of cookie for the crust?
A: Absolutely! While Oreos provide the classic flavor for this lasagna, you can certainly experiment with other cookies. Chocolate chip cookies, graham crackers, or even peanut butter cookies would work well, providing a different flavor profile. Just be sure to adjust the amount of butter accordingly to achieve the right consistency for the crust.
Q2: Can I make this Oreo Lasagna ahead of time?
A: Yes! In fact, this recipe is perfect for making ahead of time. The longer it chills, the better the flavors meld together. You can easily make it a day or two in advance and keep it refrigerated until you’re ready to serve. Just be sure to cover it tightly to prevent it from drying out or absorbing any odors from the refrigerator.
Q3: Is it possible to make this recipe dairy-free or vegan?
A: Yes, with some substitutions. You can use dairy-free Oreo cookies (check the ingredients list), dairy-free cream cheese, dairy-free Cool Whip, and a dairy-free milk alternative like almond milk or soy milk. Be sure to use a vegan-friendly instant chocolate pudding mix as well. The taste and texture might be slightly different, but it will still be a delicious dessert!
Q4: Can I freeze Oreo Lasagna?
A: While technically you can freeze it, I wouldn’t recommend it. Freezing and thawing can alter the texture of the Cool Whip and cream cheese layers, making them watery or grainy. The Oreo crust may also become soggy. If you do decide to freeze it, make sure to wrap it tightly in plastic wrap and then foil to prevent freezer burn, and thaw it completely in the refrigerator before serving.
Q5: Can I add other toppings or layers to this recipe?
A: Absolutely! Feel free to get creative and customize the recipe to your liking. You could add a layer of peanut butter cups, a drizzle of chocolate sauce or caramel sauce, chopped nuts, sprinkles, or even fresh fruit. The possibilities are endless!