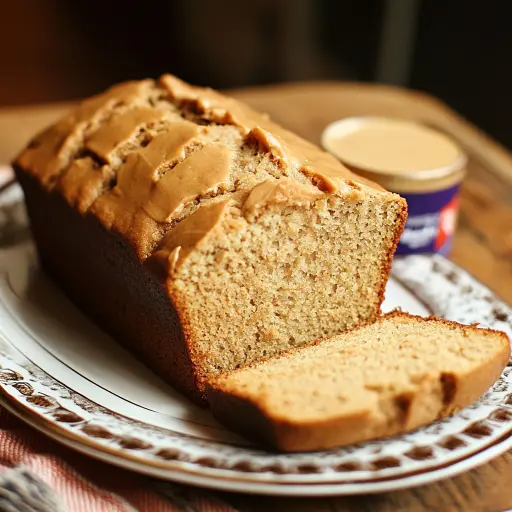
Description: Indulge in the simple yet satisfying pleasure of homemade Peanut Butter Bread. This recipe offers a delightfully moist and flavorful loaf, perfect for breakfast, a midday snack, or even a light dessert. Its rich peanut butter taste and soft texture make it a crowd-pleaser for all ages. Easy to make and wonderfully comforting, this bread will quickly become a family favorite.
Ingredients:
- 1 3/4 cups all-purpose flour
- 2 teaspoons baking powder
- 1/2 teaspoon salt
- 1/2 cup (1 stick) unsalted butter, softened
- 1 cup creamy peanut butter (use your favorite brand)
- 1 cup granulated sugar
- 1/2 cup packed brown sugar
- 3 large eggs
- 1 teaspoon vanilla extract
- 3/4 cup milk
Preparation:
Step 1: Preheat your oven to 350°F (175°C). Ensure your oven rack is positioned in the center for even baking. Grease a 9×5-inch loaf pan thoroughly. You can use butter, shortening, or cooking spray. For extra insurance against sticking, you can also dust the greased pan with flour.
Step 2: In a medium-sized bowl, whisk together the all-purpose flour, baking powder, and salt. Whisking is essential for evenly distributing the baking powder, ensuring that the bread rises properly and has a light, airy texture. Set this dry ingredient mixture aside.
Step 3: In a large mixing bowl (or the bowl of a stand mixer), cream together the softened butter, peanut butter, granulated sugar, and brown sugar until the mixture is smooth and creamy. Make sure the butter is properly softened; it should yield easily to the touch but not be melted. Creaming the butter and sugars together properly is crucial for creating a tender crumb. Continue creaming for about 3-5 minutes until the mixture is light and fluffy.
Step 4: Beat in the eggs one at a time, ensuring each egg is fully incorporated before adding the next. This helps to emulsify the batter and create a stable structure. After the eggs are added, stir in the vanilla extract. The vanilla extract enhances the overall flavor profile of the bread, complementing the peanut butter beautifully.
Step 5: Gradually add the dry ingredients to the wet ingredients, alternating with the milk. Begin and end with the dry ingredients to prevent gluten development, which can lead to a tough bread. Add about one-third of the dry ingredients, then half of the milk, followed by another third of the dry ingredients, the remaining milk, and finish with the last of the dry ingredients. Stir until just combined. Be careful not to overmix the batter, as this can also result in a dense, tough loaf. A few streaks of flour are okay at this stage.
Step 6: Pour the batter into the prepared loaf pan and smooth the top with a spatula. This ensures that the bread bakes evenly and has a nice, even surface.
Step 7: Bake in the preheated oven for 50-60 minutes, or until a toothpick inserted into the center of the loaf comes out clean or with just a few moist crumbs attached. Start checking for doneness around the 50-minute mark. If the top of the bread is browning too quickly, you can tent it loosely with aluminum foil for the last 15-20 minutes of baking.
Step 8: Allow the bread to cool in the pan for 10 minutes before transferring it to a wire rack to cool completely. Cooling it in the pan helps prevent the bread from crumbling. Once it has cooled slightly, carefully invert the loaf onto a wire rack to cool completely. This allows air to circulate around the bread, preventing the bottom from becoming soggy.
Why You Will Love This Recipe:
This Peanut Butter Bread is a winner for several reasons. First and foremost, it’s incredibly easy to make, requiring just a handful of common ingredients and simple steps. The result is a moist, tender, and flavorful loaf that captures the essence of peanut butter in every bite. It’s versatile enough to be enjoyed at any time of day – as a quick breakfast, a satisfying snack, or a comforting dessert. The delightful aroma that fills your kitchen while it bakes is an added bonus! Plus, it’s a great way to use up that jar of peanut butter in your pantry. Kids and adults alike will adore this bread, making it a perfect addition to your baking repertoire.
Serving Suggestions:
- Plain: Enjoy a slice of Peanut Butter Bread as is, for a simple and satisfying treat.
- Toasted: Toast slices lightly and spread with butter, jam, or more peanut butter for an extra layer of flavor.
- Peanut Butter & Banana Sandwich: Create a classic peanut butter and banana sandwich using slices of this homemade bread.
- French Toast: Dip slices of Peanut Butter Bread in a mixture of eggs, milk, and vanilla, and then pan-fry for a decadent French toast.
- Grilled Cheese: Use Peanut Butter Bread as the base for a unique and flavorful grilled cheese sandwich.
- With Ice Cream: Serve warm slices of Peanut Butter Bread with a scoop of vanilla ice cream or chocolate ice cream for a comforting dessert.
- As a Side: Serve alongside a bowl of soup or chili for a cozy and satisfying meal.
Tips:
- Use Room Temperature Ingredients: Ensure that your butter, eggs, and milk are at room temperature for better emulsification and a smoother batter.
- Don’t Overmix: Overmixing the batter can lead to a tough bread. Mix until just combined.
- Adjust Sweetness: If you prefer a less sweet bread, reduce the amount of granulated sugar slightly.
- Add Chocolate Chips: For an extra indulgence, stir in 1/2 cup of chocolate chips to the batter before baking.
- Use Different Peanut Butter: Experiment with different types of peanut butter, such as chunky or natural peanut butter, to vary the texture and flavor.
- Storage: Store the cooled bread in an airtight container at room temperature for up to 3 days, or in the refrigerator for up to a week. You can also freeze slices of the bread for longer storage.
- Nut Butter Alternatives: If you’re allergic to peanuts, you can substitute other nut butters like almond butter or cashew butter.
- Check for Doneness: Use a toothpick to check for doneness. If the top is browning too quickly, cover loosely with foil.
Prep Time: 15 minutes Cook Time: 50-60 minutes Total Time: 1 hour 5-15 minutes
Nutritional Information: (Approximate, per slice, based on 12 slices per loaf)
- Calories: 250-300
- Protein: 6-8 grams
- Sodium: 150-200 mg
Conclusion:
Peanut Butter Bread is a delightful treat that offers a perfect balance of simplicity and flavor. Its easy preparation and crowd-pleasing taste make it a recipe you’ll turn to again and again. Whether you enjoy it plain, toasted, or as part of a creative sandwich, this bread is sure to bring a smile to your face. Gather your ingredients, preheat your oven, and get ready to enjoy the wonderful aroma and delicious taste of homemade Peanut Butter Bread. This recipe is a testament to how simple ingredients, when combined with care, can create something truly special. Happy baking!
Questions and Answers:
- Can I use a different type of flour?
- Yes, you can substitute whole wheat flour for up to half of the all-purpose flour. This will give the bread a slightly nuttier flavor and a denser texture. Be aware that whole wheat flour absorbs more liquid, so you may need to add a tablespoon or two of extra milk if the batter seems too thick.
- What if I don’t have brown sugar?
- If you don’t have brown sugar, you can use all granulated sugar in the recipe. However, brown sugar adds a depth of flavor and helps to keep the bread moist, so if possible, try to use it. You can also make your own brown sugar by mixing 1 cup of granulated sugar with 1 tablespoon of molasses.
- Can I make this recipe gluten-free?
- Yes, you can make this recipe gluten-free by using a gluten-free all-purpose flour blend. Make sure the blend contains xanthan gum or add it separately (about 1 teaspoon) to help bind the ingredients. The texture of the gluten-free bread may be slightly different, but it should still be delicious.
- How do I prevent the bread from sticking to the pan?
- To prevent the bread from sticking to the pan, grease the loaf pan thoroughly with butter, shortening, or cooking spray. For extra insurance, you can also dust the greased pan with flour. Alternatively, you can line the pan with parchment paper, leaving an overhang on the sides for easy removal.
- Can I freeze this bread?
- Yes, this bread freezes well. Allow the bread to cool completely before wrapping it tightly in plastic wrap and then placing it in a freezer bag. You can freeze the whole loaf or slice it before freezing. To thaw, simply remove the bread from the freezer and let it thaw at room temperature. Thawed bread is best enjoyed within a few days.