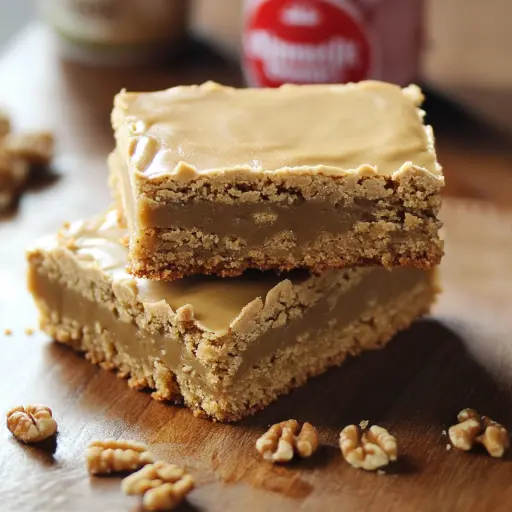
Description: Remember those soft, chewy, peanut butter-packed cookie bars from school? This recipe captures that nostalgic flavor and texture, delivering a delightful treat that’s perfect for lunchboxes, potlucks, or a comforting afternoon snack. These bars are easy to make, boasting a rich peanut butter flavor in both the cookie base and the creamy, dreamy frosting. Prepare to be transported back to simpler times with every bite!
Ingredients:
For the Bars:
- 1 cup (2 sticks) unsalted butter, softened: The foundation of these bars, unsalted butter provides richness and tenderness. Make sure it’s properly softened for easy creaming.
- 1 cup creamy peanut butter: Use your favorite brand of creamy peanut butter. It’s the star of the show, infusing the bars with that classic peanut butter taste. Avoid natural peanut butter (the kind that separates) as it can affect the texture.
- 1 cup granulated sugar: Adds sweetness and helps create a chewy texture.
- 1 cup packed light brown sugar: Provides a subtle molasses flavor and contributes to the bars’ moistness. The “packed” measurement is important to ensure the right ratio of sugar to other ingredients.
- 2 large eggs: Bind the ingredients together and add richness.
- 1 teaspoon vanilla extract: Enhances the flavors and adds a touch of warmth. Use pure vanilla extract for the best taste.
- 2 cups all-purpose flour: Provides structure and body to the bars. Measure accurately, spooning the flour into the measuring cup and leveling it off, to avoid dry bars.
- 1 teaspoon baking soda: A leavening agent that helps the bars rise and creates a soft texture.
- 1/2 teaspoon salt: Enhances the sweetness and balances the flavors.
For the Frosting:
- 1/2 cup creamy peanut butter: More peanut butter! This reinforces the peanut butter flavor in the frosting and contributes to its smooth texture.
- 1/4 cup (1/2 stick) unsalted butter: Adds richness and helps create a smooth, spreadable frosting.
- 2 cups powdered sugar: Provides sweetness and structure to the frosting. Sifting the powdered sugar can help prevent lumps.
- 1/3 cup milk: Thins the frosting to the desired consistency. Start with less and add more as needed.
- 1/2 teaspoon vanilla extract: Enhances the flavor of the frosting.
Preparation:
Step 1: Preheat your oven to 350°F (175°C). This temperature is ideal for baking the bars evenly without burning the edges. Lightly grease a 9×13 inch baking pan with cooking spray or butter. Alternatively, line the pan with parchment paper, leaving an overhang on the sides. This will make it much easier to lift the bars out of the pan after they have cooled, allowing for clean and even cuts.
Step 2: In a large mixing bowl, cream together the softened butter, peanut butter, granulated sugar, and brown sugar until smooth and fluffy. This step is crucial for creating a light and airy texture in the bars. Use an electric mixer for the best results, beating the mixture on medium speed for several minutes until it becomes pale and fluffy. Scraping down the sides of the bowl occasionally ensures that all the ingredients are incorporated evenly.
Step 3: Beat in the eggs one at a time, mixing well after each addition. This helps to emulsify the eggs into the batter, creating a smooth and stable mixture. Then, stir in the vanilla extract. The vanilla extract enhances the flavor and adds a touch of warmth to the bars.
Step 4: In a separate, medium-sized bowl, whisk together the all-purpose flour, baking soda, and salt. Whisking ensures that the dry ingredients are evenly distributed, which is important for consistent baking. Gradually add the dry ingredients to the wet ingredients, mixing until just combined. Be careful not to overmix the dough, as this can lead to tough bars. Mix until the flour disappears and the dough is uniform.
Step 5: Spread the dough evenly into the prepared baking pan and smooth the top. Use an offset spatula or the back of a spoon to ensure that the dough is spread evenly across the pan. This will help the bars bake uniformly.
Step 6: Bake for 22–25 minutes, or until the bars are lightly golden and just set in the center. Do not overbake, as this will result in dry, crumbly bars. The bars should still be slightly soft in the center when you remove them from the oven. Allow the bars to cool slightly in the pan before frosting.
Step 7: While the bars are cooling, prepare the frosting. In a small saucepan, melt the peanut butter and butter together over low heat, stirring occasionally until smooth. Remove from heat.
Step 8: Whisk in the powdered sugar, milk, and vanilla extract until smooth. Start with the smaller amount of milk, and add more as needed to reach the desired consistency. The frosting should be smooth and easily spreadable.
Step 9: Pour the frosting over the warm bars and spread evenly with a spatula. The warmth of the bars will help the frosting spread easily and create a smooth, glossy finish.
Step 10: Let the bars cool completely before slicing into squares. Cooling allows the frosting to set and makes the bars easier to cut.
Why you will love this recipe These Peanut Butter Lunch Lady Cookie Bars are irresistible for so many reasons:
- Nostalgic Flavor: They perfectly recreate the classic taste of school cafeteria cookie bars, bringing back cherished childhood memories.
- Easy to Make: The recipe is straightforward and requires minimal ingredients, making it a great option for beginner bakers.
- Peanut Butter Perfection: The double dose of peanut butter in both the bars and the frosting ensures an intensely satisfying peanut butter experience.
- Soft and Chewy Texture: These bars are delightfully soft and chewy, thanks to the combination of butter, sugar, and peanut butter.
- Perfect for Sharing: They’re ideal for potlucks, bake sales, or simply sharing with friends and family.
COOKING Rating Easy
Serving Suggestions:
- Enjoy them as a lunchtime treat, just like in school!
- Serve them as a dessert with a scoop of vanilla ice cream.
- Cut them into smaller squares for a party platter.
- Pair them with a glass of cold milk or a cup of coffee.
- Wrap them individually for easy on-the-go snacking.
Tips:
- For the best texture, use softened butter and room-temperature eggs.
- Do not overbake the bars, as this will make them dry and crumbly.
- Frost the bars while they are still slightly warm, as this will help the frosting spread easily and set smoothly.
- Use a sharp knife to cut the bars into squares. Clean the knife between cuts to prevent the frosting from sticking.
- Store the bars in an airtight container at room temperature for up to 3 days.
- For longer storage, freeze the bars in an airtight container for up to 2 months. Thaw overnight in the refrigerator before serving.
- Add chocolate chips to the dough for an extra decadent treat.
- Sprinkle chopped peanuts on top of the frosting for added texture and flavor.
- If you prefer a thinner frosting, add a little more milk until you reach the desired consistency.
- To prevent the bars from sticking to the pan, line it with parchment paper with an overhang.
Prep Time: 15 minutes
Cook Time: 25 minutes
Total Time: 40 minutes
Nutritional Information: (Estimated per bar, based on 24 servings)
- Calories: 370 kcal
- Protein: 7g
- Sodium: 150mg
Conclusion
These Peanut Butter Lunch Lady Cookie Bars are a guaranteed crowd-pleaser. They’re easy to make, packed with peanut butter flavor, and incredibly satisfying. Whether you’re craving a nostalgic treat or simply looking for a delicious dessert to share, these bars are sure to hit the spot. So, gather your ingredients, preheat your oven, and get ready to enjoy a taste of pure peanut butter bliss!
Questions and Answers about this recipe:
Q1: Can I use natural peanut butter for this recipe?
A: While you can technically use natural peanut butter, it’s not recommended for these bars. Natural peanut butter tends to separate, resulting in a greasy texture and uneven distribution of peanut butter flavor. Creamy, processed peanut butter works best for achieving the desired soft and chewy texture.
Q2: What if I don’t have light brown sugar? Can I use dark brown sugar instead?
A: Yes, you can substitute dark brown sugar for light brown sugar, although the flavor will be slightly more intense and molasses-like. The difference is subtle, but dark brown sugar has a higher molasses content, which will add a deeper, richer taste and a slightly darker color to the bars.
Q3: My bars came out dry. What did I do wrong?
A: There are a few reasons why your bars might have turned out dry. Overbaking is a common culprit, so be sure to check the bars after 22 minutes and remove them from the oven as soon as they are set in the center. Measuring the flour incorrectly can also lead to dry bars. Make sure to spoon the flour into the measuring cup and level it off, rather than scooping it directly from the bag. Finally, overmixing the dough can develop the gluten in the flour, resulting in tough, dry bars.
Q4: Can I make this recipe vegan?
A: Yes, with a few substitutions, you can easily adapt this recipe to be vegan. Replace the butter with a vegan butter alternative, the eggs with flax eggs (1 tablespoon of ground flaxseed mixed with 3 tablespoons of water per egg), and the milk with plant-based milk like almond or soy milk.
Q5: Can I add anything else to the cookie bars for extra flavor?
A: Absolutely! There are many ways to customize these bars to your liking. Adding chocolate chips, chopped peanuts, or even a swirl of caramel sauce to the dough would be delicious. You could also sprinkle sea salt on top of the frosting for a sweet and salty twist. Get creative and experiment with your favorite flavors!