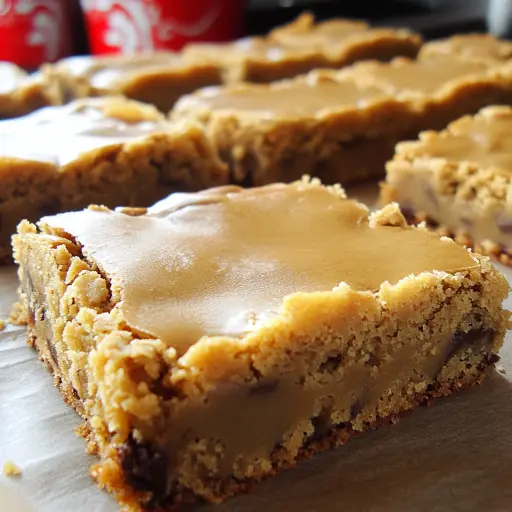
Description: A nostalgic treat that brings back memories of school lunches, these Peanut Butter Lunch Lady Cookie Bars are soft, chewy, and bursting with peanut butter flavor. Topped with a simple yet irresistible powdered sugar glaze, they’re easy to make and even easier to devour. Perfect for a quick dessert, potluck, or satisfying a sweet craving, these bars are a guaranteed crowd-pleaser. This recipe adapts the classic lunch lady bar concept, swapping the traditional frosting for a luscious peanut butter base, creating a delightful twist on a beloved favorite.
Ingredients:
- 1 cup (2 sticks) unsalted butter, softened
- 1 cup granulated sugar
- 1 cup packed light brown sugar
- 1 cup creamy peanut butter (not natural style, for best results)
- 2 large eggs
- 2 ½ teaspoons vanilla extract
- 1 ½ cups all-purpose flour
- 1 teaspoon baking powder
- ½ teaspoon salt
- Glaze:
- 1 cup powdered sugar
- 2-3 tablespoons milk (or cream)
- ½ teaspoon vanilla extract (optional, but recommended)
Preparation:
Step 1: Preheat and Prep Preheat your oven to 350°F (175°C). This is crucial for even baking. Line an 8×8-inch baking pan with parchment paper, leaving an overhang on two sides for easy removal. Alternatively, grease the pan thoroughly with butter or baking spray. Lining with parchment paper is highly recommended as it makes removing the bars incredibly easy and prevents sticking.
Step 2: Cream the Butter and Sugars In a large bowl, or the bowl of a stand mixer fitted with the paddle attachment, cream together the softened butter, granulated sugar, and brown sugar. Beat on medium speed for 3-4 minutes, or until the mixture is light and fluffy. This step is important as it incorporates air into the dough, contributing to the soft and chewy texture of the bars. Make sure the butter is properly softened, but not melted. If it is too melted, the bars may spread too thin and become greasy.
Step 3: Add Peanut Butter and Eggs Add the creamy peanut butter to the creamed butter and sugar mixture. Mix on medium speed until smooth and fully incorporated. The peanut butter should be well combined, leaving no streaks of peanut butter in the dough. Next, beat in the eggs one at a time, mixing well after each addition. Then, stir in the vanilla extract. This process ensures that each egg is fully incorporated into the mixture, contributing to a smooth and consistent batter.
Step 4: Combine Dry Ingredients In a separate medium bowl, whisk together the all-purpose flour, baking powder, and salt. Whisking ensures that the baking powder and salt are evenly distributed throughout the flour. This prevents pockets of saltiness or uneven rising in the bars.
Step 5: Combine Wet and Dry Ingredients Gradually add the dry ingredients to the wet ingredients, mixing on low speed until just combined. Be careful not to overmix the dough, as this can develop the gluten in the flour and result in tough bars. Mix until the flour is just incorporated, leaving a few streaks of flour is preferable to overmixing.
Step 6: Bake Transfer the dough to the prepared baking pan and spread it evenly using a spatula or your fingers. The dough will be thick. Ensure that the dough is evenly distributed in the pan to ensure even baking.
Step 7: Cool and Glaze Bake for 20-25 minutes, or until the edges are golden brown and the center is set. A toothpick inserted into the center should come out clean, or with a few moist crumbs attached. Let the bars cool completely in the pan before frosting. Cooling is essential to prevent the glaze from melting. In a small bowl, whisk together the powdered sugar, milk (or cream), and vanilla extract (if using) until smooth. Start with 2 tablespoons of milk and add more as needed to reach your desired glaze consistency. The glaze should be thick enough to coat the bars evenly but thin enough to spread easily. Pour the glaze over the cooled bars and spread it evenly. If desired, sprinkle with chopped peanuts or other toppings.
Step 8: Cut and Serve Once the glaze is set, cut the bars into squares and serve. For neat slices, chill the bars in the refrigerator for about 30 minutes before cutting.
Why You Will Love This Recipe:
These Peanut Butter Lunch Lady Cookie Bars are a nostalgic trip down memory lane, offering a comforting and familiar taste with a peanut butter twist. They are incredibly easy to make, requiring minimal ingredients and steps. The combination of the soft, chewy peanut butter base and the sweet, simple glaze is irresistible. These bars are perfect for satisfying a sweet craving, sharing with friends and family, or bringing to a potluck. They are also a great way to use up leftover peanut butter. The recipe is adaptable to different dietary needs by using gluten-free flour or dairy-free milk.
Serving Suggestions:
- Serve the bars chilled or at room temperature.
- Pair them with a glass of cold milk or a scoop of vanilla ice cream.
- Cut them into smaller squares for a bite-sized treat.
- Pack them in lunchboxes for a nostalgic and delicious snack.
- Serve with a cup of coffee or tea for an afternoon pick-me-up.
Tips:
- Use creamy peanut butter (not natural style) for the best texture and flavor. Natural peanut butter tends to be oily and can make the bars greasy.
- Do not overbake the bars, as they will become dry.
- Line the baking pan with parchment paper for easy removal.
- Adjust the amount of milk in the glaze to achieve your desired consistency.
- For a richer flavor, use brown butter in the recipe.
- Add chocolate chips to the dough for a chocolate peanut butter version.
- Sprinkle the glaze with chopped peanuts, sprinkles, or sea salt for added flavor and visual appeal.
- Store the bars in an airtight container at room temperature for up to 3 days or in the refrigerator for up to a week.
- Freeze the bars for longer storage.
Prep Time: 15 minutes
Cook Time: 20-25 minutes
Total Time: 35-40 minutes
Nutritional Information: (per serving, approximate)
- Calories: 350-400
- Protein: 8-10g
- Sodium: 150-200mg
Conclusion:
Peanut Butter Lunch Lady Cookie Bars are a simple yet satisfying dessert that is sure to bring a smile to your face. With their soft, chewy texture, rich peanut butter flavor, and sweet glaze, they are the perfect treat for any occasion. Whether you are looking for a nostalgic snack or a crowd-pleasing dessert, these bars are a guaranteed winner. So, gather your ingredients, preheat your oven, and get ready to bake a batch of these irresistible Peanut Butter Lunch Lady Cookie Bars!
Questions and Answers:
- Can I use natural peanut butter in this recipe? While you can use natural peanut butter, it is not recommended. Natural peanut butter tends to be more oily, which can result in greasy bars. Creamy, processed peanut butter will provide the best texture and flavor. If you do use natural peanut butter, make sure to stir it well before measuring and you may need to reduce the amount of butter in the recipe slightly.
- Can I make these bars gluten-free? Yes, you can! Simply substitute the all-purpose flour with a gluten-free all-purpose flour blend. Make sure the blend contains xanthan gum, as this will help to bind the ingredients together.
- Can I freeze these bars? Absolutely! These bars freeze very well. Allow them to cool completely, then cut them into squares and wrap them individually in plastic wrap. Place the wrapped bars in a freezer-safe bag or container and freeze for up to 2-3 months. Thaw at room temperature before serving.
- Can I add chocolate chips to this recipe? Yes, you can! Chocolate chips would be a delicious addition to these bars. Simply add about 1 cup of chocolate chips (milk, dark, or semi-sweet) to the dough along with the dry ingredients.
- My bars are too dry. What did I do wrong? Overbaking is the most common cause of dry bars. Make sure to bake the bars for only 20-25 minutes, or until the edges are golden brown and the center is just set. It’s also important not to overmix the dough, as this can develop the gluten in the flour and result in tough, dry bars. Using too much flour can also cause dryness, so make sure to measure your flour accurately.