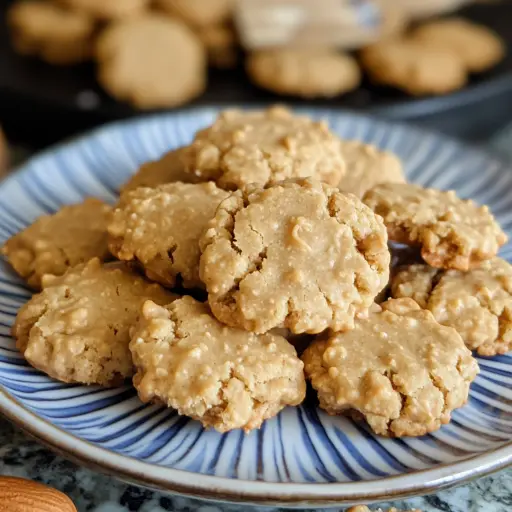
Description:These classic Peanut Butter No-Bake Cookies are a quick, easy, and utterly satisfying treat. Requiring no oven time, they are perfect for warm days, beginner bakers, or anyone craving a sweet peanut butter and oatmeal fix. This recipe uses simple pantry staples and comes together in under 20 minutes, offering a delicious and nostalgic dessert that everyone will love. The cookies are soft, chewy, and bursting with peanut butter flavor, making them an irresistible indulgence any time of day. Get ready to experience the joy of homemade cookies without the fuss!
Ingredients:
- ½ cup (115 g) unsalted butter
- 1¾ cups (350 g) granulated sugar
- ½ cup (120 ml) milk (any kind)
- ¾ cup (190 g) creamy peanut butter (smooth is best for texture)
- 1 teaspoon pure vanilla extract
- 3¼ cups (325 g) quick-cooking oats (not instant or old-fashioned)
Preparation:
Step 1: Prepare the Baking Sheets:
Before you even begin melting butter, line two large baking sheets with either parchment paper or wax paper. This crucial step ensures that your cookies won’t stick and makes for easy removal once they’ve set. Parchment paper is slightly preferred as it handles moisture better than wax paper. Ensure the paper covers the entire surface of the baking sheets to prevent any potential sticking. Set the prepared baking sheets aside, ready to receive your delicious cookie creations.
Step 2: Combine Butter, Sugar, and Milk:
In a medium saucepan, combine the unsalted butter, granulated sugar, and milk. A heavy-bottomed saucepan is ideal because it distributes heat evenly, preventing scorching. Make sure the saucepan is large enough to accommodate all the ingredients as they bubble up during cooking. Place the saucepan on the stovetop over medium heat.
Step 3: Melt and Combine Ingredients:
Continuously stir the mixture with a heat-resistant spatula or wooden spoon until the butter is completely melted and the sugar is dissolved. The mixture should be smooth and uniform. Constant stirring is essential to prevent the sugar from burning or sticking to the bottom of the pan. This step is about creating a cohesive base for the cookies, ensuring that all the flavors will meld together seamlessly.
Step 4: Boil the Mixture:
Once the butter and sugar are fully dissolved and combined, bring the mixture to a rolling boil over medium-high heat. A rolling boil is defined as a boil that continues vigorously even when stirred. The surface of the mixture should be covered with bubbles that are constantly moving and breaking.
Step 5: Precise Boiling Time:
Once it reaches a rolling boil, set a timer for exactly 60 seconds. This is a critical step in the recipe, as boiling the mixture for the correct amount of time is essential for achieving the right consistency. Resist the urge to stir during this boiling period. The high heat allows the sugar to caramelize slightly, contributing to the cookies’ characteristic chewiness. Accuracy is key here; even a few seconds can make a difference in the final texture.
Step 6: Remove from Heat and Add Peanut Butter and Vanilla:
Immediately remove the saucepan from the heat. Quickly stir in the creamy peanut butter and vanilla extract. Stir continuously until the peanut butter is fully incorporated and the mixture is smooth and glossy. Ensure there are no streaks of peanut butter remaining. The residual heat will help the peanut butter melt and blend seamlessly into the sugary base.
Step 7: Incorporate the Oats:
Add the quick-cooking oats to the mixture. Ensure you are using quick-cooking oats and not instant or old-fashioned oats. Quick-cooking oats are thinner and cook faster, providing the right texture for these no-bake cookies.
Step 8: Thorough Mixing:
Stir the oats into the mixture until they are evenly coated. This may take a bit of effort, but make sure every oat is covered with the peanut butter mixture. The oats provide structure and chewiness to the cookies. Thorough mixing ensures a consistent texture in every bite.
Step 9: Drop and Shape Cookies:
Using a spoon or a cookie scoop (a medium-sized scoop works well), drop rounded spoonfuls of the mixture onto the prepared baking sheets. Leave a little space between each cookie to allow for even cooling.
Step 10: Slight Flattening:
Gently flatten each mound slightly with the back of a spoon. This helps to create a more uniform cookie shape and ensures even setting. You can also sprinkle a touch of sea salt on top of each cookie at this stage for an extra burst of flavor, balancing the sweetness of the peanut butter.
Step 11: Cool and Set:
Allow the cookies to cool at room temperature for about 45 minutes to 1 hour, or until they are firm and set. Do not refrigerate the cookies, as this can make them too hard. The cooling process allows the oats to absorb the moisture and the mixture to solidify. Resist the temptation to touch or move the cookies during this time.
Step 12: Enjoy!
Once the cookies are firm, they are ready to enjoy! Store them in an airtight container at room temperature for up to a week.
Why You Will Love This Recipe:
- Incredibly Easy: This recipe requires no baking, making it perfect for beginner bakers or anyone who wants a quick and simple dessert.
- Minimal Ingredients: It uses common pantry staples, so you likely already have everything you need.
- Quick to Make: From start to finish, these cookies come together in under 20 minutes, making them ideal for those last-minute cravings.
- Kid-Friendly: Kids love helping to make these cookies, and they’re a guaranteed hit at parties and gatherings.
- Delicious Flavor: The combination of peanut butter, oats, and vanilla is simply irresistible.
- Nostalgic: These cookies evoke memories of childhood and simpler times, bringing a sense of comfort and happiness with every bite.
- Versatile: You can customize the recipe with different flavors and add-ins, such as chocolate chips, nuts, or sprinkles.
- No Oven Required: Perfect for hot summer days when you don’t want to turn on the oven.
Serving Suggestions:
- Serve with a glass of cold milk for a classic pairing.
- Enjoy as an afternoon snack or a dessert after dinner.
- Pack them in lunchboxes for a sweet treat.
- Bring them to potlucks or picnics.
- Crumbled over ice cream for a peanut butter oatmeal sundae.
- Pair with a cup of hot coffee or tea.
- Wrap them in cellophane bags and tie with a ribbon for a homemade gift.
Tips:
- Use creamy peanut butter for the best texture. Avoid natural peanut butter, as it can separate and make the cookies greasy.
- Make sure to use quick-cooking oats, not instant or old-fashioned oats.
- Boiling the mixture for exactly 60 seconds is crucial for achieving the right consistency. Use a timer to ensure accuracy.
- Don’t overcook the mixture, as this can make the cookies too hard.
- If the cookies are too soft, try boiling the mixture for a few seconds longer next time.
- For a richer flavor, use brown sugar instead of granulated sugar.
- Add chocolate chips, nuts, or sprinkles for extra flavor and texture.
- Store the cookies in an airtight container at room temperature to maintain their texture.
- If you live in a humid climate, you may need to refrigerate the cookies to help them set.
Prep Time: 10 minutes Cook Time: 5 minutes Total Time: 15 minutes
Nutritional Information:
(Approximate values, may vary based on specific ingredients used)
- Calories: Approximately 150 kcal per cookie
- Protein: 3g per cookie
- Sodium: 50mg per cookie
Conclusion:
Peanut Butter No-Bake Cookies are a timeless classic for a reason. They are easy to make, require minimal ingredients, and deliver a satisfying combination of peanut butter, oats, and sweetness. This recipe is perfect for anyone looking for a quick and delicious dessert that doesn’t require any baking. Whether you’re a beginner baker or an experienced cook, these cookies are sure to become a favorite. So, gather your ingredients, follow the simple steps, and enjoy the delightful taste of homemade Peanut Butter No-Bake Cookies! They are the ultimate comfort food, perfect for sharing with friends and family or enjoying all by yourself.
Question and Answers:
Q1: Can I use natural peanut butter in this recipe?
A: While you can use natural peanut butter, it’s not recommended for the best results. Natural peanut butter tends to separate, leading to a greasy texture in the cookies. Creamy, processed peanut butter will give you a smoother, more consistent cookie. If you must use natural peanut butter, make sure to stir it thoroughly before measuring to ensure the oil is well incorporated, and be prepared for a potentially different texture. You can also try adding a tablespoon of honey or corn syrup to the mixture to help bind it together if you’re concerned about separation.
Q2: What happens if I don’t boil the mixture for exactly 60 seconds?
A: The boiling time is critical for achieving the right consistency. If you don’t boil the mixture long enough (less than 60 seconds), the cookies might not set properly and will remain too soft or sticky. On the other hand, if you boil it for too long (more than 60 seconds), the cookies might become too hard and crumbly. The 60-second boiling time allows the sugar to reach the perfect stage of caramelization, which is essential for the cookies to set without being overly hard. Use a timer to ensure accuracy!
Q3: Can I substitute the milk with a non-dairy alternative?
A: Yes, you can definitely substitute the milk with a non-dairy alternative like almond milk, soy milk, oat milk, or even coconut milk. Just be aware that the flavor of the non-dairy milk might slightly affect the overall taste of the cookies. Oat milk is a good choice as it has a neutral flavor and creamy texture that works well in this recipe. Coconut milk will add a subtle coconut flavor, which can be delicious if you enjoy that. Choose an unsweetened variety to avoid making the cookies too sweet.
Q4: My cookies are still soft after an hour. What should I do?
A: If your cookies are still soft after an hour, there are a few possible reasons:
- Insufficient Boiling Time: The most common reason is that the mixture wasn’t boiled long enough. Next time, make sure to boil it for the full 60 seconds.
- Humid Weather: High humidity can prevent the cookies from setting properly. If it’s a humid day, try refrigerating the cookies for 15-20 minutes to help them firm up.
- Incorrect Measurements: Double-check your measurements to ensure you used the correct amount of each ingredient. Too much liquid can prevent the cookies from setting.
- Peanut Butter Type: As mentioned earlier, using natural peanut butter can also contribute to a softer texture.
Q5: Can I add chocolate chips to these cookies?
A: Absolutely! Adding chocolate chips is a fantastic way to enhance these cookies. Simply stir in about 1 cup of chocolate chips (milk chocolate, semi-sweet, or dark chocolate, depending on your preference) after you’ve added the oats. Make sure the mixture is still warm enough to melt the chocolate chips slightly, creating a delightful, gooey experience in every bite. White chocolate chips or even chopped peanut butter cups would also be delicious additions!