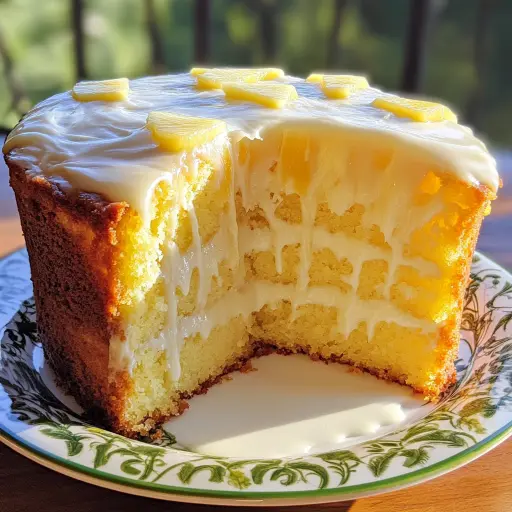
Description: This Pineapple Dream Cake is a tropical twist on a classic yellow cake, infused with the bright, tangy sweetness of pineapple. It’s incredibly moist, flavorful, and easy to make, making it the perfect dessert for any occasion, from a casual weeknight treat to a festive celebration. The vibrant glaze adds a touch of elegance, while the optional pineapple chunks on top provide a delightful textural contrast. Get ready to transport your taste buds to a sunny island paradise with every bite!
Ingredients:
- 1 box (15.25 ounces) yellow cake mix
- 1 cup pineapple juice, preferably unsweetened
- ½ cup vegetable oil (canola, corn, or vegetable blend work well)
- 4 large eggs, preferably at room temperature
- 1 cup crushed pineapple, well-drained (reserve the juice for other uses, like smoothies!)
For the Pineapple Glaze:
- 1 cup powdered sugar, sifted to remove lumps
- ¼ cup pineapple juice, or more to reach desired consistency
- Optional: Pineapple chunks for garnish
Preparation:
Step 1: Preheat and Prepare: Start by preheating your oven to 350°F (175°C). This ensures the cake bakes evenly. While the oven is heating up, grease and flour your bundt pan or a 9-inch round cake pan. This is crucial for preventing the cake from sticking, ensuring a clean release after baking. Use shortening or cooking spray for greasing, and then dust with flour, tapping out any excess. Alternatively, you can use baking spray that contains flour.
Step 2: Combine Wet and Dry Ingredients: In a large mixing bowl, combine the yellow cake mix, pineapple juice, vegetable oil, and eggs. Make sure the bowl is large enough to accommodate all the ingredients without overflowing. The pineapple juice adds a unique flavor and moisture that sets this cake apart from a traditional yellow cake. The vegetable oil contributes to the cake’s tenderness, while the eggs provide structure and richness. Using room-temperature eggs helps them emulsify better with the other ingredients, resulting in a smoother batter.
Step 3: Mix the Batter: Using an electric mixer (either a stand mixer or a hand mixer), beat the ingredients on medium speed for about 2 minutes, or until the batter is smooth and well combined. It’s important to avoid overmixing, as this can develop the gluten in the cake mix, leading to a tough cake. Mix until just combined, scraping down the sides of the bowl as needed to ensure all the ingredients are incorporated. The batter should be light and airy.
Step 4: Fold in Crushed Pineapple: Gently fold in the drained crushed pineapple. Use a rubber spatula for this step to avoid overmixing. Distribute the pineapple evenly throughout the batter, ensuring that each bite is bursting with pineapple flavor. Draining the pineapple well is essential to prevent the cake from becoming soggy. If you prefer, you can lightly pat the crushed pineapple dry with a paper towel before adding it to the batter.
Step 5: Bake the Cake: Pour the prepared batter into the greased and floured bundt pan or 9-inch round cake pan. Ensure the batter is evenly distributed in the pan. Place the pan in the preheated oven and bake for 35-40 minutes, or until a toothpick inserted in the center of the cake comes out clean. The baking time may vary depending on your oven, so it’s always best to check for doneness by inserting a toothpick. If the toothpick comes out with wet batter, continue baking for a few more minutes and check again. A few moist crumbs are okay, but you want to avoid a completely wet center.
Step 6: Cool the Cake: Once the cake is baked, remove it from the oven and let it cool in the pan for about 15 minutes. This allows the cake to firm up slightly, making it easier to transfer to a wire rack. After 15 minutes, invert the cake onto a wire rack to cool completely. Make sure the wire rack is clean to avoid any unwanted flavors or textures transferring to the cake.
Step 7: Prepare the Pineapple Glaze: While the cake is cooling, prepare the pineapple glaze. In a small bowl, whisk together the powdered sugar and pineapple juice until smooth. Start with the ¼ cup of pineapple juice and add more, one teaspoon at a time, until you reach the desired consistency. The glaze should be pourable but not too thin. If it’s too thick, it will be difficult to drizzle evenly over the cake. Sifting the powdered sugar beforehand will help prevent lumps in the glaze.
Step 8: Glaze and Decorate: Once the cake is completely cooled, drizzle the pineapple glaze over the top. Allow the glaze to set for a few minutes before serving. If desired, garnish with pineapple chunks for an extra touch of tropical flair. Arrange the pineapple chunks attractively on top of the glazed cake.
Why You Will Love This Recipe:
This Pineapple Dream Cake is a guaranteed crowd-pleaser for several reasons:
- Simplicity: It starts with a box cake mix, making it incredibly easy to prepare, even for novice bakers. The minimal steps ensure a quick and hassle-free baking experience.
- Moisture: The pineapple juice and crushed pineapple infuse the cake with an unparalleled level of moisture, preventing it from becoming dry or crumbly. This is a key factor in the cake’s delightful texture.
- Flavor: The combination of yellow cake mix and pineapple creates a harmonious blend of sweetness and tanginess. The pineapple flavor is present in every bite, making it a truly tropical delight.
- Versatility: This cake is perfect for any occasion, from a simple afternoon treat to a special celebration. It can be easily customized with different toppings or additions, such as shredded coconut or chopped nuts.
- Beautiful Presentation: The pineapple glaze adds a touch of elegance and visual appeal to the cake. The optional pineapple chunks on top create a stunning final presentation.
Serving Suggestions:
- Serve the Pineapple Dream Cake with a scoop of vanilla ice cream or whipped cream for an extra decadent treat.
- Pair it with a cup of coffee or tea for a delightful afternoon snack.
- Offer it as a dessert at a potluck or gathering; it’s sure to be a hit.
- Garnish with fresh mint leaves for a pop of color and freshness.
- Serve chilled or at room temperature, depending on your preference.
Tips:
- For an extra moist cake, poke small holes on top of the warm cake with a skewer or toothpick and pour a little pineapple juice over it before glazing. This will allow the juice to soak into the cake, further enhancing its moisture.
- To prevent the cake from sticking to the pan, ensure you grease and flour the pan thoroughly. You can also use parchment paper to line the bottom of the pan for extra insurance.
- If you don’t have pineapple juice on hand, you can use orange juice or apple juice as a substitute, although the flavor will be slightly different.
- For a richer flavor, you can add a teaspoon of vanilla extract or rum extract to the batter.
- Store any leftover cake in an airtight container in the refrigerator for up to 3 days.
Prep Time: 15 minutes
Cook Time: 40 minutes
Total Time: 55 minutes
Nutritional Information: (Approximate, may vary based on specific ingredients)
- Calories: 320 kcal per slice
- Protein: 3g
- Sodium: 250mg
Conclusion:
The Pineapple Dream Cake is a testament to the fact that simple recipes can often be the most satisfying. With its moist texture, tropical flavor, and easy preparation, this cake is a guaranteed winner. Whether you’re a seasoned baker or just starting out, this recipe is sure to become a staple in your kitchen. So, gather your ingredients, preheat your oven, and get ready to bake a slice of sunshine!
Questions and Answers:
Q1: Can I use a different type of cake mix?
A: Absolutely! While the recipe calls for a yellow cake mix, you can experiment with other flavors like white cake mix or even a pineapple cake mix for a more intense pineapple flavor. Just keep in mind that the texture and sweetness might vary slightly.
Q2: What can I do if I don’t have a bundt pan?
A: No problem! You can easily use a 9-inch round cake pan instead. The baking time might be slightly shorter, so keep a close eye on it and test for doneness with a toothpick. You can also use a 9×13 inch pan, the baking time will change drastically, and you will have to adjust accordingly.
Q3: Can I make this cake ahead of time?
A: Yes, you can definitely make this cake ahead of time! In fact, it often tastes even better the next day as the flavors have had time to meld together. Just be sure to store it in an airtight container in the refrigerator to keep it moist. You can glaze it right before serving for the best presentation.
Q4: Is it necessary to drain the crushed pineapple?
A: Yes, draining the crushed pineapple is essential to prevent the cake from becoming soggy. Too much moisture can result in a dense and gummy texture. Make sure to drain it well using a fine-mesh sieve or by squeezing out the excess liquid with a paper towel.
Q5: Can I add any other ingredients to the cake batter?
A: Absolutely! This cake is very versatile and can be easily customized to your liking. Some popular additions include shredded coconut, chopped macadamia nuts, or even a swirl of cream cheese frosting in the batter. Get creative and experiment with different flavors to create your own unique version of the Pineapple Dream Cake!