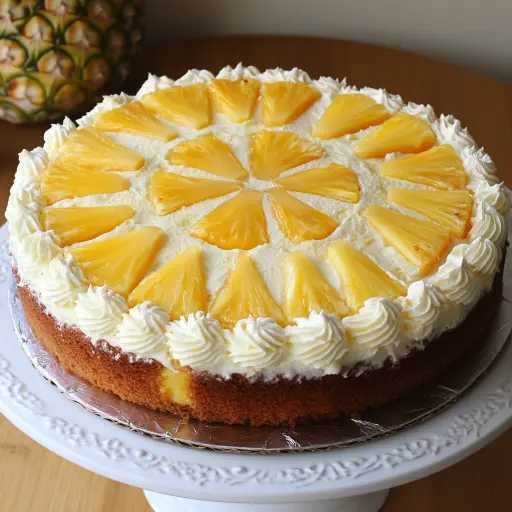
Description:This Pineapple Sunshine Cake is a burst of tropical joy, guaranteed to brighten any occasion. Imagine sinking your teeth into a cake that’s unbelievably moist, boasting a sweet, tangy pineapple flavor that dances on your tongue. It’s a recipe that’s as easy to make as it is delightful to eat, making it a perfect centerpiece for potlucks, family gatherings, or simply a well-deserved Sunday treat. The combination of caramelized pineapple, fluffy cake, and a creamy, dreamy topping creates a symphony of textures and tastes that will leave everyone wanting more. This isn’t just a cake; it’s sunshine in every single bite!
Ingredients:
- 1 box (15-18 oz) yellow cake mix (plus ingredients called for on the box, like eggs and oil)
- 1 can (20 oz) pineapple slices, drained, juice reserved
- 1/2 cup (1 stick) unsalted butter, melted
- 1/2 cup packed light brown sugar
- 1 cup crushed pineapple, with juice
- 1 box (3.4 oz) instant vanilla pudding mix
- 1 1/2 cups cold milk (any kind works, but whole milk creates a richer pudding)
- 1 cup whipped topping (like Cool Whip), thawed
Preparation:
Step 1: Preheating and Base Preparation:
Begin by preheating your oven to a consistent 350°F (175°C). This ensures even baking and prevents the cake from drying out. While the oven warms up, focus on preparing the base of your cake. Grab a 9×13″ baking dish and grease it thoroughly with cooking spray or a light coating of butter. This prevents the cake from sticking and makes it easier to remove after baking. Once greased, pour the melted butter evenly across the bottom of the dish. Then, sprinkle the packed light brown sugar uniformly over the melted butter. This mixture will caramelize during baking, creating a rich, gooey layer that complements the pineapple. Finally, carefully arrange the drained pineapple slices artfully on top of the brown sugar mixture. Don’t overlap the slices; aim for an even distribution across the entire surface. This pineapple layer will become the beautiful top of your cake after it’s inverted.
Step 2: Cake Batter Creation:
Now, it’s time to prepare the cake batter. In a large mixing bowl, combine the yellow cake mix with the ingredients called for on the box (typically eggs and oil). However, instead of using water, substitute it with the crushed pineapple (with its juice). The pineapple juice adds extra moisture and intensifies the tropical flavor of the cake. Mix the ingredients according to the box directions, but be careful not to overmix. Overmixing can lead to a tough cake. Mix until just combined, ensuring there are no large lumps of dry ingredients remaining. The batter should be smooth and pourable.
Step 3: Assembly and Baking:
Carefully pour the prepared cake batter evenly over the pineapple slices in the baking dish. Ensure the batter covers the entire surface, filling in any gaps between the pineapple slices. Gently spread the batter with a spatula if necessary. This ensures a uniform cake layer. Once the batter is poured, place the baking dish in the preheated oven and bake for 35-40 minutes. To check for doneness, insert a toothpick into the center of the cake. If the toothpick comes out clean or with just a few moist crumbs attached, the cake is ready. If the toothpick comes out with wet batter, continue baking for a few more minutes and check again. Avoid opening the oven door frequently during baking, as this can cause the cake to collapse.
Step 4: Cooling and Flipping (Optional):
Once the cake is baked, remove it from the oven and let it cool completely in the baking dish. This is crucial because flipping the cake while it’s still warm can cause it to fall apart. Allow the cake to cool for at least an hour, or even longer if possible. Once cooled, you can either leave the cake in the baking dish and frost it directly, or you can invert it onto a serving platter to showcase the caramelized pineapple topping. To invert the cake, run a knife around the edges of the baking dish to loosen it. Then, place a serving platter over the top of the baking dish and carefully flip it over. Gently tap the bottom of the baking dish to release the cake.
Step 5: Pudding Topping Preparation and Assembly:
While the cake is cooling, prepare the pudding topping. In a medium mixing bowl, whisk together the instant vanilla pudding mix and the cold milk until the mixture begins to thicken. This usually takes about 2-3 minutes. Once the pudding has thickened slightly, gently fold in the thawed whipped topping. Be careful not to overmix, as this can deflate the whipped topping. The pudding topping should be light and airy. If you chose to invert the cake, spread the creamy pudding topping evenly over the pineapple layer. If you left the cake in the baking dish, you can either spread the topping on top or slice the cake horizontally in half and spread the filling between the layers.
Step 6: Chilling and Serving:
Once the cake is assembled and topped with the pudding mixture, cover it with plastic wrap or foil and chill in the refrigerator for at least 30 minutes, or preferably longer, before serving. Chilling allows the flavors to meld together and the pudding topping to set properly. Before serving, you can garnish the cake with extra pineapple slices, maraschino cherries, or a sprinkle of toasted coconut for an extra touch of tropical flair. Slice the cake into squares and serve chilled. Enjoy!
Why You Will Love This Recipe:
This Pineapple Sunshine Cake is a crowd-pleaser for so many reasons! First and foremost, it’s incredibly easy to make, thanks to the use of a cake mix and instant pudding. This means you can whip it up in a snap, even on busy weeknights. The cake itself is wonderfully moist and tender, thanks to the addition of crushed pineapple and its juice. The pineapple flavor is perfectly balanced with the sweetness of the cake and the richness of the caramelized brown sugar and butter. The creamy pudding topping adds a luscious, dreamy texture that complements the cake perfectly. And let’s not forget the beautiful presentation – the golden pineapple slices create a visually stunning dessert that’s sure to impress. Whether you’re hosting a potluck, celebrating a special occasion, or simply craving a taste of the tropics, this Pineapple Sunshine Cake is guaranteed to be a hit! Plus, it’s endlessly customizable – you can use different flavors of cake mix, add nuts or spices to the batter, or experiment with different toppings to create your own unique version.
Serving Suggestions:
- Serve chilled as a refreshing dessert on a warm day.
- Pair with a scoop of vanilla ice cream or a dollop of whipped cream for an extra indulgent treat.
- Garnish with fresh pineapple chunks, maraschino cherries, or toasted coconut flakes.
- Serve alongside a tropical fruit salad for a complete tropical-themed meal.
- Enjoy with a cup of coffee or tea for a delightful afternoon snack.
- Cut into smaller squares and serve as part of a dessert buffet.
- Offer a variety of toppings, such as chocolate shavings, chopped nuts, or caramel sauce, for guests to customize their slices.
Tips:
- Be sure to grease the baking dish thoroughly to prevent the cake from sticking.
- Substitute the water called for on the cake mix with the crushed pineapple juice for extra flavor.
- Don’t overmix the cake batter, as this can result in a tough cake.
- Allow the cake to cool completely before flipping it to prevent it from falling apart.
- Chill the cake for at least 30 minutes before serving to allow the flavors to meld together.
- For a richer pudding topping, use whole milk instead of skim milk.
- Add a sprinkle of cinnamon or nutmeg to the cake batter for a warm, spicy flavor.
- Substitute the vanilla pudding mix with butterscotch or coconut cream pudding mix for a different flavor variation.
- If you don’t have crushed pineapple, you can use diced pineapple instead.
- Store leftover cake in the refrigerator for up to 3 days.
Prep Time: 10 minutes
Cook Time: 35-40 minutes
Total Time: 45-50 minutes
Nutritional Information: (per slice, approximate)
- Calories: ~280
- Protein: ~3g
- Sodium: ~250mg (depending on cake mix)
Conclusion:
The Pineapple Sunshine Cake is more than just a dessert; it’s an experience. It’s a simple recipe that delivers maximum flavor and satisfaction. The combination of the moist, pineapple-infused cake, the caramelized brown sugar and butter, and the creamy pudding topping is simply irresistible. Whether you’re a seasoned baker or a kitchen novice, this recipe is guaranteed to be a success. So, gather your ingredients, preheat your oven, and get ready to create a little sunshine in your kitchen! This cake is perfect for any occasion and is sure to become a family favorite. Enjoy the delightful taste of the tropics with every bite!
Questions and Answers:
- Q: Can I use a different size baking dish?
- A: While a 9×13″ baking dish is ideal, you can use an 8×8″ or 9×9″ square baking dish. Keep in mind that the baking time may need to be adjusted slightly, as the cake will be thicker. Start checking for doneness a few minutes earlier than the recipe suggests. The cake will be higher but will require longer baking time.
- Q: Can I make this cake ahead of time?
- A: Absolutely! In fact, this cake is even better when made ahead of time, as it allows the flavors to meld together. You can bake the cake layer up to 2 days in advance and store it tightly wrapped in the refrigerator. Prepare the pudding topping just before serving to prevent it from becoming too runny.
- Q: Can I use fresh pineapple instead of canned?
- A: While canned pineapple is convenient, you can definitely use fresh pineapple. Make sure it’s ripe and sweet. For the pineapple slices, peel and core the pineapple and then cut it into slices. For the crushed pineapple, you can pulse the pineapple chunks in a food processor until they are finely chopped. Also, the juice from the fresh pineapple can be used to substitute water.
- Q: Is there a substitute for the whipped topping?
- A: If you prefer not to use whipped topping like Cool Whip, you can make your own homemade whipped cream. Simply whip heavy cream with a little powdered sugar and vanilla extract until stiff peaks form. Be careful not to overwhip, as the cream can turn into butter.
- Q: Can I add nuts to this recipe?
- A: Yes, you can add chopped nuts to the cake batter or sprinkle them on top of the pudding topping for added texture and flavor. Macadamia nuts, pecans, or walnuts would be delicious additions. About 1/2 to 1 cup of chopped nuts would be a good amount.