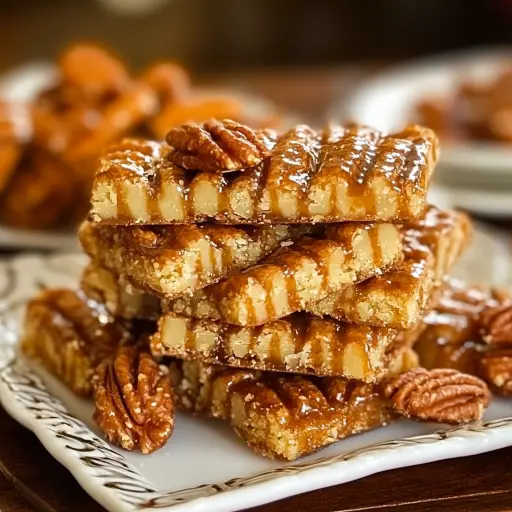
Description: This Praline Crunch is a delightful, addictive snack that combines the satisfying crunch of Crispix cereal and pecans with a sweet, buttery, homemade praline coating. It’s easy to make, requires minimal ingredients, and is perfect for parties, gifts, or simply enjoying on your own. The baking process transforms simple ingredients into a caramelized masterpiece that will have everyone reaching for more.
Ingredients:
- 8 cups Crispix cereal (or similar rice-based cereal for a gluten-free option)
- 2 cups pecan halves (feel free to use other nuts or a mix of nuts)
- 1/2 cup unsalted butter (high-quality butter contributes significantly to the flavor)
- 1/2 cup packed brown sugar (light or dark brown sugar works, dark brown will give a richer, molasses flavor)
- 1/2 cup light corn syrup (this provides the necessary sweetness and prevents crystallization)
- 1 teaspoon vanilla extract (pure vanilla extract is recommended for the best flavor)
- 1/2 teaspoon baking soda (this creates bubbles in the caramel, resulting in a lighter, crispier crunch)
Preparation:
This recipe is all about precision and timing to achieve the perfect praline coating. Here’s a detailed breakdown of each step to ensure your Praline Crunch turns out perfectly every time.
Step 1: Preheat and Prep: Begin by preheating your oven to a gentle 250°F (120°C). This low temperature is crucial for slowly baking the cereal and nuts, allowing the caramel to fully caramelize without burning. While the oven is heating, line a large baking sheet (or two smaller sheets if necessary) with parchment paper. Parchment paper is essential as it prevents the Praline Crunch from sticking to the baking sheet, making cleanup a breeze. Avoid using wax paper, as it can melt at oven temperatures.
Step 2: Combine Cereal and Nuts: In a large mixing bowl – and I mean large – gently combine the Crispix cereal and pecan halves. You need a bowl that gives you ample room to stir without making a mess. Use a rubber spatula or your hands to gently toss the ingredients together, ensuring the pecans are evenly distributed throughout the cereal. Setting this aside prevents any last-minute scrambling when the caramel is ready. Consider toasting your pecan halves lightly in the oven for 8-10 minutes at 350 before beginning to combine them with the cereal.
Step 3: Make the Caramel: In a medium saucepan (preferably one with a heavy bottom to prevent scorching) over medium heat, melt the unsalted butter. Once melted, add the packed brown sugar and light corn syrup. Stir constantly with a wooden spoon or heat-resistant spatula until the brown sugar is completely dissolved and the mixture is smooth and homogenous. This usually takes about 2-3 minutes. Don’t stop stirring! Overheating can lead to a grainy texture in the final product.
Step 4: Boil and Foam: Bring the mixture to a boil, continuing to stir constantly. Once boiling, set a timer for exactly 1 minute and continue to boil, stirring the entire time. This boiling process is critical for achieving the right caramel consistency. After 1 minute, immediately remove the saucepan from the heat. Quick action is key! Stir in the vanilla extract and baking soda. The mixture will foam up rapidly, so be prepared! This foaming action is what creates the light, airy texture that makes the Praline Crunch so irresistible.
Step 5: Coat, Bake, and Cool: Immediately pour the hot caramel mixture over the cereal and pecan mixture in the large bowl. Working quickly, gently stir to coat everything evenly. Be thorough! Every piece of cereal and every pecan half should be coated in the caramel. This step is crucial for achieving that perfect, uniformly sweet and crunchy texture in every bite. Then, spread the coated mixture in an even layer on the prepared baking sheet. The thinner the layer, the crispier the final product will be. Place the baking sheet in the preheated oven and bake for 1 hour, stirring every 15 minutes. The stirring ensures that the cereal and nuts are evenly coated and caramelized. After an hour, remove the baking sheet from the oven and let the Praline Crunch cool completely on the baking sheet. As it cools, the caramel will harden, creating that signature praline texture. Once completely cooled, break the Praline Crunch into clusters with your hands. This allows for easy snacking and gifting.
Why You Will Love This Recipe:
This Praline Crunch recipe is more than just a snack; it’s an experience. You’ll love it because:
- It’s Incredibly Addictive: The combination of sweet, salty, crunchy, and buttery flavors is simply irresistible. You won’t be able to stop at just one handful!
- It’s Easy to Make: With only a few simple ingredients and straightforward instructions, even novice cooks can achieve delicious results.
- It’s Versatile: You can easily customize the recipe to your liking by adding different nuts, spices, or even chocolate chips.
- It Makes a Great Gift: Packaged in a pretty jar or treat bag, Praline Crunch makes a thoughtful and delicious homemade gift for friends and family.
- It’s Perfect for Any Occasion: Whether you’re hosting a party, need a quick snack, or want to satisfy a sweet craving, Praline Crunch is always a winner.
- The Home Made taste is amazing! Unlike store-bought options, this allows for quality and control of ingredients.
- The Aroma. Baking fills the kitchen with a warm, inviting praline scent.
- The texture is exceptional. The crunchiness is satisfying and superior to other snacks!
- It’s a fun activity. Easy enough to involve kids in the process!
Serving Suggestions:
- Enjoy it straight from the container as a snack.
- Sprinkle it over ice cream or yogurt for added crunch and flavor.
- Use it as a topping for cakes or pies.
- Serve it alongside coffee or tea as a sweet treat.
- Mix it with trail mix for an extra burst of sweetness.
- Package it in jars and give it as gifts for the holidays.
- Enjoy it while watching movies.
- Serve it at parties, game nights, or gatherings.
Tips:
- Use a large enough bowl to prevent the cereal from spilling over when you’re mixing.
- Don’t overcook the caramel, as it will become hard and brittle.
- Stir the mixture gently to avoid breaking the cereal into small pieces.
- Spread the mixture in an even layer on the baking sheet to ensure even baking.
- Let the Praline Crunch cool completely before breaking it into clusters.
- Store the Praline Crunch in an airtight container at room temperature for up to a week, or freeze for longer storage.
- For a chocolatey version, drizzle melted chocolate over the cooled Praline Crunch.
- Add a pinch of sea salt to the caramel for a sweet-salty flavor.
- Experiment with different extracts, such as almond or maple, for a unique twist.
- Feel free to add dried fruit, such as cranberries or raisins, to the mix.
- Use different types of cereal.
Prep Time: 15 minutes
Cook Time: 1 hour
Total Time: 1 hour 15 minutes
Nutritional Information: (Per serving, approximate)
- Calories: 250
- Protein: 3g
- Sodium: 150mg
(Note: Nutritional information is an estimate and may vary based on specific ingredients and portion sizes.)
Conclusion:
This Praline Crunch recipe is a testament to the fact that simple ingredients, combined with a little bit of care and attention, can create something truly extraordinary. It’s a crowd-pleaser that’s perfect for any occasion, and it’s sure to become a family favorite. So, gather your ingredients, preheat your oven, and get ready to indulge in the irresistible goodness of Praline Crunch!
Questions and Answers:
Q1: Can I use a different type of cereal instead of Crispix?
A: Absolutely! Crispix is a great choice because of its light, airy texture, but you can definitely experiment with other cereals. Rice Chex, Corn Chex, or even lightly sweetened cereals like Life or Cheerios would work well. Just be mindful of the cereal’s sweetness level, as you might need to adjust the amount of brown sugar in the caramel to balance the flavors. Using a gluten-free rice cereal makes the recipe gluten free.
Q2: What if I don’t have pecans? Can I substitute another nut?
A: Definitely! Pecans are classic, but this recipe is incredibly versatile. Walnuts, almonds, cashews, or even a mix of your favorite nuts would be delicious. Just be sure to chop larger nuts into smaller pieces so they’re evenly distributed throughout the cereal. Consider toasting the nuts before adding them to the cereal for an even deeper flavor.
Q3: My caramel is too hard/brittle. What did I do wrong?
A: The most likely culprit is overcooking the caramel. Boiling it for longer than 1 minute can lead to a brittle texture. Be sure to use a timer and remove the saucepan from the heat as soon as the minute is up. Also, make sure you’re using the correct ratio of ingredients, especially the corn syrup, which helps prevent crystallization. If your caramel does turn out too hard, you can try adding a tablespoon or two of water or milk to the saucepan and gently reheating it until it softens.
Q4: Can I make this recipe ahead of time? How should I store it?
A: Yes, you can definitely make this Praline Crunch ahead of time! Once it’s cooled completely, store it in an airtight container at room temperature. It should stay fresh for up to a week. For longer storage, you can freeze it for up to a month. Just be sure to thaw it completely before serving.
Q5: Can I add anything else to this recipe for extra flavor?
A: Absolutely! This recipe is a blank canvas for your culinary creativity. Consider adding a pinch of sea salt to the caramel for a sweet-salty contrast. You could also mix in some chocolate chips (milk, dark, or white) after the Praline Crunch has cooled. Spices like cinnamon, nutmeg, or even a touch of cayenne pepper can add a warm and inviting flavor. Get creative and experiment with your favorite flavor combinations!