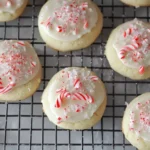
Description of this recipe
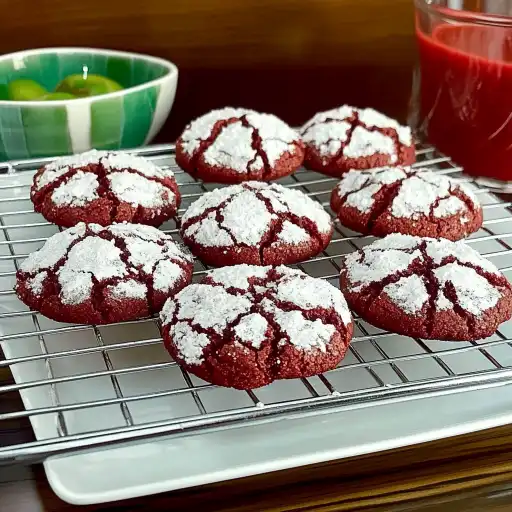
Red Velvet Crinkle Cookies are a delightful twist on the classic crinkle cookie, infusing the rich, subtle chocolate flavor of red velvet with a visually stunning presentation. These cookies are not only delicious but also incredibly festive, making them perfect for holidays, parties, or any occasion that calls for a touch of elegance and fun. The vibrant red hue peeking through the snowy powdered sugar coating creates a captivating contrast that is as pleasing to the eye as it is to the palate. This recipe balances ease of preparation with impressive results, making it accessible for bakers of all skill levels. From the initial mixing of ingredients to the moment they emerge from the oven, displaying their characteristic cracks and crevices, these cookies are a joy to create and even more of a joy to share.
Why you will love this recipe
You will absolutely fall in love with these Red Velvet Crinkle Cookies for several reasons. First and foremost, the taste is simply irresistible. The subtle cocoa flavor, combined with the tangy hint of buttermilk (achieved through the reaction of the cocoa and food coloring), creates a unique and complex flavor profile that is both comforting and exciting. The soft, chewy texture of the cookie contrasts beautifully with the delicate, slightly crunchy exterior, making each bite a textural delight.
Beyond the taste, these cookies are incredibly visually appealing. The striking red color against the white powdered sugar coating makes them a standout treat on any dessert table. They are perfect for adding a touch of whimsy to holiday gatherings, birthday parties, or even as a special homemade gift.
Finally, this recipe is surprisingly easy to follow. With simple ingredients and straightforward instructions, even novice bakers can achieve impressive results. The chilling time is crucial for developing the right texture and preventing the cookies from spreading too much in the oven, but it also allows you to prepare the dough in advance, making these cookies perfect for busy schedules. These Red Velvet Crinkle Cookies are more than just a dessert; they’re an experience, a delightful combination of flavor, texture, and visual appeal that will leave everyone wanting more.
Ingredients:
For the Dough:
- 2 ½ cups all-purpose flour
- ½ cup unsweetened cocoa powder
- 2 teaspoons baking powder
- ½ teaspoon salt
- ½ cup (1 stick) unsalted butter, softened
- 1 ½ cups powdered sugar
- 1 large egg
- 2 tablespoons red food coloring (gel food coloring recommended for best color)
- 2 tablespoons milk
For Coating:
- 1 cup powdered sugar, for rolling
Preparation:
Step 1: Whisk Together Dry Ingredients
In a medium-sized mixing bowl, whisk together the all-purpose flour, cocoa powder, baking powder, and salt. This ensures that the leavening agent (baking powder) and cocoa powder are evenly distributed throughout the flour, which is essential for the cookies to rise properly and have a consistent flavor. Whisking also helps to break up any lumps in the dry ingredients, resulting in a smoother dough.
Step 2: Combine Wet Ingredients
In a separate, larger mixing bowl, combine the softened butter and powdered sugar. Cream them together using an electric mixer (or a sturdy whisk and some elbow grease) until the mixture is light and fluffy. This process incorporates air into the butter and sugar, which is crucial for creating a tender and airy cookie. Next, add the egg, red food coloring, and milk to the creamed butter and sugar. Whisk until all the wet ingredients are well combined and the mixture is a vibrant red color. The food coloring is best added to the wet ingredients to ensure even distribution throughout the dough.
Step 3: Combine Wet and Dry Ingredients
Gradually add the dry ingredients to the wet ingredients, mixing on low speed (or by hand) until just combined. Be careful not to overmix the dough, as this can develop the gluten in the flour, resulting in a tough cookie. Mix until the dry ingredients are incorporated and a soft, slightly sticky dough forms. The dough will be a beautiful, deep red color.
Step 4: Chill the Dough
Cover the bowl with plastic wrap and refrigerate the dough for at least 2 hours, or preferably overnight. Chilling the dough is a crucial step in this recipe. It allows the butter to solidify, which prevents the cookies from spreading too much during baking. Chilling also allows the flavors to meld together, resulting in a more flavorful cookie. The dough should be firm enough to handle without being overly sticky.
Step 5: Preheat Oven and Prepare Baking Sheets
Preheat your oven to 350°F (175°C). Line baking sheets with parchment paper. Parchment paper prevents the cookies from sticking to the baking sheets and makes cleanup much easier. It also helps to distribute heat evenly, ensuring that the cookies bake uniformly.
Step 6: Shape and Coat the Cookies
Remove the chilled dough from the refrigerator. Using a cookie scoop or a spoon, scoop out rounded tablespoons of dough and roll them into 1-inch balls. Roll each dough ball generously in powdered sugar, ensuring that it is completely coated. The powdered sugar coating is essential for creating the signature crinkled appearance of these cookies.
Step 7: Bake the Cookies
Arrange the coated dough balls on the prepared baking sheets, spacing them about 2 inches apart. Bake for 10-12 minutes, or until the cookies have puffed up and the crinkles are prominent. The baking time may vary depending on your oven, so keep a close eye on the cookies. They should be soft in the center and slightly firm around the edges.
Step 8: Cool and Enjoy
Remove the baking sheets from the oven and let the cookies cool on the baking sheets for 5 minutes before transferring them to a wire rack to cool completely. Allowing the cookies to cool slightly on the baking sheets helps them to firm up and prevents them from breaking when you transfer them to the wire rack. Once the cookies are completely cool, they are ready to enjoy.
COOKING Rating:
Easy
Serving Suggestions:
These Red Velvet Crinkle Cookies are perfect on their own as a sweet treat with a cup of coffee or tea. They also make a wonderful addition to a dessert platter or cookie exchange. Consider serving them with a scoop of vanilla ice cream or a dollop of whipped cream for an extra special treat. They also pair well with a glass of cold milk or a rich hot chocolate.
Tips:
- Use gel food coloring for the most vibrant red color. Liquid food coloring may not provide as intense a color and can also affect the consistency of the dough.
- Make sure your butter is softened but not melted. Softened butter will cream more easily with the sugar, resulting in a lighter and more tender cookie.
- Don’t overmix the dough. Overmixing can develop the gluten in the flour, leading to a tough cookie.
- Chill the dough for at least 2 hours, or preferably overnight. This is a crucial step for preventing the cookies from spreading too much during baking.
- Roll the dough balls generously in powdered sugar. The powdered sugar coating is essential for creating the signature crinkled appearance of these cookies.
- Store the cookies in an airtight container at room temperature for up to 3-4 days.
Prep Time:
20 minutes
Cook Time:
10-12 minutes
Total Time:
2 hours 30 minutes (includes chilling time)
Nutritional Information: (per cookie, approximate)
Calories: 150
Protein: 1g
Sodium: 50mg
Conclusion
Red Velvet Crinkle Cookies are a delightful and visually stunning treat that is perfect for any occasion. With their rich, subtle chocolate flavor, soft and chewy texture, and signature crinkled appearance, these cookies are sure to impress. The easy-to-follow recipe makes them accessible for bakers of all skill levels, and the chilling time allows you to prepare the dough in advance, making them perfect for busy schedules. Whether you’re baking them for a holiday gathering, a birthday party, or simply as a special treat for yourself, these Red Velvet Crinkle Cookies are guaranteed to be a hit. So, gather your ingredients, preheat your oven, and get ready to create a batch of these irresistible cookies that will delight your senses and leave everyone wanting more.
5 Questions and Answers About This Recipe:
Q1: Can I use liquid food coloring instead of gel food coloring?
A: While you can use liquid food coloring, gel food coloring is highly recommended for this recipe. Gel food coloring is more concentrated, so it will provide a more vibrant red color without adding excess liquid to the dough, which can affect its consistency. If you use liquid food coloring, you may need to use more to achieve the desired color, and the cookies may spread more during baking.
Q2: Why is chilling the dough so important?
A: Chilling the dough is a crucial step in this recipe for several reasons. First, it allows the butter to solidify, which prevents the cookies from spreading too much during baking, resulting in a thicker, chewier cookie. Second, chilling allows the flavors to meld together, creating a more complex and delicious flavor profile. Finally, chilled dough is easier to handle and roll into balls, which makes the shaping process much smoother.
Q3: Can I freeze the cookie dough for later use?
A: Yes, you can definitely freeze the cookie dough for later use. Simply shape the dough into balls, coat them in powdered sugar, and then place them on a baking sheet lined with parchment paper. Freeze the dough balls for about 1-2 hours, or until they are solid. Then, transfer the frozen dough balls to a freezer-safe bag or container and store them in the freezer for up to 2-3 months. When you’re ready to bake the cookies, simply remove the desired number of dough balls from the freezer and bake them according to the recipe instructions, adding a few extra minutes to the baking time if necessary.
Q4: What can I do if my cookies are spreading too much during baking?
A: If your cookies are spreading too much during baking, there are a few things you can try. First, make sure your oven is preheated to the correct temperature. A too-low oven temperature can cause the cookies to spread. Second, try chilling the dough for a longer period of time. This will allow the butter to solidify even more, which will help prevent spreading. Finally, you can try adding a tablespoon or two of flour to the dough to help absorb excess moisture.
Q5: Can I use a different type of sugar instead of powdered sugar in the dough?
A: While powdered sugar is recommended for this recipe because it creates a softer and more tender cookie, you can substitute granulated sugar if necessary. However, the texture of the cookies may be slightly different. Granulated sugar can result in a slightly crispier cookie. If you use granulated sugar, make sure to cream it well with the butter to ensure that it is fully incorporated into the dough. You may also want to reduce the amount of granulated sugar slightly, as it is sweeter than powdered sugar.