Description of this recipe
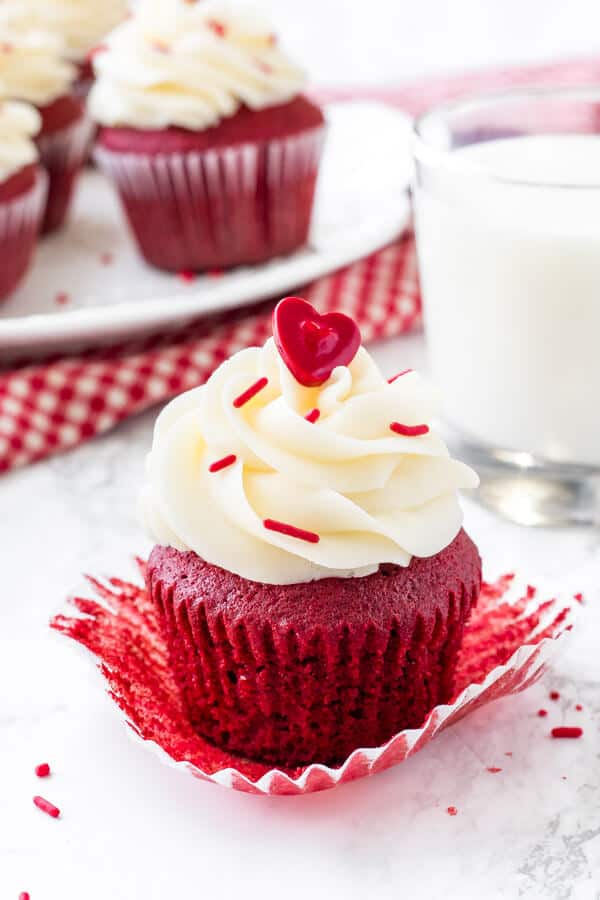
These Red Velvet Cupcakes are the perfect combination of tangy, moist, and rich. A classic Southern treat, these cupcakes boast a vibrant red hue and a delicate cocoa flavor, topped with a luscious cream cheese frosting. They are ideal for birthdays, holidays, or any occasion that calls for a touch of elegance and indulgence.
Why you will love this recipe
You will adore this recipe because it delivers bakery-quality cupcakes right in your own kitchen. The balance of flavors—subtle cocoa, tangy buttermilk, and sweet cream cheese—is simply irresistible. Plus, the striking red color makes them a visual stunner! These cupcakes are relatively easy to make, and the recipe is designed to ensure a moist, tender crumb every time. Whether you are an experienced baker or just starting out, these Red Velvet Cupcakes are sure to impress.
Ingredients:
For the Cupcakes
- 1 1/3 cups cake flour*
- 1 tablespoon cocoa powder
- 1/4 teaspoon salt
- 1/3 cup unsalted butter, softened to room temperature
- 3/4 cup white sugar
- 1 large egg
- 1 teaspoon vanilla extract
- 1 tablespoon red food coloring, liquid or gel
- 1/2 cup buttermilk**
- 1 1/2 teaspoons distilled vinegar
- 3/4 teaspoon baking soda
For the Cream Cheese Frosting
- 1/2 cup unsalted butter, room temperature
- 8 oz cream cheese, room temperature
- 1 teaspoon vanilla extract
- 1/4 teaspoon salt
- 3 cups powdered sugar
- 1/4 cup cornstarch (optional, for a more stable frosting)
Preparation:
The key to perfect Red Velvet Cupcakes lies in the careful balance of wet and dry ingredients, as well as the chemical reaction between the vinegar and baking soda, which contributes to the cupcakes’ signature tang and airy texture. Follow these steps to achieve cupcake perfection:
Step 1: Preheat and Prep
Begin by preheating your oven to 350°F (175°C). Place cupcake liners into a 12-cup muffin tin. This ensures that the cupcakes will bake evenly and be easy to remove once cooled. Setting the oven and preparing the pan ahead of time streamlines the baking process.
Step 2: Sift Dry Ingredients
In a large bowl, sift together the cake flour, cocoa powder, and salt. Sifting is essential because it removes any lumps and ensures that the ingredients are evenly distributed. Whisk the mixture gently after sifting to further combine. Cake flour is crucial for the delicate texture of these cupcakes, providing a tender crumb that is characteristic of red velvet.
Step 3: Cream Butter and Sugar
In a separate large bowl, beat the softened butter with an electric mixer until it is light and fluffy, about 2 minutes. Then, gradually add the sugar and continue to beat until the mixture is creamy and pale, about 1-2 more minutes. Creaming the butter and sugar together incorporates air into the batter, which is vital for a light and airy cupcake. Make sure the butter is at room temperature to achieve the best results.
Step 4: Incorporate Egg and Vanilla
Beat in the egg and vanilla extract until well combined. The egg adds richness and structure to the cupcakes, while the vanilla extract enhances the overall flavor profile, adding a hint of warmth and sweetness.
Step 5: Combine Wet Ingredients
In a liquid measuring cup, whisk together the buttermilk and red food coloring. Buttermilk adds a tangy flavor and helps to tenderize the gluten in the flour, resulting in a moist cupcake. The red food coloring is, of course, what gives Red Velvet Cupcakes their signature vibrant hue. You can use either liquid or gel food coloring, but gel tends to provide a more intense color with less liquid, which can be beneficial for maintaining the batter’s consistency.
Step 6: Alternate Wet and Dry Ingredients
Gradually beat the dry ingredients into the butter mixture, alternating with the buttermilk mixture. Start by adding about 1/3 of the dry ingredients, followed by 1/3 of the buttermilk mixture. Repeat until all ingredients are incorporated, ending with the dry ingredients. This method prevents the batter from becoming overmixed, which can result in tough cupcakes. Be sure to scrape down the sides of the bowl as needed to ensure everything is evenly mixed.
Step 7: Activate the Batter
In a small bowl or cup, dissolve the baking soda into the distilled vinegar. The mixture will fizz and bubble. Quickly beat this into the cupcake batter. This step is crucial because the reaction between the baking soda and vinegar creates carbon dioxide, which helps the cupcakes rise and gives them a light, airy texture.
Step 8: Fill Cupcake Liners
Spoon the batter into the prepared muffin liners, filling each about 2/3 full. This allows the cupcakes to rise properly without overflowing.
Step 9: Bake
Bake in the preheated oven for 15-18 minutes, or until an inserted toothpick comes out clean. Start checking for doneness at 15 minutes and adjust the baking time as needed, depending on your oven.
Step 10: Cool
Allow the cupcakes to cool in the pan for 5-10 minutes before removing them and continuing to cool on a wire rack. This prevents the cupcakes from sticking to the pan and allows them to cool evenly.
Step 11: Prepare Cream Cheese Frosting
While the cupcakes are cooling, prepare the cream cheese frosting. In a large bowl, use an electric mixer on medium speed to beat the butter until fluffy.
Step 12: Combine Cream Cheese and Vanilla
Mix in the cream cheese until evenly combined. Then add in the vanilla extract and salt. Ensure that both the butter and cream cheese are at room temperature to avoid lumps and create a smooth, creamy frosting.
Step 13: Add Powdered Sugar
In a separate bowl, sift together the powdered sugar and cornstarch (if using). Sifting the powdered sugar prevents lumps in the frosting, and cornstarch helps to stabilize the frosting, making it less prone to melting.
Step 14: Frost
Gradually beat the powdered sugar into the butter and cream cheese mixture about 1 cup at a time, starting with the mixer on low and turning it up to medium speed as the sugar incorporates. This prevents the powdered sugar from flying everywhere. Beat until the frosting is smooth and creamy.
Step 15: Decorate
Frost the cooled cupcakes using a piping bag and tip (a 1M tip is a popular choice for a classic swirl) or simply spread the frosting on with a knife. Get creative with your decorations! You can add sprinkles, chocolate shavings, or even a dusting of cocoa powder for an extra touch of elegance.
COOKING Rating:
Easy to Medium. While the steps are straightforward, attention to detail and precise measurements are key to achieving the perfect Red Velvet Cupcake.
Serving Suggestions:
These cupcakes are delicious on their own, but here are a few serving suggestions to elevate the experience:
- Pair with Coffee or Tea: The slight tang of the cupcake complements the bitterness of coffee or the delicate flavors of tea.
- Add Fresh Berries: A few fresh raspberries or strawberries on top of the frosting add a burst of freshness and color.
- Serve with Vanilla Ice Cream: For an extra indulgent treat, serve these cupcakes with a scoop of vanilla ice cream.
Tips:
- Use Room Temperature Ingredients: This is crucial for proper emulsification and a smooth batter.
- Don’t Overmix: Overmixing can develop the gluten in the flour, resulting in tough cupcakes.
- Measure Accurately: Baking is a science, so precise measurements are essential.
- Cool Completely Before Frosting: Frosting cupcakes that are still warm can cause the frosting to melt.
- Store Properly: Store frosted cupcakes in an airtight container in the refrigerator to keep them fresh.
Prep Time:
20 minutes
Cook Time:
15-18 minutes
Total Time:
Approximately 1 hour (including cooling and frosting time)
Nutritional Information:
(Approximate values per cupcake)
Calories:
350-400
Protein:
3-4 grams
Sodium:
200-250mg
Conclusion
These Red Velvet Cupcakes are more than just a dessert; they are a culinary experience. The perfect balance of flavors, the vibrant red color, and the tender crumb make them a crowd-pleaser every time. Whether you are baking for a special occasion or simply want to treat yourself, these cupcakes are sure to bring joy and satisfaction. So, gather your ingredients, preheat your oven, and get ready to create a batch of these irresistible Red Velvet Cupcakes. Happy baking!
Questions and Answers:
Q1: Can I use all-purpose flour instead of cake flour?
A: While you can use all-purpose flour in a pinch, cake flour is highly recommended for Red Velvet Cupcakes. Cake flour has a lower protein content, which results in a more tender and delicate crumb. If you must use all-purpose flour, you can try substituting 2 tablespoons of the flour with cornstarch per cup to mimic the properties of cake flour.
Q2: Can I make these cupcakes ahead of time?
A: Yes, you can bake the cupcakes ahead of time. Allow them to cool completely, then store them in an airtight container at room temperature for up to 2 days, or in the refrigerator for up to 5 days. Frost them just before serving for the best texture and flavor.
Q3: What can I use if I don’t have buttermilk?
A: If you don’t have buttermilk, you can make a substitute by adding 1 tablespoon of lemon juice or white vinegar to a liquid measuring cup, then filling the cup to the 1/2 cup mark with milk. Let it stand for 5-10 minutes to curdle slightly before using in the recipe. This mixture will provide a similar tang and acidity to buttermilk.
Q4: Can I use a different type of frosting?
A: While cream cheese frosting is the classic pairing for Red Velvet Cupcakes, you can certainly experiment with other frostings. A vanilla buttercream, a chocolate ganache, or even a simple glaze would all be delicious options. Consider the flavors and textures you enjoy most when choosing an alternative frosting.
Q5: How can I make these cupcakes even more moist?
A: To ensure extra moist cupcakes, avoid overbaking them. Start checking for doneness at 15 minutes and remove them from the oven as soon as a toothpick inserted into the center comes out clean. You can also add a tablespoon of oil to the batter for added moisture, or brush the cooled cupcakes with a simple syrup before frosting.
*If you don’t have cake flour, you can make a substitute by measuring out 1 cup of all-purpose flour, removing 2 tablespoons, and then adding 2 tablespoons of cornstarch back in.
**If you don’t have buttermilk on hand, you can easily make your own by adding 1 tablespoon of white vinegar or lemon juice to a measuring cup. Then, add enough milk to bring the total volume to 1/2 cup. Let it sit for about 5 minutes, and you’ll have a perfect buttermilk substitute.