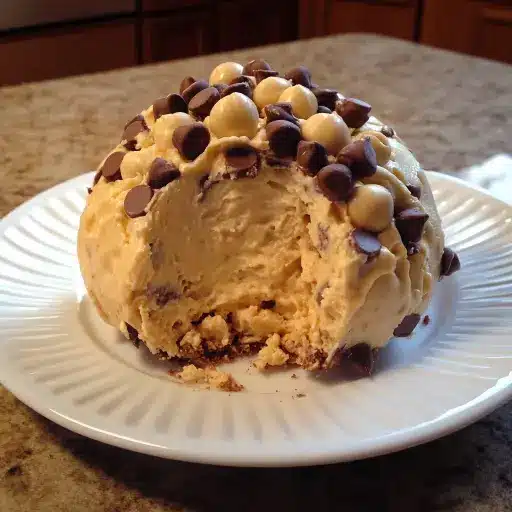
Description: A delightful dessert masquerading as a party appetizer! This Reese’s Peanut Butter Bliss Cheese Ball is a creamy, sweet, and utterly addictive treat that’s sure to be the star of any gathering. It’s incredibly easy to make, requires no baking, and the combination of peanut butter, cream cheese, chocolate, and Reese’s Pieces is a guaranteed crowd-pleaser. Prepare for rave reviews and requests for the recipe!
Ingredients:
- 8 oz cream cheese, softened
- 1/2 cup peanut butter (creamy or crunchy, your preference)
- 1/2 cup powdered sugar
- 1/4 cup brown sugar, packed
- 1 teaspoon vanilla extract
- 1 cup mini Reese’s Pieces
- 1/2 cup mini chocolate chips
- 1/2 cup crushed peanut butter cups (optional, but highly recommended!)
For the Coating:
- 1/4 cup mini Reese’s Pieces
- 1/4 cup mini chocolate chips
- 1/4 cup crushed peanut butter cups
Preparation:
Before you dive in, make sure your cream cheese is thoroughly softened. This is crucial for achieving a smooth, lump-free cheese ball. Take it out of the refrigerator at least an hour before you plan to start. Gather all your ingredients and prepare your coating ingredients in a shallow dish.
Instructions:
Step 1:
In a large mixing bowl, combine the softened cream cheese, peanut butter, powdered sugar, brown sugar, and vanilla extract. Use an electric mixer (handheld or stand mixer) to beat the ingredients together until they are smooth and completely combined. This may take a couple of minutes, and you may need to scrape down the sides of the bowl occasionally to ensure everything is incorporated evenly. You’re looking for a mixture that is creamy, light, and airy.
Step 2:
Gently fold in the mini Reese’s Pieces, mini chocolate chips, and crushed peanut butter cups (if using). Be careful not to overmix at this stage, as you want to keep the Reese’s Pieces and chocolate chips intact. Overmixing can also cause the cream cheese mixture to become dense and less appealing. Aim for an even distribution of these delightful add-ins throughout the mixture.
Step 3:
Shape the peanut butter mixture into a ball. The easiest way to do this is to gather the mixture together in the bowl, then gently mold it with your hands. If the mixture is too soft to handle easily, you can place it in the refrigerator for about 15 minutes to firm up slightly. Once you have formed a ball, wrap it tightly in plastic wrap. Make sure to press the plastic wrap against the surface of the cheese ball to prevent any air pockets from forming.
Step 4:
Chill the wrapped cheese ball in the refrigerator for at least 1 hour. This chilling time is essential for firming up the cheese ball and making it easier to roll in the coating. You can chill it for longer, even overnight, if you prefer. The longer it chills, the firmer it will become.
Step 5:
While the cheese ball is chilling, prepare your coating mixture. In a shallow dish (a pie plate or a shallow bowl works well), combine the mini Reese’s Pieces, mini chocolate chips, and crushed peanut butter cups. Stir them together to ensure they are evenly mixed. This will be your delicious coating for the cheese ball.
Step 6:
Once the cheese ball has chilled sufficiently, remove it from the refrigerator and unwrap it. Place the chilled cheese ball on a clean work surface. Gently roll the cheese ball in the coating mixture, pressing lightly to ensure the coating adheres to the surface. Continue rolling until the entire cheese ball is evenly covered with the Reese’s Pieces, chocolate chips, and crushed peanut butter cups.
Step 7:
Place the coated cheese ball on a serving plate or platter. If you’re not serving it immediately, you can cover it loosely with plastic wrap and store it in the refrigerator until you’re ready to serve. However, it’s best to serve it within a few hours of coating, as the coating may start to soften if stored for too long.
Step 8:
Serve with graham crackers, pretzels, apple slices, or cookies for dipping. These provide a great balance of flavors and textures to complement the richness of the cheese ball. Arrange the dippers attractively around the cheese ball on the serving plate for a visually appealing presentation.
Why you will love this recipe:
This Reese’s Peanut Butter Bliss Cheese Ball is the perfect blend of sweet and salty, creamy and crunchy. It’s a simple recipe that delivers an impressive result. It’s also incredibly versatile – you can customize the ingredients to suit your preferences. It’s a guaranteed crowd-pleaser that requires no baking, making it perfect for parties, holidays, or any occasion when you want to whip up a quick and delicious dessert. Plus, who can resist the combination of peanut butter and chocolate?
Serving Suggestions:
- Classic Dippers: Graham crackers, pretzels, and vanilla wafers are excellent choices.
- Fruit: Sliced apples, strawberries, or bananas provide a fresh contrast to the rich cheese ball.
- Cookies: Shortbread cookies, chocolate chip cookies, or peanut butter cookies enhance the peanut butter flavor.
- Presentation: Arrange the cheese ball on a decorative platter with the dippers surrounding it for an elegant look. Garnish with a few extra Reese’s Pieces or chocolate chips.
Tips:
- Softened Cream Cheese is Key: Ensure your cream cheese is completely softened to avoid lumps in the cheese ball.
- Chill Time is Important: Don’t skip the chilling time. It helps the cheese ball hold its shape and makes it easier to roll.
- Customize the Coating: Get creative with your coating! Try using chopped nuts, sprinkles, or even a drizzle of melted chocolate.
- Make Ahead: This cheese ball can be made a day in advance, making it perfect for entertaining.
- Storage: Store any leftovers in an airtight container in the refrigerator.
Prep Time: 15 minutes
Cook Time: 0 minutes
Total Time: 1 hour 15 minutes (includes chilling time)
Nutritional Information: (Approximate values per serving)
- Calories: 300 kcal
- Protein: 6g
- Sodium: 150mg (can vary depending on ingredients)
Conclusion:
The Reese’s Peanut Butter Bliss Cheese Ball is more than just a recipe; it’s an experience. It’s the perfect combination of flavors and textures that will leave everyone wanting more. Whether you’re hosting a party or simply craving a sweet treat, this cheese ball is sure to satisfy. Enjoy the peanut butter bliss!
Questions and Answers:
Q1: Can I use a different type of peanut butter?
A: Absolutely! While creamy peanut butter is commonly used, crunchy peanut butter will add extra texture to the cheese ball. You can also experiment with flavored peanut butters like honey roasted or chocolate peanut butter for a unique twist.
Q2: What if I don’t have Reese’s Pieces?
A: No problem! You can substitute them with other candies like M&Ms, chopped peanut brittle, or even just more mini chocolate chips. The key is to have a combination of sweet and crunchy elements to complement the peanut butter flavor.
Q3: Can I freeze the cheese ball?
A: While technically you can freeze it, it’s not highly recommended. Freezing can alter the texture of the cream cheese, making it slightly grainy when thawed. If you do freeze it, wrap it tightly in plastic wrap and then in a freezer-safe bag. Thaw it in the refrigerator overnight before serving. It’s best enjoyed fresh, though!
Q4: How long will the cheese ball last in the refrigerator?
A: The cheese ball will last for up to 3-4 days in the refrigerator, stored in an airtight container. Keep in mind that the coating might soften slightly over time.
Q5: Can I make this recipe vegan?
A: Yes, you can! Substitute the cream cheese with a vegan cream cheese alternative, ensure your peanut butter and vanilla extract are vegan-friendly, and use vegan chocolate chips and candies for the coating. Many vegan alternatives are available on the market today that offer similar taste and texture to the original ingredients.