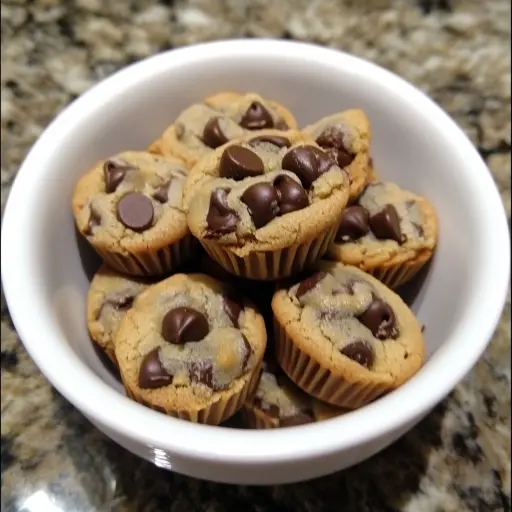
Description: These Reese’s Peanut Butter Chocolate Chip Cookie Bites are a delightful fusion of classic chocolate chip cookies and the irresistible peanut butter goodness of Reese’s Peanut Butter Cups. They are bite-sized explosions of flavor, perfectly combining the buttery, sweet, and slightly salty tastes that everyone craves. These little treats are incredibly easy to make and are sure to be a crowd-pleaser at any gathering, or simply a comforting indulgence at home. The soft, chewy cookie, studded with chocolate chips, forms a delicious base for the creamy, peanut buttery center, making each bite a perfect balance of textures and flavors. This recipe is perfect for bakers of all skill levels and delivers a consistently delicious result that will leave you wanting more.
Ingredients:
- 1 cup (2 sticks) unsalted butter, softened
- ¾ cup granulated sugar
- ¾ cup packed brown sugar
- 2 large eggs
- 1 tablespoon pure vanilla extract
- 1 teaspoon sea salt
- 1 teaspoon baking soda
- 2½ cups all-purpose flour
- 2 cups semi-sweet chocolate chips
- 1½ to 2 packages mini Reese’s Peanut Butter Cups, unwrapped (approximately 36-48 cups)
Preparation:
The preparation for these delightful cookie bites is quite straightforward, ensuring even novice bakers can achieve excellent results. Proper preparation ensures the ingredients meld together harmoniously and that the final cookie bites have the perfect texture and flavor profile.
Step 1:
- Preheat and Prep: Begin by preheating your oven to 350°F (175°C). This ensures that the oven is at the correct temperature for even baking, which is crucial for preventing the cookies from spreading too thin or cooking unevenly. While the oven is preheating, line your baking sheets with parchment paper. Parchment paper is essential as it prevents the cookies from sticking to the baking sheet, making removal easier and preserving their shape. It also simplifies cleanup, as you won’t need to scrub baked-on cookie residue from the sheets.
Step 2:
- Cream the Butter and Sugars: In a large mixing bowl, cream together the softened butter, granulated sugar, and packed brown sugar. Using an electric mixer (either a stand mixer or a hand mixer) on medium speed is ideal for this step. Creaming the butter and sugars together until light and fluffy, typically takes about 3-5 minutes. This process incorporates air into the mixture, which is crucial for creating a tender and airy cookie texture. Make sure the butter is at room temperature for optimal creaming; if it’s too cold, it won’t cream properly, and if it’s too melted, the cookies may spread too much during baking.
Step 3:
- Incorporate Eggs and Vanilla: Once the butter and sugars are creamed, beat in the eggs one at a time, ensuring each egg is fully incorporated before adding the next. This helps to emulsify the mixture and prevent it from separating. After the eggs, stir in the pure vanilla extract. Vanilla extract enhances the overall flavor of the cookies, adding a warm, sweet note that complements the chocolate and peanut butter.
Step 4:
- Combine Dry Ingredients: In a separate, medium-sized bowl, whisk together the all-purpose flour, sea salt, and baking soda. Whisking ensures that the dry ingredients are evenly distributed, preventing lumps of flour and ensuring that the baking soda is properly mixed in. The sea salt enhances the sweetness of the cookies and balances the flavors, while the baking soda acts as a leavening agent, helping the cookies to rise and become light and airy.
Step 5:
- Combine Wet and Dry Ingredients: Gradually add the dry ingredients to the wet ingredients, mixing on low speed until just combined. Be careful not to overmix the dough, as this can develop the gluten in the flour and result in tough cookies. Once the dry ingredients are mostly incorporated, fold in the semi-sweet chocolate chips gently. Folding them in ensures they are evenly distributed throughout the dough without breaking or melting.
Step 6:
- Assemble the Cookie Bites: Scoop small mounds of cookie dough onto the prepared baking sheets, leaving some space between each mound to allow for spreading during baking. A small cookie scoop works well for this, ensuring uniform sizes. Press a mini Reese’s Peanut Butter Cup into the center of each mound of dough, gently pushing it down so that it is partially embedded. If desired, cover the Reese’s Cup slightly with a bit more dough to create a more enclosed bite. This helps to prevent the peanut butter cup from melting too much during baking.
Step 7:
- Bake and Cool: Bake the cookie bites in the preheated oven for 10–12 minutes, or until the edges are golden brown and the centers are set. Keep a close eye on them during the last few minutes of baking to prevent them from burning. Once baked, remove the baking sheets from the oven and let the cookies cool on the baking sheets for a few minutes before transferring them to a wire rack to cool completely. This allows them to firm up slightly, making them easier to handle.
Why You Will Love This Recipe:
- Irresistible Flavor Combination: The blend of rich chocolate, buttery cookie dough, and creamy peanut butter is simply divine. Every bite is a symphony of flavors that will tantalize your taste buds.
- Easy to Make: The recipe is straightforward and requires minimal effort, making it perfect for both beginner and experienced bakers.
- Perfect for Any Occasion: These cookie bites are ideal for parties, bake sales, holidays, or simply a sweet treat to enjoy at home.
- Customizable: You can easily customize the recipe to suit your preferences. For example, you can use different types of chocolate chips or add chopped nuts for extra texture.
- Portable and Convenient: Their bite-sized nature makes them easy to transport and perfect for snacking on the go.
- Crowd-Pleasing: These cookie bites are always a hit with kids and adults alike.
Cooking Rating: Easy
Serving Suggestions:
- Serve these cookie bites warm, straight from the oven, for an extra gooey treat.
- Pair them with a glass of cold milk or a scoop of vanilla ice cream for a classic dessert combination.
- Pack them in lunchboxes for a delightful midday treat.
- Arrange them on a platter for a festive party dessert.
- Drizzle with melted chocolate or peanut butter for an extra touch of decadence.
- Serve with coffee or tea for an afternoon pick-me-up.
- Use them as a base for mini ice cream sandwiches.
- Crumble them over yogurt or oatmeal for a sweet and textural addition.
Tips:
- Use Room Temperature Butter: Ensure that your butter is softened but not melted for the best creaming results.
- Don’t Overmix: Overmixing the dough can lead to tough cookies. Mix until just combined.
- Chill the Dough (Optional): For thicker cookies, chill the dough for at least 30 minutes before baking.
- Use Parchment Paper: This prevents the cookies from sticking and makes cleanup a breeze.
- Keep an Eye on Baking Time: Ovens vary, so keep a close watch on the cookies during the last few minutes of baking to prevent burning.
- Store Properly: Store the cooled cookie bites in an airtight container at room temperature for up to 3 days.
- Variations: Experiment with different types of chocolate chips (dark, white, or milk chocolate) or add chopped nuts for extra texture and flavor.
- Freezing: These cookie bites freeze well. Place cooled cookies in a freezer-safe container or bag and freeze for up to 2 months. Thaw at room temperature before serving.
- Even Baking: For even baking, make sure your oven is properly calibrated and that you use the middle rack.
Prep Time: 15 minutes
Cook Time: 10–12 minutes
Total Time: 25–27 minutes
Nutritional Information:
(Note: Nutritional information is approximate and may vary based on specific ingredients and serving size.)
- Calories: Approximately 150-180 per cookie bite
- Protein: Approximately 2-3 grams per cookie bite
- Sodium: Approximately 80-100mg per cookie bite
Conclusion:
These Reese’s Peanut Butter Chocolate Chip Cookie Bites are a delightful and easy-to-make treat that is sure to satisfy your sweet tooth. With their perfect combination of chocolate, peanut butter, and soft, chewy cookie dough, they are a guaranteed crowd-pleaser. Whether you’re baking for a special occasion or simply want a comforting treat at home, this recipe is a winner. Enjoy the process, savor the flavors, and share the joy of these irresistible cookie bites with your loved ones. Happy baking!
Frequently Asked Questions (FAQ):
- Can I use a different type of flour?
- Yes, you can substitute all-purpose flour with a gluten-free all-purpose flour blend for a gluten-free version. Keep in mind that the texture might be slightly different, and you may need to adjust the liquid slightly.
- Can I freeze the cookie dough?
- Absolutely! You can freeze the cookie dough either as a whole or in individual scoops. To freeze, place the dough in an airtight container or wrap it tightly in plastic wrap. When ready to bake, thaw the dough in the refrigerator overnight or at room temperature for a few hours until softened.
- What if I don’t have mini Reese’s Peanut Butter Cups? Can I use regular-sized ones?
- While mini Reese’s Peanut Butter Cups work best for this recipe because of the bite-sized format, you can use regular-sized cups. Cut each regular-sized cup into quarters and use those pieces in the center of the cookie dough mounds. Adjust the baking time accordingly, as the cookies may need a minute or two longer to bake through.
- My cookies spread too thin. What did I do wrong?
- Several factors can cause cookies to spread too thin. Ensure that your butter wasn’t too soft or melted when you creamed it with the sugar. Also, overmixing the dough can lead to excess gluten development, causing the cookies to spread. Lastly, an oven that is not at the correct temperature or using a baking sheet that is too hot can also contribute to spreading. Consider chilling the dough before baking to help prevent this.
- Can I add nuts to this recipe?
- Yes, adding nuts can provide a delightful textural contrast and flavor boost. Chopped peanuts, walnuts, or pecans would all be excellent additions. Fold about 1/2 to 1 cup of chopped nuts into the dough along with the chocolate chips. Ensure the nuts are evenly distributed throughout the dough for the best results.