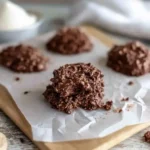
Description of this recipe:
Santa Nutter Butter Cookies are a delightful and festive treat that brings the magic of Christmas to your kitchen. These adorable cookies transform ordinary Nutter Butters into charming Santa figures, perfect for holiday parties, cookie exchanges, or a fun family baking activity. With a simple combination of melted almond bark, mini M&M’s, chocolate chips, and a sprinkle of festive red sugar, these cookies are as easy to make as they are enjoyable to eat. They capture the spirit of the season with their whimsical design and peanut butter goodness.
Why you will love this recipe:
You’ll absolutely adore these Santa Nutter Butter Cookies for several reasons:
- Easy and Quick: This recipe requires minimal baking skills and uses pre-made Nutter Butter cookies, making it a quick and straightforward project. Perfect for when you want a festive treat without spending hours in the kitchen.
- Festive and Fun: These cookies are incredibly cute and capture the essence of the holiday season. They’re a guaranteed hit with both kids and adults, adding a touch of whimsy to any Christmas celebration.
- Customizable: While the recipe provides a specific design, you can easily customize the cookies with different colors of sanding sugar, various types of candies, or even add edible glitter for extra sparkle.
- Perfect for Gifting: These cookies are ideal for gifting to friends, family, or coworkers. Package them in festive tins or cellophane bags for a thoughtful and homemade present.
- Delicious Peanut Butter Flavor: Nutter Butter cookies are a classic for a reason. The combination of peanut butter cookies with sweet almond bark and chocolate creates a flavor profile that everyone will love.
Ingredients:
- 1 package of Nutter Butter cookies (approximately 32 cookies)
- 12 oz white almond bark
- 32 red mini M&M’s (for noses)
- 64 mini chocolate chips (for eyes)
- 32 white chocolate chips (for hat pom-poms)
- Red sanding sugar
Preparation:
Before you begin, gather all your ingredients and prepare your workspace. Cover a large baking sheet with parchment paper to prevent the cookies from sticking. This will also make cleanup much easier. Ensure you have enough space to lay out the cookies as you decorate them.
Step 1: Melt the Almond Bark:
The first step is to melt the white almond bark. You can do this in one of two ways: using a double boiler or a microwave.
- Double Boiler: Fill the bottom pot of a double boiler with water and bring it to a simmer. Place the almond bark in the top pot and stir occasionally until it is completely melted and smooth. Be careful not to let any water get into the almond bark, as this can cause it to seize.
- Microwave: Place the almond bark in a microwave-safe bowl. Microwave in 30-second intervals, stirring well between each interval. Continue this process until the almond bark is fully melted and smooth. Be careful not to overheat the almond bark, as it can burn.
Once the almond bark is melted, keep it warm to prevent it from hardening. You can place the bowl over a pot of warm water or keep it in the microwave on a very low setting.
Step 2: Create Santa’s Face:
Dip one end of a Nutter Butter cookie into the melted almond bark, covering about half of the cookie. Ensure the coating is even and not too thick to avoid a messy appearance.
Immediately place the dipped cookie on the parchment paper. While the almond bark is still melted, gently press a red mini M&M onto the dipped side to create Santa’s nose. Position the M&M in the center of the coated area, leaving enough space above for the eyes.
Repeat this process for all the cookies, ensuring each has a red M&M nose. Allow the almond bark to harden completely. This may take about 15-20 minutes at room temperature, or you can speed up the process by placing the baking sheet in the refrigerator for about 10 minutes.
Step 3: Create Santa’s Hat:
Once the almond bark on the face has hardened, dip the opposite end of the cookie into the melted almond bark. Shake off any excess to avoid a thick coating.
Immediately press the dipped end into the red sanding sugar, ensuring it is fully coated. This will create Santa’s festive red hat. Gently shake off any excess sugar.
Step 4: Add the Pom-Pom:
Place a white chocolate chip at the edge of the red sanding sugar to create the pom-pom on Santa’s hat. This adds a touch of elegance and completes the Santa hat design.
Set the cookie back onto the parchment paper to harden. Ensure the pom-pom is securely attached to the hat.
Step 5: Add Santa’s Eyes:
To add Santa’s eyes, dip the back of two mini chocolate chips lightly into the melted almond bark. Place them just above the nose, ensuring they are evenly spaced and aligned. The melted almond bark will act as glue, holding the eyes in place.
Repeat this process for all the cookies, carefully positioning the eyes to give each Santa a cheerful expression.
Allow the entire cookie to harden completely before serving or packaging. This will ensure that all the decorations are securely in place.
COOKING Rating:
- Ease of Preparation: 5/5 (Very Easy)
- Kid-Friendly: 5/5 (Great for Kids)
- Festive Appeal: 5/5 (Highly Festive)
- Taste: 4/5 (Delicious and Enjoyable)
Serving Suggestions:
- Holiday Parties: These cookies are perfect for serving at Christmas parties, cookie exchanges, or family gatherings. Arrange them on a festive platter for an eye-catching display.
- Gifts: Package these cookies in decorative tins or cellophane bags to give as homemade gifts to friends, family, or coworkers.
- Dessert Table: Add these cookies to your dessert table alongside other holiday treats for a variety of festive options.
- Snacks: Enjoy these cookies as a sweet snack with a glass of milk or a cup of hot cocoa.
- Lunchboxes: Pack these cookies in lunchboxes for a special holiday treat.
Tips:
- Melted Almond Bark: Ensure the almond bark is completely smooth and free of lumps for easy dipping. If it starts to harden, gently reheat it.
- Even Coating: Shake off any excess almond bark after dipping to prevent a thick, messy coating.
- Parchment Paper: Always use parchment paper to prevent the cookies from sticking and make cleanup easier.
- Hardening Time: Allow the cookies to harden completely before serving or packaging to ensure the decorations stay in place.
- Storage: Store the cookies in an airtight container at room temperature to maintain their freshness.
Prep Time: 20 minutes Cook Time: 0 minutes Total Time: 20 minutes (plus hardening time)
Nutritional Information: (per cookie, approximate) Calories: 150 Protein: 2g Sodium: 70mg
Conclusion:
Santa Nutter Butter Cookies are a delightful and festive treat that brings joy to any holiday celebration. Their ease of preparation, combined with their charming design and delicious flavor, makes them a perfect activity for families and a wonderful addition to any Christmas gathering. Whether you’re baking with kids, preparing gifts for loved ones, or simply indulging in a sweet snack, these cookies are sure to spread holiday cheer. Enjoy the process of creating these adorable Santa cookies and savor the delicious results!
Questions and Answers:
Q1: Can I use regular chocolate instead of almond bark?
A: While almond bark is recommended for its smooth melting and easy handling, you can use white chocolate as an alternative. However, white chocolate can be more finicky and may require more careful melting to avoid burning. Ensure you use a high-quality white chocolate for the best results and flavor. You may also need to add a small amount of shortening or coconut oil to help it melt smoothly.
Q2: How can I prevent the almond bark from seizing?
A: To prevent almond bark from seizing, ensure that no water or steam comes into contact with it during the melting process. When using a double boiler, make sure the water in the bottom pot is simmering gently and not boiling vigorously. If using a microwave, melt the almond bark in short intervals (30 seconds) and stir well between each interval to prevent overheating. If the almond bark does seize, you can try adding a small amount of vegetable shortening to smooth it out, but it’s best to avoid seizing altogether.
Q3: Can I make these cookies ahead of time?
A: Yes, you can definitely make these cookies ahead of time. Once the cookies are fully decorated and the almond bark has hardened, store them in an airtight container at room temperature. They will stay fresh for up to a week. This makes them a great option for preparing in advance for holiday parties or gifting.
Q4: What other decorations can I use besides M&M’s and chocolate chips?
A: Feel free to get creative with your decorations! You can use other types of candies, such as sprinkles, edible glitter, or small candy canes. For the eyes, you could use candy pearls or even edible markers to draw on the eyes. Consider using different colors of sanding sugar for the hat to add variety. The possibilities are endless, so have fun and personalize your Santa cookies to your liking!
Q5: How do I store these cookies to keep them fresh?
A: To keep these cookies fresh, store them in an airtight container at room temperature. Avoid storing them in the refrigerator, as the moisture can cause the almond bark to soften and the decorations to become sticky. If you live in a warm climate, you can store them in a cool, dry place to prevent the almond bark from melting. Properly stored, these cookies will stay fresh and delicious for up to a week.