Description of this recipe
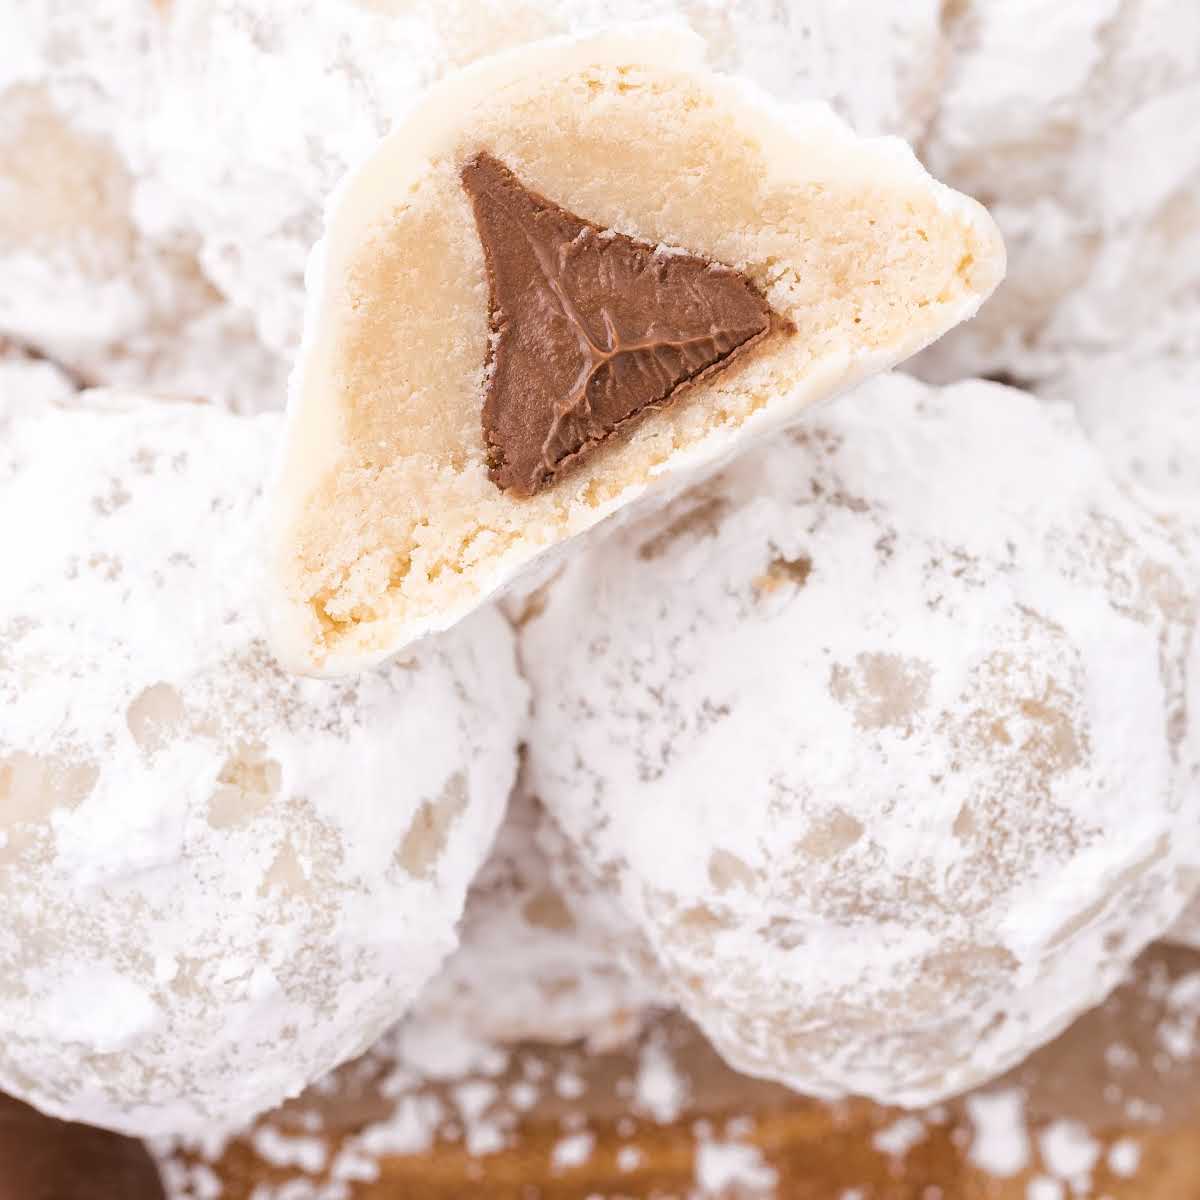
Snowball Kisses are delightful, bite-sized cookies that perfectly blend the buttery, melt-in-your-mouth texture of a snowball cookie with the sweet, chocolatey surprise of a Hershey’s Kiss hidden inside. These cookies are not only delicious but also incredibly festive, making them a wonderful addition to holiday baking or any special occasion. Each bite offers a harmonious balance of crumbly cookie and smooth chocolate, creating a truly irresistible treat.
Why you will love this recipe
There are countless reasons to adore Snowball Kisses. First and foremost, they are incredibly easy to make, requiring minimal ingredients and straightforward steps. This makes them perfect for both novice bakers and seasoned pros. Secondly, their unique combination of textures and flavors is simply divine. The delicate, buttery cookie crumbles in your mouth, followed by the satisfying sweetness of the chocolate kiss.
Furthermore, these cookies are incredibly versatile. They can be customized with different flavors and add-ins to suit your preferences. Want to add a hint of warmth? Try incorporating a pinch of cinnamon or nutmeg into the dough. Looking for a nutty crunch? Mix in some finely chopped pecans or walnuts. The possibilities are endless!
Finally, Snowball Kisses are visually appealing, making them a standout treat on any dessert platter. Their petite size and elegant appearance make them perfect for gifting or serving at parties. Whether you’re looking for a simple yet impressive dessert or a fun baking project to share with loved ones, Snowball Kisses are sure to become a new favorite.
Ingredients:
- 1 cup (2 sticks) salted sweet cream butter, softened
- ½ cup granulated sugar
- 2 tablespoons granulated sugar
- 1¼ teaspoons vanilla extract
- 2 cups all-purpose flour
- 32 Hershey Kisses, unwrapped
- 2 cups powdered sugar, (or more if needed)
Preparation:
Step 1: Begin by preparing your workstation. Gather all your ingredients and tools, including your stand mixer or mixing bowls, measuring cups, baking sheets, and parchment paper. Ensuring everything is readily available will streamline the baking process and prevent any last-minute scrambling.
Step 2: Using a stand mixer fitted with the paddle attachment or a medium-sized mixing bowl and a handheld mixer, cream together the softened butter for 1 minute on medium-high speed. The butter should be soft enough to easily incorporate with the other ingredients but not melted.
Step 3: Add the granulated sugar and vanilla extract to the creamed butter. Continue mixing for another minute, until the mixture is light and fluffy. This step is crucial for creating a tender and airy cookie.
Step 4: Gradually add the all-purpose flour to the wet ingredients. Mix on low speed for 30 seconds to 1 minute, until the dry ingredients are just combined. Be careful not to overmix, as this can result in a tough cookie. The dough should be smooth and slightly sticky.
Step 5: Cover the cookie dough with plastic wrap and chill it in the refrigerator for at least 30 minutes. Chilling the dough allows the butter to firm up, which will prevent the cookies from spreading too much during baking.
Step 6: Preheat your oven to 375°F (190°C). While the oven is preheating, line two baking sheets with parchment paper. This will prevent the cookies from sticking and make cleanup a breeze.
Step 7: Once the dough is chilled, use a 1 tablespoon cookie scoop to scoop out the dough. If you don’t have a cookie scoop, you can use a spoon to measure out approximately 1 tablespoon of dough at a time.
Step 8: Roll each scoop of dough into a ball. This will ensure that the cookies bake evenly and have a uniform shape.
Step 9: Using your hands, gently flatten each cookie dough ball to create a small disc. The disc should be large enough to wrap around a Hershey’s Kiss.
Step 10: Place an unwrapped Hershey’s Kiss in the center of the flattened cookie dough disc.
Step 11: Carefully fold the dough up around the Kiss, completely encasing it. Pinch the edges together to seal the dough and create a seamless closure.
Step 12: Place the shaped dough balls on the prepared baking sheets, spacing them about 2 inches apart. This will allow the cookies to spread slightly during baking without sticking together.
Step 13: Bake for 10 to 12 minutes, or until the cookies are lightly golden brown. Keep a close eye on them to prevent them from burning.
Step 14: Once the cookies are baked, allow them to cool on the baking sheet for 8 to 10 minutes. This will allow them to firm up slightly before rolling them in powdered sugar.
Step 15: While the cookies are still slightly warm, roll them generously in powdered sugar. The powdered sugar will adhere to the warm cookies, creating a sweet and snowy coating.
Step 16: Return the coated cookies to the baking sheet to cool completely. As they cool, the powdered sugar will set, creating a beautiful and delicious finish.
COOKING Rating: Easy
Serving Suggestions:
Snowball Kisses are incredibly versatile and can be served in a variety of ways. They make a delightful addition to holiday cookie platters, afternoon tea gatherings, or simple after-dinner treats. Pair them with a warm cup of coffee, tea, or hot cocoa for a cozy and comforting experience.
For a festive presentation, arrange the cookies on a tiered serving stand or in a decorative box. You can also package them in cellophane bags and tie them with ribbon for a thoughtful homemade gift.
Tips:
- Use softened butter: Make sure your butter is softened to room temperature before creaming it with the sugar. This will ensure that the ingredients incorporate properly and create a light and fluffy cookie.
- Don’t overmix the dough: Overmixing can develop the gluten in the flour, resulting in a tough cookie. Mix the dough just until the ingredients are combined.
- Chill the dough: Chilling the dough is essential for preventing the cookies from spreading too much during baking.
- Don’t overbake: Overbaking can result in dry and crumbly cookies. Bake the cookies until they are lightly golden brown.
- Roll in powdered sugar while warm: Rolling the cookies in powdered sugar while they are still slightly warm will help the sugar adhere better.
- Add flavor variations: Experiment with different flavor extracts, such as almond, peppermint, or lemon, to create unique variations of Snowball Kisses.
- Incorporate nuts: Add finely chopped pecans, walnuts, or almonds to the dough for a nutty crunch.
- Use different Hershey’s Kisses: Try using different flavors of Hershey’s Kisses, such as caramel-filled or dark chocolate, to add a twist to the classic recipe.
Prep Time: 20 minutes
Cook Time: 12 minutes
Total Time: 1 hour (including chilling time)
Nutritional Information: (per cookie, estimated)
Calories: 120
Protein: 1g
Sodium: 30mg
Conclusion
Snowball Kisses are more than just cookies; they’re a delightful experience that combines simple ingredients with a touch of magic. Their delicate texture, sweet chocolate surprise, and festive appearance make them a perfect treat for any occasion. Whether you’re baking for the holidays, a special event, or simply to satisfy your sweet tooth, these cookies are sure to bring joy to everyone who tries them. So gather your ingredients, preheat your oven, and get ready to create a batch of Snowball Kisses that will leave everyone wanting more.
5 Questions and Answers about this recipe
Q1: Can I use unsalted butter instead of salted sweet cream butter?
A: Yes, you can substitute unsalted butter for salted sweet cream butter. However, you’ll need to add a pinch of salt (about ¼ teaspoon) to the dough to enhance the flavor. Salt helps to balance the sweetness of the sugar and brings out the other flavors in the recipe.
Q2: Can I make the dough ahead of time and store it in the refrigerator?
A: Absolutely! In fact, making the dough ahead of time can be quite convenient. You can store the dough in the refrigerator for up to 2 days. Just make sure to wrap it tightly in plastic wrap to prevent it from drying out. When you’re ready to bake, let the dough sit at room temperature for about 15-20 minutes to soften slightly before scooping and shaping it.
Q3: What if I don’t have parchment paper? Can I still bake the cookies?
A: Yes, you can still bake the cookies without parchment paper. However, it’s important to grease your baking sheets well to prevent the cookies from sticking. You can use cooking spray or a thin layer of butter. Keep a close eye on the cookies during baking, as they may brown more quickly on the bottom without parchment paper.
Q4: Can I freeze Snowball Kisses?
A: Yes, Snowball Kisses freeze well, making them a great option for make-ahead baking. To freeze, place the cooled cookies in a single layer on a baking sheet and freeze for about 1-2 hours, or until solid. Then, transfer them to an airtight container or freezer bag. They can be stored in the freezer for up to 2 months. When you’re ready to serve them, let them thaw at room temperature for a few hours before enjoying. You may want to dust them with fresh powdered sugar before serving to freshen them up.
Q5: My cookies spread too much during baking. What could be the reason?
A: There are a few reasons why your cookies might have spread too much during baking. First, make sure you’re using the correct amount of flour in the recipe. Too little flour can result in a flatter cookie. Secondly, ensure that your butter is softened but not melted. Melted butter can cause the cookies to spread. Finally, chilling the dough is crucial for preventing spreading. If your dough is too warm, the butter will melt quickly in the oven, causing the cookies to flatten out. Try chilling the dough for a longer period of time or even freezing it for a few minutes before baking to help prevent spreading.