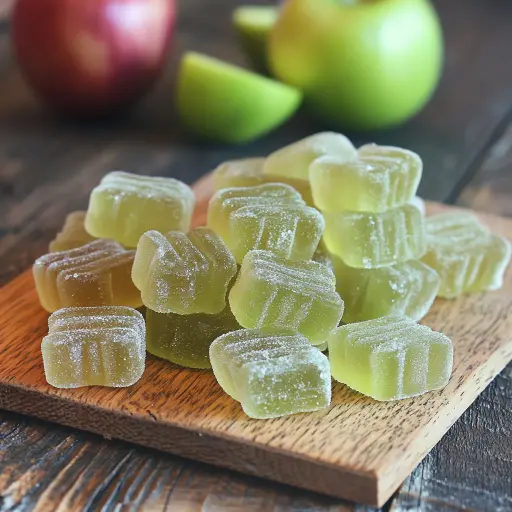
Description: These Sour Apple Tequila Gummies are a fun and flavorful adult treat, combining the tartness of sour apples with a kick of tequila. Easy to make and perfect for parties, these gummies are sure to be a hit!
Ingredients:
- 1 cup sour apple juice (look for natural, unsweetened juice for best results)
- 1/2 cup tequila (blanco or silver tequila is recommended for its clean flavor)
- 1/4 cup granulated sugar (adjust to taste depending on the sweetness of your apple juice)
- 1 packet (3 oz) green apple flavored gelatin (Jell-O or similar brand)
- 1 packet (1 oz) unflavored gelatin (Knox or similar brand)
- 1/4 cup sour apple candy powder or sour sugar (for coating)
Preparation:
Step 1: Gather all your ingredients and prepare your silicone molds. Choose molds that are small and easy to manage. Consider shapes like bears, stars, or even simple cubes. Ensure they are clean and dry. Having everything ready beforehand streamlines the process.
Step 2: In a medium saucepan, combine the sour apple juice and tequila. Place the saucepan over medium heat. Stir the mixture gently, ensuring it heats evenly. Do not let it boil! Boiling can affect the gelatin’s setting properties and alter the flavor. The goal is to warm the liquids to help dissolve the sugar and gelatin.
Step 3: Gradually whisk in the granulated sugar. Continue stirring until the sugar is fully dissolved into the liquid. This usually takes a few minutes. Ensure no sugar granules remain at the bottom of the pan. Taste the mixture to see if it’s sweet enough for your liking. You can adjust the sugar amount slightly if needed, keeping in mind the added sweetness from the flavored gelatin.
Step 4: Once the mixture is heated and the sugar is dissolved, remove the saucepan from the heat. This is crucial because high heat can damage the gelatin. Sprinkle both the green apple flavored gelatin and the unflavored gelatin evenly over the liquid. This is called “blooming” the gelatin. Allow the gelatin to sit undisturbed for about one minute. Blooming allows the gelatin granules to absorb the liquid, which helps them dissolve more easily and ensures a smoother texture in the final product.
Step 5: After blooming, whisk the mixture vigorously until all the gelatin is completely dissolved. It’s essential to eliminate any lumps or undissolved gelatin particles, as they can ruin the texture of the gummies. The mixture should be smooth and translucent. If you notice any stubborn lumps, you can gently warm the mixture over very low heat, stirring constantly, until they dissolve. Be careful not to overheat.
Step 6: Carefully pour the gelatin mixture into your prepared silicone molds. Fill each mold about three-quarters full, leaving some space at the top. This makes it easier to remove the gummies later and prevents them from overflowing. If you spill any mixture on the molds, wipe it off immediately with a clean, damp cloth.
Step 7: Once the molds are filled, gently tap them on the counter to release any trapped air bubbles. This ensures the gummies have a smooth and uniform appearance. Place the molds in the refrigerator.
Step 8: Refrigerate the gummies for at least 2 hours, or preferably longer, until they are completely firm and set. The longer they chill, the firmer they will become. To check if they’re ready, gently press on a gummy. It should feel firm and not sticky.
Step 9: Once the gummies are set, carefully remove them from the molds. Gently stretch the silicone mold to loosen the gummies, and then push them out from the bottom. Be patient to avoid tearing the gummies.
Step 10: Prepare your sour coating by combining the sour apple candy powder or sour sugar in a shallow bowl. Ensure the bowl is large enough to roll the gummies easily.
Step 11: Roll each gummy in the sour coating, ensuring it is evenly coated on all sides. The sour coating adds a tangy kick that complements the sweetness of the gummies and the flavor of the tequila.
Step 12: Store the finished Sour Apple Tequila Gummies in an airtight container in the refrigerator. They are best consumed within a few days for optimal texture and flavor. Storing them in the refrigerator keeps them firm and prevents them from becoming sticky.
Why You Will Love This Recipe:
This recipe is a winner for several reasons:
- Unique Flavor Combination: The blend of tart green apple, the subtle warmth of tequila, and the sour sugar coating creates an irresistible taste experience. It’s a sophisticated twist on traditional gummies.
- Easy to Make: The recipe is straightforward and requires minimal cooking skills. With just a few simple steps and ingredients, you can create a batch of delicious gummies.
- Fun and Festive: These gummies are perfect for parties, gatherings, or any occasion where you want to add a playful and flavorful touch. They’re a conversation starter and a crowd-pleaser.
- Customizable: You can easily adapt the recipe to suit your preferences. Experiment with different flavors of juice, different types of tequila, or even different sour coatings.
- Homemade Goodness: Making your own gummies allows you to control the ingredients and avoid artificial additives or preservatives found in store-bought versions.
Serving Suggestions:
- Serve the Sour Apple Tequila Gummies chilled as a fun and refreshing party snack.
- Pair them with other adult treats, such as cocktails or flavored popcorn, for a themed gathering.
- Package them in small, decorative bags or boxes as a unique and personalized gift for friends or family.
- Arrange them on a platter with other appetizers for a colorful and eye-catching display.
- Use them as a garnish for cocktails or desserts to add a touch of whimsy and flavor.
Tips:
- Quality Ingredients: Use high-quality sour apple juice and tequila for the best flavor. Avoid juices with added sugars or artificial flavors.
- Gelatin Ratio: The ratio of flavored to unflavored gelatin is crucial for the right texture. Adjusting the ratio can result in gummies that are too soft or too tough.
- Mold Selection: Silicone molds are ideal for making gummies because they are flexible and make it easy to remove the gummies without damaging them.
- Bloom Time: Allowing the gelatin to bloom properly is essential for a smooth texture.
- Temperature Control: Be careful not to overheat the mixture, as this can affect the gelatin’s setting properties.
- Storage: Store the gummies in an airtight container in the refrigerator to maintain their firmness and freshness.
- Adults Only: This recipe contains alcohol and is intended for adults only.
- Flavor Variations: Explore different fruit juice flavors and tequila types to create unique variations of the recipe.
- Sour Coating Alternatives: If you don’t have sour apple candy or sour sugar, you can use a mixture of granulated sugar and citric acid for a similar effect.
- Cutting Calories: You can use sugar-free juice or sugar substitute for a low-calorie version.
Prep Time: 15 minutes
Cook Time: 5 minutes
Total Time: 2 hours 20 minutes (includes chilling time)
Nutritional Information: (Estimates will vary based on specific ingredients used)
Disclaimer: The following information is based on approximations and can vary depending on specific ingredients and serving size.
- Calories: Approximately 50-75 per gummy (depending on size and sugar content)
- Protein: Approximately 1-2 grams per gummy
- Sodium: Approximately 5-10mg per gummy
Conclusion:
These Sour Apple Tequila Gummies are a delightful and playful treat for adults who enjoy a bit of tartness, sweetness, and a hint of tequila. The recipe is simple to follow, customizable, and sure to impress your friends and family. Whether you’re hosting a party or just looking for a fun and unique snack, these gummies are a guaranteed hit. Remember to enjoy them responsibly and store them properly to maintain their delicious flavor and texture.
Questions and Answers:
Q1: Can I use a different type of juice instead of sour apple?
A: Yes, you can definitely experiment with other types of juice! Green grape juice or kiwi juice would be good sour flavor alternatives that would compliment the taste of the tequila, providing the same amount of liquid called for in the recipe. Remember that the flavor of the juice will significantly impact the final taste of the gummies. If you do decide to change the juice, make sure that you compliment the juice flavor with an adequate gelatin flavor (like kiwi juice with kiwi gelatin).
Q2: What if I don’t want to use tequila? Can I substitute it with something else?
A: Absolutely! If you prefer not to use tequila, you can substitute it with an equal amount of water or non-alcoholic apple cider. This will still provide the liquid needed for the recipe without the alcohol content. Keep in mind that the gummies will lack the subtle warmth and depth of flavor that the tequila provides, but they will still be delicious. You could add a few drops of apple extract to the mixture to enhance the apple flavor if you choose to omit the tequila.
Q3: How long do the Sour Apple Tequila Gummies last in the refrigerator?
A: These gummies are best consumed within 3-5 days when stored in an airtight container in the refrigerator. Over time, they may become slightly sticky or lose some of their firmness. Keeping them properly sealed will help maintain their texture and flavor. If you notice any signs of spoilage, such as a change in color or odor, it’s best to discard them.
Q4: Can I freeze the Sour Apple Tequila Gummies?
A: Freezing the gummies is not recommended, as it can alter their texture and make them mushy when thawed. Gelatin-based products often don’t hold up well to freezing and thawing. For the best quality, it’s best to store them in the refrigerator and consume them within a few days.
Q5: What can I do if my gummies are too soft and don’t set properly?
A: If your gummies are too soft, it could be due to a few factors. First, ensure that you used the correct ratio of gelatin to liquid. If you used too much liquid, the gummies won’t set properly. Another possibility is that the mixture wasn’t chilled for long enough. Make sure to refrigerate them for at least 2 hours, or preferably longer, until they are completely firm. If the problem persists, you can try adding a small amount of additional unflavored gelatin to the mixture, re-heating it gently, and then re-pouring it into the molds for chilling.