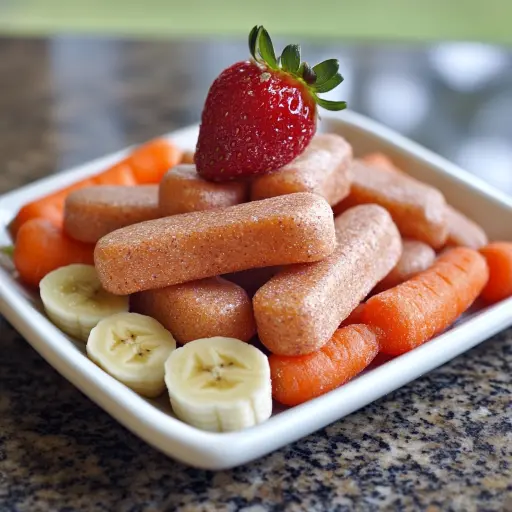
Description: These homemade dog treats are a healthy and delicious way to show your furry friend some love. Packed with natural sweetness from strawberries and bananas, the goodness of carrots, and wholesome oat flour, these snacks are a much better alternative to store-bought options that often contain artificial additives and preservatives. These treats are easy to make, require minimal ingredients, and your dog will absolutely adore them!
Ingredients:
- 1 ripe banana 🍌 (Provides natural sweetness and potassium)
- 1/2 cup fresh strawberries, diced 🍓 (Rich in antioxidants and vitamin C)
- 1/2 cup grated carrot 🥕 (Excellent source of beta-carotene and fiber)
- 1/2 cup oat flour (Gluten-free and easily digestible)
- 1/4 cup plain Greek yogurt (unsweetened) (Good source of protein and probiotics)
Preparation:
Step 1: Preheat and Prepare: Begin by preheating your oven to 350°F (175°C). This ensures the snacks bake evenly. While the oven is heating, line a baking sheet with parchment paper. Parchment paper prevents the snacks from sticking, making cleanup a breeze and ensuring the treats bake without burning on the bottom.
Step 2: Mash the Banana: In a medium-sized bowl, place the ripe banana. Using a fork, thoroughly mash the banana until it forms a smooth puree. A ripe banana is crucial as it’s easier to mash and provides the best natural sweetness to the treats. Ensure there are no large lumps.
Step 3: Combine Fruits and Vegetables: Add the diced fresh strawberries and grated carrot to the bowl with the mashed banana. Gently stir these ingredients together until they are evenly distributed throughout the banana mixture. The combination of strawberries and carrots not only adds nutritional value but also contributes to the appealing color and texture of the treats.
Step 4: Add Oat Flour and Yogurt: Now, incorporate the oat flour and plain Greek yogurt (unsweetened) into the mixture. Start by adding half of the oat flour and gently stir. Then, add the Greek yogurt and continue stirring. Add the remaining oat flour gradually, mixing continuously until all the ingredients are well combined. The mixture should form a dough-like consistency that is neither too sticky nor too dry. If the dough seems too wet, add a little more oat flour, one tablespoon at a time. If it’s too dry, add a teaspoon or two of water.
Step 5: Shape and Bake: Using a spoon or a small cookie scoop, drop spoonfuls of the mixture onto the prepared baking sheet. Leave a small space between each snack to allow for even baking. Once all the mixture has been placed on the baking sheet, gently flatten each spoonful with the back of a spoon or your fingers. This will help the snacks bake more evenly and create a more palatable texture for your dog.
Step 6: Bake to Perfection: Place the baking sheet in the preheated oven and bake for 15-20 minutes. Keep a close eye on the snacks during the baking process. They are ready when they are firm to the touch and lightly golden brown around the edges. The baking time may vary slightly depending on your oven, so it’s important to monitor them closely.
Step 7: Cool Completely: Once the snacks are baked, remove the baking sheet from the oven and place it on a wire rack. Allow the snacks to cool completely before serving them to your dog. Cooling allows the snacks to firm up further and prevents your dog from burning their mouth. Patience is key!
Why You Will Love This Recipe:
- Healthy and Nutritious: You’ll love knowing exactly what goes into your dog’s snacks. These treats are packed with natural ingredients, free from artificial colors, flavors, and preservatives that are often found in commercial dog treats.
- Easy to Make: The recipe is simple and straightforward, requiring only a few common ingredients and basic kitchen tools. You can whip up a batch of these snacks in under an hour.
- Dog-Approved Taste: The combination of sweet banana and strawberries with the wholesome flavor of carrot is irresistible to most dogs.
- Customizable: You can easily adapt the recipe to suit your dog’s preferences or dietary needs. For example, you can substitute the oat flour with brown rice flour or add other dog-safe fruits and vegetables.
- Cost-Effective: Making your own dog treats is often more economical than buying them from the store, especially if you use seasonal ingredients or buy in bulk.
- Peace of Mind: By making your own treats, you have complete control over the ingredients and can ensure that your dog is getting a healthy and safe snack. You can avoid potential allergens or ingredients your dog is sensitive to.
- Bonding Experience: Preparing these snacks can be a fun and rewarding activity that strengthens the bond between you and your furry friend.
- Perfect for Training: These small, tasty treats are ideal for positive reinforcement during training sessions.
Serving Suggestions:
- As a Reward: Offer these snacks as a reward for good behavior during training or simply as a special treat.
- Between Meals: Give your dog a snack between meals to help keep them satisfied and prevent them from begging for food.
- On the Go: Pack a few snacks in your bag when you go for walks or car rides to keep your dog entertained and well-behaved.
- Frozen Treat: For a refreshing summer treat, freeze the snacks and give them to your dog on a hot day.
- Hidden Treat: Use the snacks as part of enrichment activities by hiding them in puzzle toys or snuffle mats.
Tips:
- Adjust Sweetness: If your dog has diabetes or needs a lower sugar snack, reduce or eliminate the strawberries and add a touch of unsweetened applesauce instead.
- Storage: Store the cooled snacks in an airtight container in the refrigerator for up to a week or in the freezer for up to a month.
- Check for Allergies: Always check with your veterinarian before introducing new foods to your dog, especially if they have known allergies or sensitivities.
- Size Matters: Adjust the size of the snacks based on your dog’s breed and size. Smaller dogs should receive smaller treats.
- Consistency is Key: For best results, use a consistent oven temperature and baking time.
- Cooling Rack is Important: Always let the snacks cool completely on a wire rack to prevent them from becoming soggy.
- Don’t Overbake: Overbaking can make the snacks hard and difficult for your dog to chew. Aim for a lightly golden brown color.
- Get Creative: Feel free to experiment with other dog-safe ingredients, such as blueberries, pumpkin puree, or cooked sweet potato.
- Consult Your Vet: If you are unsure about any ingredients or have specific concerns about your dog’s diet, consult with your veterinarian.
Prep Time: 15 minutes
Cook Time: 15-20 minutes
Total Time: 30-35 minutes
Nutritional Information: (Per snack, approximate)
- Calories: 20-30
- Protein: 1-2g
- Sodium: Varies depending on the yogurt
Conclusion:
Strawberry Banana Carrot Dog Snacks are a fantastic way to pamper your beloved canine companion with a treat that’s both delicious and beneficial. These homemade snacks offer a much healthier alternative to commercially produced treats, allowing you to have complete control over the ingredients and ensure your dog is getting a wholesome and nutritious snack. The ease of preparation, combined with the versatility of the recipe, makes it a winner for any dog owner looking to provide their furry friend with the best. So, grab your ingredients, preheat your oven, and get ready to bake up some happiness for your dog! They’ll thank you with wagging tails and plenty of love.
Questions and Answers about this Recipe:
Q1: Can I use frozen strawberries instead of fresh strawberries?
A: Yes, you can use frozen strawberries! Just make sure to thaw them completely and drain any excess liquid before dicing and adding them to the mixture. Frozen strawberries may release more moisture, so you might need to add a little extra oat flour to achieve the desired dough consistency.
Q2: My dog is allergic to oats. Can I substitute the oat flour?
A: Absolutely! If your dog has an oat allergy, you can easily substitute the oat flour with other gluten-free alternatives such as brown rice flour, coconut flour (use sparingly as it’s very absorbent), or tapioca flour. Just keep in mind that different flours may have different absorption rates, so you might need to adjust the amount to achieve the right dough consistency.
Q3: Can I add peanut butter to this recipe?
A: Yes, adding peanut butter is a great idea! Make sure to use plain, unsweetened peanut butter with no added salt, sugar, or xylitol (which is extremely toxic to dogs). Add about 1-2 tablespoons of peanut butter to the mixture along with the other ingredients. Peanut butter will add extra protein and healthy fats, as well as a delicious flavor that most dogs love.
Q4: How long can I store these dog snacks?
A: These homemade dog snacks can be stored in an airtight container in the refrigerator for up to one week. For longer storage, you can freeze them for up to one month. When freezing, place the snacks in a single layer on a baking sheet until frozen, then transfer them to a freezer-safe bag or container to prevent them from sticking together. Thaw them in the refrigerator before serving.
Q5: My dog is a picky eater. What can I do to make these snacks more appealing to him?
A: If your dog is a picky eater, there are a few things you can try to make these snacks more appealing:
- Add a stronger flavor: Try adding a small amount of unsalted chicken broth or beef broth to the mixture.
- Use smaller pieces: Smaller dogs or picky eaters might prefer smaller treats. Cut the baked snacks into smaller pieces.
- Warm them up: Warming the snacks slightly can enhance their aroma and make them more enticing.
- Mix with favorite food: Mix a few of these snacks with your dog’s regular food to introduce them to the new flavor.
- Be patient: It may take a few tries for your dog to get used to the new snacks. Don’t give up if they don’t immediately love them. Keep offering them in small amounts and eventually, they may come around.