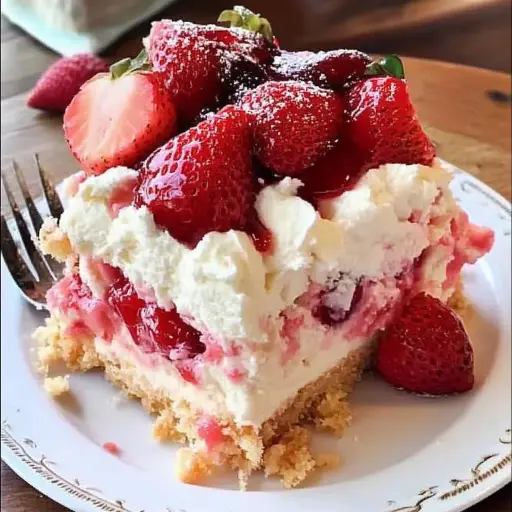
Description: This Strawberry Cheesecake Dump Cake is the ultimate easy dessert recipe! It requires minimal effort, uses just a handful of ingredients, and delivers a delicious combination of sweet strawberries, creamy cheesecake, and a buttery cake topping. It’s the perfect treat for potlucks, weeknight desserts, or any occasion when you want something satisfying without spending hours in the kitchen. This recipe is so simple, anyone can make it, even beginner bakers!
Ingredients:
- 1 box (15.25 oz) yellow or white cake mix (ensure it’s the dry mix, not prepared batter)
- 1 (21 oz) can strawberry pie filling (look for a high-quality pie filling with plenty of fruit)
- 1 (8 oz) package cream cheese, softened (full-fat cream cheese provides the best texture and flavor)
- ½ cup granulated sugar (adds sweetness to the cheesecake layer)
- 1 tsp vanilla extract (enhances the flavor of the cheesecake)
- ½ cup unsalted butter, melted (adds richness and helps the cake topping crisp up)
- Optional: Fresh strawberries, sliced, for garnish (adds a fresh and vibrant touch)
Preparation:
This recipe emphasizes simplicity, focusing on layering ingredients rather than extensive mixing and preparation. Each step is straightforward and ensures a perfectly layered and delicious final product.
Step 1: Preheat Oven and Prepare Baking Dish:
Preheat your oven to 350°F (175°C). This temperature allows the cake to bake evenly without burning the top while ensuring the cheesecake layer sets properly. Grease a 9×13-inch baking dish thoroughly with butter, cooking spray, or parchment paper. Greasing the dish prevents the cake from sticking and makes it easier to serve clean slices. Parchment paper adds an extra layer of protection against sticking and allows you to lift the entire cake out for easy cutting.
Step 2: Layer Strawberry Filling:
Pour the entire can of strawberry pie filling into the prepared baking dish. Spread the filling evenly across the bottom of the dish. This layer forms the base of the cake and provides the delicious strawberry flavor that complements the cheesecake layer. Make sure the filling is distributed uniformly to ensure every slice has a generous amount of strawberry goodness.
Step 3: Make Cheesecake Layer:
In a medium mixing bowl, combine the softened cream cheese, granulated sugar, and vanilla extract. Use an electric mixer (handheld or stand mixer) to beat the ingredients together until smooth and creamy. It is crucial that the cream cheese is properly softened to avoid any lumps in the cheesecake layer. The sugar sweetens the cream cheese and helps create a smooth texture, while the vanilla extract adds a hint of warmth and enhances the overall flavor. This layer adds a rich and tangy counterpoint to the sweetness of the strawberry filling and the cake topping.
Step 4: Add Cake Mix:
Evenly sprinkle the dry cake mix over the top of the strawberry filling and cheesecake mixture. It’s essential not to mix the cake mix with the other layers. The dry cake mix will bake into a crumbly, buttery topping that adds a delightful texture to the cake. Distribute the cake mix uniformly across the entire surface to ensure an even topping. Avoid creating thick clumps of cake mix in any particular area.
Step 5: Top with Butter:
Drizzle the melted butter evenly over the dry cake mix. The melted butter is crucial for creating the crumbly, golden-brown topping that characterizes a dump cake. Ensure that the butter is distributed as evenly as possible to moisten the cake mix and help it bake properly. This step is key to achieving that irresistible buttery flavor and texture.
Step 6: Bake:
Place the baking dish in the preheated oven and bake for 40-45 minutes, or until the top is golden brown and bubbly. The baking time may vary slightly depending on your oven, so keep an eye on the cake. A toothpick inserted into the center of the cake should come out with moist crumbs attached, indicating that it is cooked through. The edges of the cake should also be pulling away slightly from the sides of the dish.
Step 7: Cool & Serve:
Remove the cake from the oven and let it cool slightly before serving. This allows the cake to set and makes it easier to slice. You can serve the cake warm, which is particularly comforting, or chill it in the refrigerator for a few hours for a cooler, more refreshing treat. Garnish with fresh strawberries, sliced, for an extra touch of elegance and flavor.
Why You Will Love This Recipe
- Unbelievably Easy: Seriously, it doesn’t get much simpler than this. Dump cakes are notorious for their ease, and this one lives up to the hype. Perfect for beginner bakers or anyone short on time.
- Minimal Ingredients: Just a handful of readily available ingredients that you might already have in your pantry.
- Delicious Flavor Combination: The blend of sweet strawberries, creamy cheesecake, and buttery cake topping is a match made in dessert heaven.
- Versatile: Easily adaptable to different fruit fillings. Try it with cherry, blueberry, or apple pie filling for a different twist.
- Crowd-Pleasing: Always a hit at parties, potlucks, and family gatherings. Everyone loves a good dump cake!
COOKING Rating:
- Ease of Preparation: 5/5 (Extremely Easy)
- Taste: 4.5/5 (Delicious and satisfying)
- Ingredient Availability: 5/5 (Common ingredients)
- Overall: 4.8/5 (Highly Recommended)
Serving Suggestions:
- Serve warm or chilled.
- Top with a dollop of whipped cream or a scoop of vanilla ice cream.
- Garnish with fresh strawberries, sliced.
- Dust with powdered sugar for a pretty presentation.
- A drizzle of chocolate syrup adds a decadent touch.
- Pair with a cup of coffee or tea for a perfect dessert course.
Tips:
- Ensure the cream cheese is completely softened for a smooth cheesecake layer.
- Do not mix the cake mix with the other ingredients; simply sprinkle it evenly over the top.
- Melt the butter completely for even distribution and a perfectly crumbly topping.
- Watch the cake carefully during the last few minutes of baking to prevent burning.
- For a richer flavor, use brown butter instead of melted butter.
- Experiment with different fruit fillings to customize the cake to your liking.
- If you don’t have fresh strawberries, use a strawberry glaze or strawberry sauce as a garnish.
- For a gluten-free option, use a gluten-free cake mix.
Prep Time: 10 minutes Cook Time: 40-45 minutes Total Time: 50-55 minutes
Nutritional Information:
(Approximate values per serving, based on 12 servings)
- Calories: 350-400
- Protein: 4-5g
- Sodium: 200-250mg
Conclusion:
The Strawberry Cheesecake Dump Cake is a testament to the fact that delicious desserts don’t have to be complicated. Its simplicity, combined with its irresistible flavor, makes it a go-to recipe for any occasion. Whether you’re a seasoned baker or a beginner in the kitchen, this dump cake is sure to impress. So, gather your ingredients, preheat your oven, and get ready to enjoy a slice of pure, effortless dessert bliss!
Questions and Answers About This Recipe:
- Can I use a different type of fruit filling?
- Absolutely! One of the best things about dump cakes is their versatility. You can easily substitute the strawberry pie filling with other flavors like cherry, blueberry, apple, or even peach. Each filling will create a unique flavor profile, so feel free to experiment and find your favorite combination. Consider the sweetness and tartness of the filling when choosing, and adjust the sugar in the cheesecake layer if necessary.
- Can I use a sugar-free cake mix and/or sugar-free pie filling to make this healthier?
- Yes, you can definitely use sugar-free alternatives to reduce the sugar content of this recipe. Using a sugar-free cake mix will significantly lower the overall sugar. For the pie filling, ensure it doesn’t contain artificial sweeteners that you might be sensitive to. Keep in mind that using sugar-free ingredients might slightly alter the taste and texture of the final product, but it can be a great way to enjoy this dessert with fewer calories and sugar.
- How do I prevent the cake mix from clumping on top?
- To prevent clumping, make sure you distribute the dry cake mix evenly over the strawberry filling and cheesecake layer. Gently break up any large clumps with your fingers as you sprinkle it. Also, ensure the melted butter is drizzled evenly over the cake mix to moisten it properly. If you notice any dry spots after drizzling the butter, you can lightly sprinkle a little more melted butter on those areas.
- Can I make this dump cake ahead of time?
- Yes, you can definitely make this dump cake ahead of time. After baking, allow it to cool completely, then cover it tightly with plastic wrap or foil and store it in the refrigerator for up to 2-3 days. When you’re ready to serve, you can warm it up slightly in the oven or microwave, or enjoy it cold straight from the fridge. Making it ahead of time is a great way to save time and effort, especially if you’re preparing for a party or gathering.
- What if I don’t have cream cheese? Can I substitute it with something else?
- While cream cheese provides the classic cheesecake flavor, you can try substituting it with Greek yogurt or ricotta cheese. Greek yogurt will offer a tangier flavor and a slightly lighter texture, while ricotta cheese will create a smoother, milder cheesecake layer. Be sure to drain any excess liquid from the Greek yogurt or ricotta cheese before using it to prevent a soggy cake. These substitutions will alter the overall flavor slightly, but they can be a good option if you don’t have cream cheese on hand.