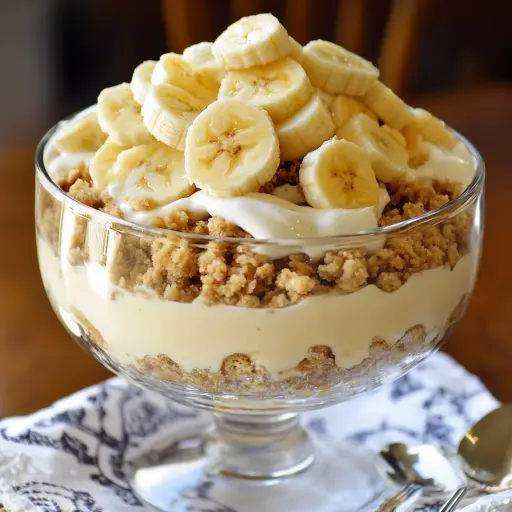
Description: A classic Southern dessert made easy! This creamy, dreamy banana pudding requires no cooking and is the perfect make-ahead treat for any occasion. Layers of vanilla wafers, ripe bananas, and a luscious vanilla pudding mixture come together to create a symphony of flavors and textures that will have everyone begging for more.
Ingredients:
- 1 box (5.1 oz) instant vanilla pudding mix
- 2 cups cold whole milk
- 1 can (14 oz) sweetened condensed milk
- 1 teaspoon pure vanilla extract
- 1 tub (8 oz) whipped topping (such as Cool Whip), thawed
- 1 box (11 oz) vanilla wafer cookies (e.g., Nilla Wafers)
- 4–5 ripe bananas, sliced into rounds
Preparation:
This recipe is a no-bake dream, meaning minimal work for maximum flavor. Get ready for a simple, step-by-step process that will result in a dessert everyone will adore.
Step 1: Prepare the Pudding Base In a large mixing bowl, whisk together the instant vanilla pudding mix and cold whole milk. Whisk vigorously for about 2 minutes, or until the mixture begins to thicken slightly and becomes smooth. Ensure there are no lumps of pudding mix remaining. A smooth base is key to a creamy final product.
Step 2: Add Sweetness and Flavor To the thickened pudding mixture, add the can of sweetened condensed milk and the teaspoon of pure vanilla extract. The sweetened condensed milk adds a rich, creamy sweetness that elevates this pudding to another level. The vanilla extract enhances the overall flavor profile, creating a warm and inviting taste.
Step 3: Fold in the Whipped Topping Gently fold in the thawed whipped topping using a rubber spatula. Be careful not to overmix, as this can deflate the whipped topping and result in a less airy pudding. The goal is to incorporate the whipped topping evenly, creating a light and fluffy texture.
Step 4: Layer the Ingredients Now comes the fun part – assembling the banana pudding! In a 9×13-inch glass baking dish or a large trifle bowl, begin by placing a single, even layer of vanilla wafer cookies at the bottom. Don’t worry if you need to break some cookies to fill in the gaps; the point is to create a solid base.
Step 5: Add Bananas and Pudding Next, add a layer of sliced bananas over the vanilla wafer cookies. Make sure the banana slices are evenly distributed to ensure every bite is bursting with banana flavor. Spoon a generous layer of the prepared pudding mixture over the bananas, spreading it evenly with your spatula.
Step 6: Repeat and Finish Repeat the layering process: cookies, bananas, and pudding. Continue layering until all of the ingredients are used, finishing with a layer of pudding on top. This ensures a beautiful presentation and allows the flavors to meld together perfectly during chilling.
Step 7: Chill and Soften Cover the dish tightly with plastic wrap, pressing it gently against the surface of the pudding to prevent a skin from forming. Refrigerate the banana pudding for at least 4 hours, but preferably overnight. This chilling time is crucial, as it allows the flavors to meld together, the cookies to soften, and the pudding to set properly.
Step 8: Garnish and Serve Before serving, garnish the banana pudding as desired. You can add additional banana slices, crushed vanilla wafers, dollops of whipped topping, fresh mint leaves, or a drizzle of caramel or chocolate sauce. Get creative and personalize your pudding to make it your own!
Why You Will Love This Recipe
This no-bake banana pudding is the ultimate comfort food. It’s incredibly easy to make, requiring no cooking or complicated techniques. The combination of creamy pudding, sweet bananas, and soft vanilla wafers is simply irresistible. It’s the perfect dessert for potlucks, parties, or any occasion where you want a crowd-pleasing treat. Plus, it can be made ahead of time, making it a stress-free dessert option.
COOKING Rating: Easy
Serving Suggestions:
- Serve chilled, straight from the refrigerator.
- Garnish with fresh banana slices, crushed vanilla wafers, or a dollop of whipped cream.
- Drizzle with caramel or chocolate sauce for an extra touch of indulgence.
- Serve in individual parfait glasses for an elegant presentation.
- Pair with a scoop of vanilla ice cream for an extra-special treat.
Tips:
- Use ripe, but not overripe, bananas for the best flavor and texture. Overripe bananas will be too mushy and can make the pudding too sweet.
- For a richer flavor, use whole milk instead of low-fat or skim milk.
- If you don’t have vanilla wafer cookies, you can substitute graham crackers or other similar cookies.
- To prevent the bananas from browning, toss them with a little lemon juice before layering them into the pudding.
- If you want a thicker pudding, use a little less milk.
- For a fun twist, add a layer of peanut butter or Nutella between the bananas and pudding.
- Store leftover banana pudding in the refrigerator for up to 3 days.
Prep Time: 15–20 minutes Cook Time: 0 minutes Total Time: ~4 hours 20 minutes (including chilling time)
Nutritional Information: (Note: Nutritional information is an estimate and may vary depending on specific ingredients and serving sizes.)
- Calories: ~350–400 per serving
- Protein: ~5-7g per serving
- Sodium: ~200-250mg per serving
Conclusion:
This no-bake banana pudding is a true classic that’s sure to become a family favorite. It’s easy to make, incredibly delicious, and perfect for any occasion. With its creamy texture, sweet banana flavor, and comforting vanilla wafers, it’s a dessert that will bring a smile to everyone’s face. So gather your ingredients, follow these simple steps, and get ready to enjoy the best banana pudding you’ve ever tasted!
Questions and Answers about this Recipe:
- Can I use a different type of pudding mix?
- Yes, you can certainly experiment with other pudding flavors. Butterscotch, banana cream, or even cheesecake pudding would all be delicious variations. Keep in mind that the flavor profile will change, but the basic method remains the same.
- Can I use fresh whipped cream instead of whipped topping?
- Absolutely! Fresh whipped cream will add a richer, more decadent flavor to the pudding. Be sure to whip it to stiff peaks and fold it in gently to maintain its airy texture. However, keep in mind that fresh whipped cream is more prone to deflating, so the pudding may not hold its shape as well over time.
- How can I prevent the bananas from turning brown?
- Bananas tend to oxidize and turn brown when exposed to air. To prevent this, you can toss the banana slices with a little lemon juice or pineapple juice before layering them into the pudding. The acidity in the juice will help to slow down the browning process.
- Can I make this pudding ahead of time?
- Yes, banana pudding is a great make-ahead dessert. In fact, it’s even better when made a day in advance, as this allows the flavors to meld together and the cookies to soften. Just be sure to store it tightly covered in the refrigerator.
- Can I freeze this banana pudding?
- Freezing banana pudding is not recommended, as the texture of the pudding and the bananas may change upon thawing. The pudding can become watery, and the bananas can become mushy. It’s best to enjoy this dessert fresh.