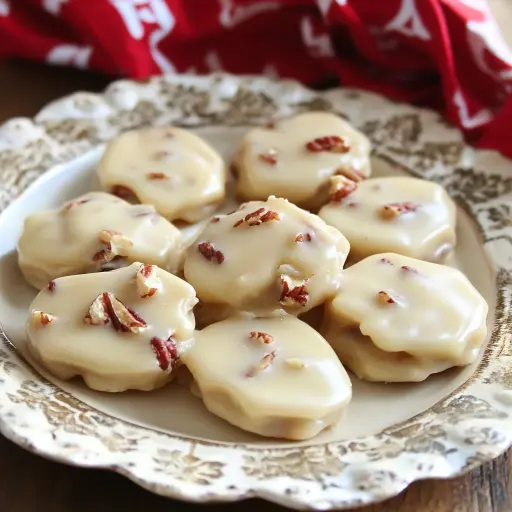
Description: These creamy, melt-in-your-mouth Vanilla Pecan Pralines are a Southern classic, reimagined with a hint of vanilla and the satisfying crunch of pecans. Perfect for gifting, holiday gatherings, or simply indulging in a sweet treat, this recipe is surprisingly easy to make and guaranteed to impress.
Ingredients:
- 2 1/2 cups granulated sugar
- 7 oz (approximately 3/4 cup + 2 tablespoons) evaporated milk
- 1/4 cup (2 ounces or 1/2 stick) unsalted butter, cubed
- 1 package (11 oz) vanilla or white chocolate chips (Ghirardelli recommended for superior melting and flavor)
- 4 oz marshmallow creme (about 1/2 cup)
- 1 teaspoon pure vanilla extract
- 2 cups chopped pecans (toasted pecans add a deeper, richer flavor)
Preparation:
Before you even think about turning on the stove, a little preparation goes a long way in ensuring pralines that are perfect every time. This recipe, while straightforward, benefits from a well-organized approach.
Step 1: Prepare Your Workspace
Line two large baking sheets or a clean countertop with long sheets of waxed paper or parchment paper. This is crucial! The hot praline mixture will stick to almost anything else, and you’ll want a surface that allows for easy removal once the pralines have cooled and set. Make sure the waxed paper extends beyond the edges of the baking sheets for easy lifting later. This simple step will save you a lot of frustration later on.
Step 2: Toast the Pecans (Optional but Highly Recommended)
While the recipe calls for chopped pecans, toasting them beforehand elevates the flavor profile significantly. To toast the pecans, spread them in a single layer on a baking sheet. Bake in a preheated oven at 350°F (175°C) for 8-10 minutes, or until fragrant and lightly browned. Watch them carefully, as they can burn quickly. Alternatively, you can toast them in a dry skillet over medium heat, stirring frequently, until fragrant. Allow the toasted pecans to cool slightly before chopping them if they aren’t already chopped, or before adding them to the praline mixture. Toasting intensifies their nutty flavor and adds a delightful depth to the final product.
Step 3: Measure and Prep Ingredients
Measure out all of your ingredients before you start cooking. This ensures that you have everything readily available and prevents any frantic searching for ingredients while the sugar mixture is boiling. Having your sugar, evaporated milk, butter, chocolate chips, marshmallow creme, vanilla extract, and pecans measured and ready to go will streamline the process and allow you to focus on the cooking process. Cube the butter into small pieces for quicker and more even melting.
Step 4: Choose Your Pan Wisely
Select a heavy-bottomed saucepan that is large enough to accommodate the mixture as it boils and expands. A heavy-bottomed pan is essential to prevent the sugar from scorching and to ensure even heat distribution. A lighter pan can lead to hot spots and uneven cooking, which can result in grainy pralines. The saucepan should be at least 3-4 quarts in size to prevent the mixture from boiling over.
Step 5: Gather Your Tools
Have a heat-resistant spatula or wooden spoon readily available for stirring the mixture. Avoid using a whisk, as it can incorporate too much air into the mixture, which can affect the texture of the pralines. A candy thermometer is helpful but not essential; however, it can provide a more accurate indication of when the mixture has reached the correct temperature and consistency. Also, have a tablespoon ready for dropping the praline mixture onto the waxed paper.
Instructions:
- Place two long sheets of waxed paper on cookie sheets or your countertop.
- Add sugar, evaporated milk, and butter to a heavy-bottomed saucepan. Cook over medium-low heat, stirring constantly with a heat-resistant spatula or wooden spoon. It is paramount to keep the mixture moving to prevent the sugar from crystallizing or sticking to the bottom of the pan.
- Bring the mixture to a boil, then reduce the heat to a low boil. Continue boiling, stirring constantly, for exactly 8 minutes. This timing is crucial for achieving the correct consistency. Use a timer to ensure accuracy. The mixture should thicken slightly and develop a light caramel color. If using a candy thermometer, the mixture should reach 235-240°F (113-116°C), which is the soft-ball stage.
- Remove the saucepan from the heat immediately after the 8 minutes are up. Add the vanilla chips and marshmallow creme. Stir continuously until the chips are fully melted and the marshmallow creme is completely incorporated. The mixture should be smooth and creamy. Be careful not to overstir, as this can cause the sugar to crystallize.
- Stir in the vanilla extract and chopped pecans, ensuring everything is evenly combined throughout the mixture. The vanilla extract enhances the overall flavor profile, while the pecans add texture and a nutty element.
- Let the mixture cool for 2–3 minutes until it thickens slightly but is still creamy. This cooling period is essential for preventing the pralines from spreading too thin on the waxed paper. The mixture should be thick enough to hold its shape when dropped from a spoon. If it feels too firm, add a couple of teaspoons of evaporated milk and stir well until the desired consistency is achieved.
- Drop the mixture by tablespoons onto the prepared waxed paper, spacing them about 1-2 inches apart. Aim for uniform sizes to ensure even cooling and setting.
- Let the pralines cool completely until they are firm and set. This may take anywhere from 30 minutes to an hour, depending on the room temperature. Avoid touching or moving the pralines while they are cooling, as this can disrupt their shape.
- Once the pralines are fully set, gently peel them off the waxed paper.
- Store the pralines in an airtight container, layering them between sheets of waxed paper to prevent them from sticking together. Store at room temperature for up to a week or in the refrigerator for longer storage.
Why You Will Love This Recipe
This Vanilla Pecan Praline recipe is a winner for several reasons. First, it’s surprisingly easy to make, despite the impressive results. The straightforward instructions and minimal ingredients make it accessible even for novice candy makers. Second, the combination of creamy vanilla, rich pecans, and a hint of marshmallow creates an irresistible flavor profile that appeals to all ages. The pralines are melt-in-your-mouth smooth with a satisfying crunch from the pecans. Third, these pralines are perfect for gifting during the holidays or any special occasion. Their elegant appearance and delicious taste make them a thoughtful and appreciated treat. Finally, the recipe is versatile and can be easily adapted to suit your preferences. You can experiment with different types of nuts, add a touch of cinnamon or nutmeg, or even drizzle them with melted chocolate for an extra layer of indulgence.
COOKING Rating: Easy to Medium (due to the need to pay attention to the boiling process)
Serving Suggestions:
- As a Sweet Treat: Enjoy them as a standalone dessert, perfect with a cup of coffee or tea.
- Gift Giving: Package them in decorative boxes or tins for a thoughtful homemade gift.
- Party Favors: Use them as elegant party favors for weddings, birthdays, or holiday gatherings.
- Dessert Board Addition: Add them to a dessert board alongside other candies, cookies, and fruits.
- Ice Cream Topping: Crumble them over ice cream for a delicious and crunchy topping.
- Coffee Accompaniment: Serve alongside coffee for a decadent after-dinner treat.
Tips:
- Use High-Quality Ingredients: The quality of your ingredients will directly impact the flavor of your pralines. Use high-quality vanilla extract and fresh pecans for the best results.
- Don’t Overstir: Overstirring the mixture after adding the chocolate chips and marshmallow creme can cause the sugar to crystallize, resulting in grainy pralines.
- Watch the Heat: It’s crucial to control the heat during the boiling process. If the heat is too high, the sugar can burn. If it’s too low, the mixture won’t reach the correct consistency.
- Cool Completely: Allow the pralines to cool completely before removing them from the waxed paper. This will prevent them from sticking or losing their shape.
- Toasting Pecans: As mentioned earlier, toasting the pecans enhances their flavor and adds depth to the pralines. It’s a simple step that makes a big difference.
- Adjust for Humidity: On humid days, the pralines may take longer to set. If they are not setting properly, you can place them in the refrigerator for a short period to help them firm up.
- Storage: Store the pralines in an airtight container, layered between sheets of waxed paper, to prevent them from sticking together.
Prep Time: 15 minutes
Cook Time: 15 minutes
Total Time: 30 minutes (plus cooling time)
Nutritional Information: (Approximate, per praline)
- Calories: 200-250 (depending on size)
- Protein: 2-3 grams
- Sodium: 20-30 mg (varies depending on butter)
Conclusion
These Vanilla Pecan Pralines are more than just a sweet treat; they’re a taste of Southern tradition with a delightful vanilla twist. Easy to make, incredibly delicious, and perfect for sharing, this recipe is sure to become a new favorite. Whether you’re looking for a homemade gift, a party favor, or simply a decadent dessert, these pralines are guaranteed to impress. So gather your ingredients, follow the simple instructions, and prepare to indulge in a melt-in-your-mouth experience. Enjoy!
Questions and Answers:
Q1: Can I use a different type of nut besides pecans?
A: Absolutely! While pecans are traditional for pralines, you can easily substitute them with other nuts like walnuts, almonds, or even macadamia nuts. Keep in mind that the flavor profile will change slightly depending on the nut you choose. Toasting any nut before adding it to the mixture will always enhance the flavor.
Q2: My pralines are grainy. What did I do wrong?
A: Grainy pralines are usually caused by sugar crystallization. This can happen if you overstir the mixture after adding the chocolate chips and marshmallow creme, or if the heat is too high, causing the sugar to scorch. Make sure to stir gently and continuously while the sugar mixture is boiling, and avoid overstirring after adding the chocolate chips and marshmallow creme. Using a heavy-bottomed pan and controlling the heat are also crucial.
Q3: My pralines are too soft and not setting properly. What can I do?
A: If your pralines are too soft, it could be due to a few reasons. First, make sure you boiled the sugar mixture for the full 8 minutes (or reached the soft-ball stage if using a candy thermometer). Underboiling can result in a mixture that is too runny. Additionally, humidity can affect the setting time. If the pralines are not setting properly, you can place them in the refrigerator for a short period to help them firm up. A few minutes in the freezer can also help, but watch them carefully to avoid them becoming too hard.
Q4: Can I add other flavors to this recipe?
A: Definitely! This recipe is a great base for experimentation. You can add a pinch of cinnamon or nutmeg for a warm, spiced flavor. A tablespoon of bourbon or rum extract can also add a sophisticated touch. For a chocolate variation, drizzle the cooled pralines with melted dark chocolate or add a tablespoon of cocoa powder to the mixture. Get creative and customize the recipe to your liking!
Q5: How long do these pralines stay fresh?
A: When stored properly in an airtight container, layered between sheets of waxed paper, these Vanilla Pecan Pralines can stay fresh for up to a week at room temperature or for up to two weeks in the refrigerator. Freezing is not recommended as it can alter the texture of the pralines. The key is to prevent them from drying out or absorbing moisture.