Description of this recipe
This Copycat Dairy Queen Ice Cream Cake is a dream dessert for anyone who loves the iconic combination of creamy ice cream, rich chocolate fudge, and crunchy cookie layers. Designed to replicate the beloved classic with precision, this homemade version solves the common problems of melting layers, collapsing structure, and soggy textures. Instead, you get beautifully defined layers, a firm yet creamy consistency, and that signature cookie crunch that holds up perfectly when sliced.
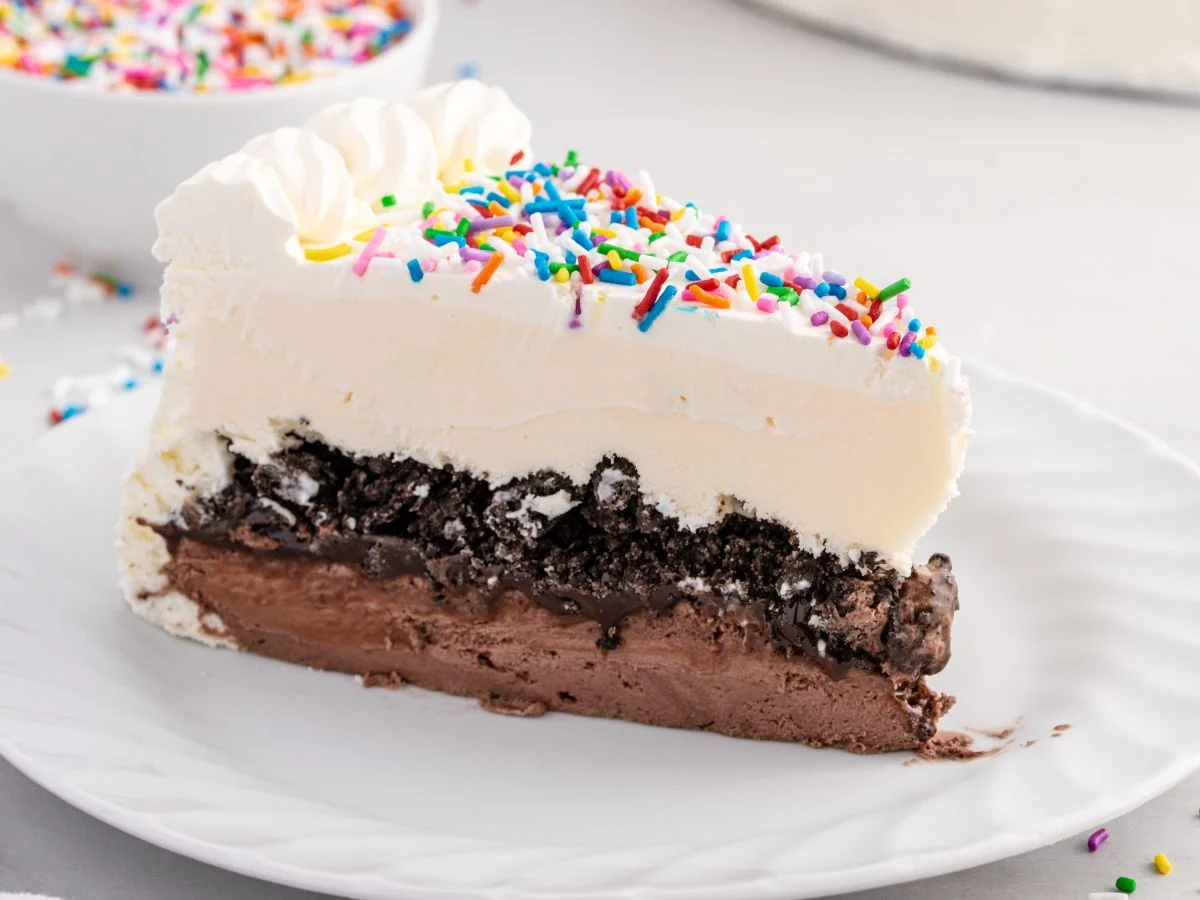
At its core, this dessert is a layered masterpiece. It begins with a smooth chocolate ice cream base, followed by a thick layer of warm, spreadable hot fudge, topped with a crisp chocolate cookie crumble. The final layer of vanilla ice cream adds contrast and balance, all wrapped in a light, fluffy whipped cream frosting. The result is a stunning, bakery-style cake that looks impressive and tastes even better—perfect for birthdays, celebrations, or any occasion that calls for something special.
Why you will love this recipe
You will love this recipe because it brings the nostalgic joy of a classic ice cream cake right into your kitchen, with improved structure and flavor. Unlike many homemade versions, this one is carefully crafted to ensure clean slices and distinct layers, making it both visually appealing and easy to serve.
Another reason to love it is its versatility. You can customize the ice cream flavors, adjust the sweetness, or even add your favorite toppings. The whipped cream frosting is light and not overly sweet, which balances the richness of the fudge and cookie layers. Plus, it’s a make-ahead dessert, meaning you can prepare it in advance and simply pull it out when you’re ready to celebrate.
Ingredients:
For the cookie layer:
- 20 chocolate sandwich cookies, crushed (with filling intact)
- 4 tablespoons salted butter, melted
For the ice cream layers:
- 1 quart chocolate ice cream
- 1 quart vanilla ice cream
For the fudge layer:
- 11.75 ounces hot fudge topping
For the whipped cream frosting:
- 2 cups cold heavy cream
- 1¼ cups powdered sugar
- 1½ teaspoons clear vanilla flavoring
- Colorful sprinkles
Preparation:
Step 1
Prepare a 9-inch springform pan by lining it with plastic wrap, ensuring enough overhang to help lift the cake later. Preheat your oven to 350°F (175°C) and line a baking sheet with parchment paper.
Step 2:
In a small mixing bowl, combine the crushed chocolate sandwich cookies with the melted butter. Stir until all crumbs are evenly coated. Spread the mixture onto the prepared baking sheet and bake for 7–8 minutes. Remove from the oven and allow the crumbs to cool completely—this step ensures they stay crisp inside the cake.
Step 3:
Remove the chocolate ice cream from the freezer and let it soften for 15–20 minutes. Once spreadable, press it evenly into the bottom of the prepared springform pan. Smooth the surface with a spatula, then place the pan in the freezer for 30 minutes to 1 hour until firm.
Step 4:
Warm the hot fudge topping slightly in the microwave (about 20 seconds) to make it easier to spread. Stir היט, then spread a smooth, even layer over the hardened chocolate ice cream. Sprinkle the cooled cookie crumbs evenly over the fudge layer. Return the cake to the freezer for about 1 hour to set.
Step 5:
Soften the vanilla ice cream for 15–20 minutes, then spread it evenly over the cookie layer. Smooth the top and freeze the entire cake for at least 4–6 hours or overnight until completely firm. Before serving, whip the heavy cream, powdered sugar, and clear vanilla flavoring until stiff peaks form. Remove the cake from the pan, frost quickly with whipped cream, decorate with piped borders and sprinkles, and return to the freezer until ready to serve.
Serving Suggestions:
Serve this ice cream cake slightly softened for easier slicing—let it sit at room temperature for about 5 minutes before cutting. Use a sharp knife warmed in hot water for clean slices. This cake is perfect for birthdays, summer parties, or festive gatherings. Pair it with fresh fruit or a drizzle of chocolate syrup for an extra indulgent touch.
Tips:
Work quickly when assembling and frosting to prevent melting. Always refreeze between layers to maintain structure. Baking the cookie crumbs is essential for keeping them crunchy inside the cake. Use clear vanilla flavoring instead of extract to maintain the bright white color of the frosting. For best results, use a springform pan for easy removal and clean edges.
Prep Time:
20 minutes
Cook Time:
10 minutes
Total Time:
8 hours 30 minutes
Nutritional Information:
Calories: 480 per serving
Protein: 6g
Sodium: 290mg
Conclusion
This Copycat Dairy Queen Ice Cream Cake is a show-stopping dessert that combines nostalgic flavors with improved technique for perfect results every time. With its creamy layers, rich fudge, and crunchy cookie center, it delivers everything you love about the original—only better, because it’s homemade. Whether you’re celebrating a special occasion or simply treating yourself, this cake is guaranteed to impress both visually and in flavor.
Questions and Answers:
- Can I use different ice cream flavors?
Yes, you can customize the cake with any flavors you prefer, such as cookies and cream, strawberry, or mint chocolate chip. - Why do I need to bake the cookie crumbs?
Baking helps them stay crisp and prevents them from becoming soggy when layered with ice cream and fudge. - How do I keep the cake from melting while decorating?
Work quickly and, if needed, place the cake back in the freezer between steps to keep it firm. - Can I make this cake without a springform pan?
Yes, but a springform pan makes it much easier to remove the cake cleanly. Alternatively, use a lined deep cake pan.