Description of this recipe
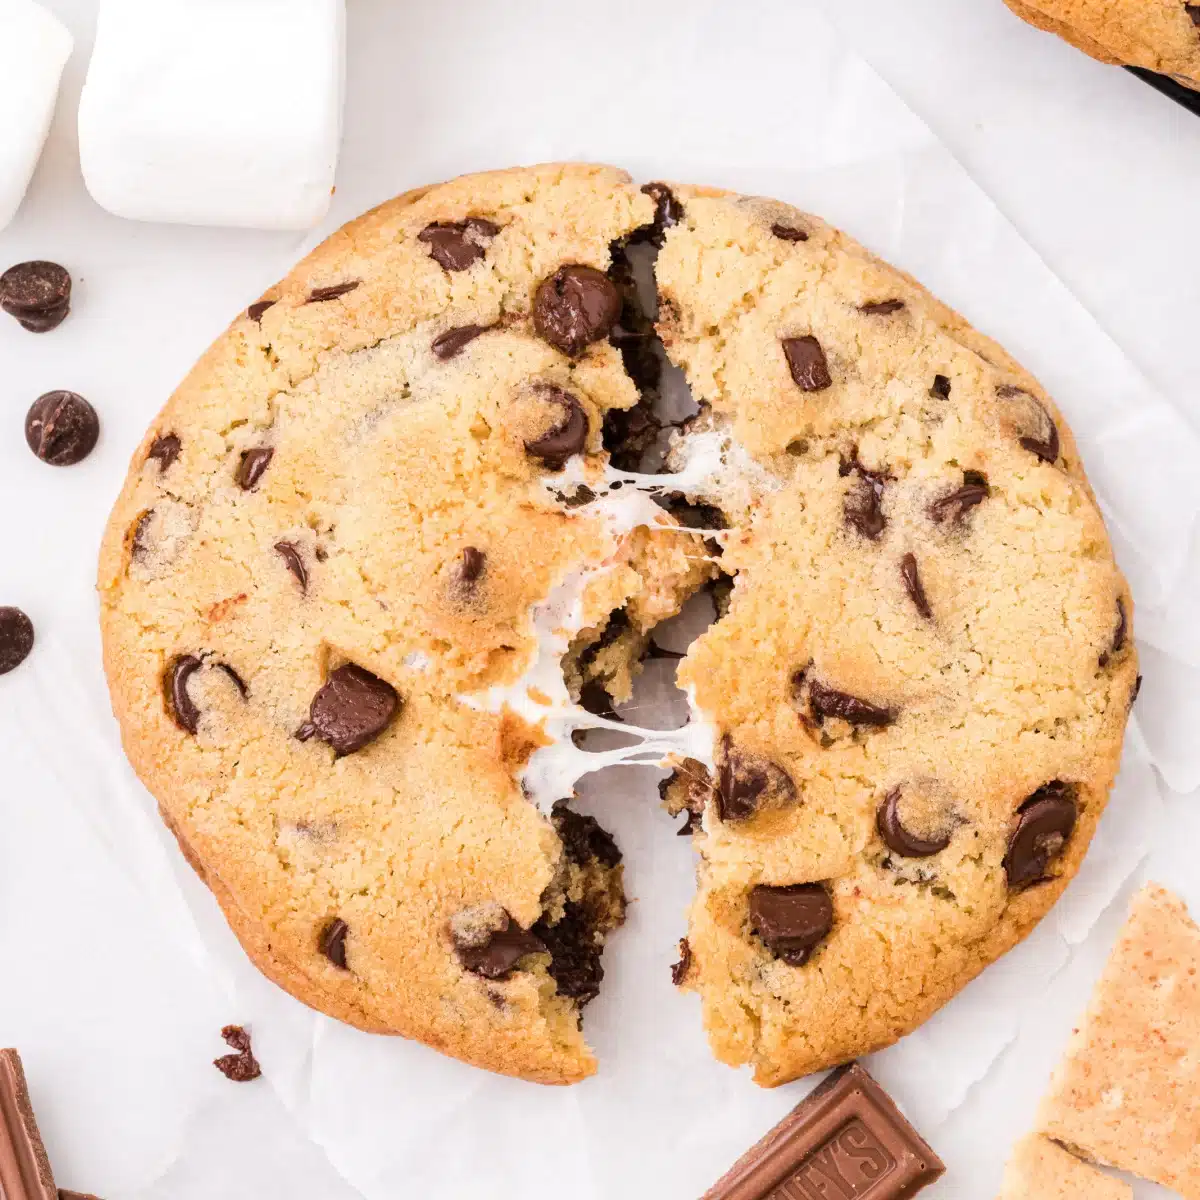
S’mores Stuffed Cookies are the ultimate indulgence for dessert lovers who crave a nostalgic campfire treat wrapped in the comfort of a bakery-style cookie. These oversized, gooey-centered cookies combine everything you love about classic s’mores—melty chocolate, toasted marshmallows, and crunchy graham crackers—encased inside a rich, buttery chocolate chip cookie dough. Each bite delivers a contrast of textures: crisp golden edges, soft chewy centers, and a molten, sweet surprise hidden within. These cookies are not just desserts—they are an experience, bringing childhood memories and decadent flavors together in one irresistible creation.
Why you will love this recipe
You’ll love this recipe because it takes a familiar favorite and elevates it into something extraordinary. Instead of assembling s’mores over a fire, you get all those flavors conveniently baked into a cookie that’s perfect for sharing—or not. The jumbo size makes them impressive and satisfying, while the gooey filling adds a delightful surprise factor. This recipe is also perfect for special occasions, bake sales, or cozy nights at home. The dough is rich and easy to work with, and the freezing step ensures perfectly thick cookies every time. Whether you’re a seasoned baker or just starting out, these cookies deliver bakery-quality results with straightforward steps.
Ingredients:
- 6 large marshmallows, cut in half
- 3 full-size graham crackers, broken into smaller pieces
- 2 milk chocolate bars (1.55-ounce each), broken into pieces
- 1⅓ cups salted butter, softened
- 1 cup granulated sugar
- 1 cup light brown sugar, packed
- 3 large eggs
- 2 teaspoons vanilla extract
- 3½ cups all-purpose flour
- 1½ teaspoons baking soda
- ¾ teaspoon salt
- 3½ cups semi-sweet chocolate chips
Preparation:
Step 1
Begin by preparing your baking area. Line two large baking sheets with parchment paper and set them aside. Next, prepare your filling ingredients. Cut the marshmallows in half, break the graham crackers into small bite-sized pieces, and divide the chocolate bars into chunks. Keep these ingredients separated but ready, as each cookie will be individually filled later.
Step 2:
In a large mixing bowl, use a hand mixer or stand mixer to cream together the softened butter, granulated sugar, and brown sugar. Beat the mixture until it becomes light, fluffy, and creamy. This step is essential for achieving a soft and tender cookie texture. Add the eggs one at a time, mixing well after each addition, then stir in the vanilla extract. Continue mixing until the batter is smooth and well combined.
Step 3:
In a separate bowl, whisk together the flour, baking soda, and salt. Gradually add this dry mixture to the wet ingredients, mixing slowly to avoid overworking the dough. Overmixing can lead to dense cookies, so stop as soon as everything is combined. Using a spatula, gently fold in the chocolate chips, ensuring they are evenly distributed throughout the dough.
Step 4:
Using a large cookie scoop (about 3 tablespoons), portion out 24 dough balls. Place them on your prepared baking sheets, then gently flatten each ball into a disc about 3 inches wide. On half of the discs, place a piece of marshmallow, a few graham cracker chunks, and a couple of chocolate pieces. Be careful not to overfill, as this can cause the cookies to burst during baking.
Step 5:
Take the remaining dough discs and place them on top of the filled ones. Carefully seal the edges by pressing them together, then roll them gently in your hands to form large, smooth cookie balls. Transfer all the stuffed cookie dough balls onto one baking sheet and place them in the freezer for 30 minutes. This step helps the cookies maintain their shape and prevents excessive spreading.
Step 6:
While the cookies are chilling, preheat your oven to 375°F (190°C). Once chilled, arrange 4 to 6 cookie balls per baking sheet, leaving plenty of space between them. Bake for 13 to 15 minutes, or until the edges are lightly golden and the centers are just set. The cookies will continue to cook slightly as they cool.
Step 7:
Remove the cookies from the oven and let them rest on the baking sheet for 3 to 4 minutes. This allows the structure to set while keeping the centers soft and gooey. Be cautious when biting in, as the marshmallow filling will be hot and molten.
Serving Suggestions:
Serve these cookies warm for the ultimate gooey experience. Pair them with a cold glass of milk or a scoop of vanilla ice cream for a decadent dessert. They also make an excellent addition to dessert platters or party spreads. For an extra indulgent twist, drizzle melted chocolate over the top or dust lightly with powdered sugar before serving.
Tips:
Chilling the dough is crucial for thick, bakery-style cookies, so don’t skip the freezer step. If you want an extra toasted marshmallow flavor, lightly toast the marshmallows before stuffing them into the cookies. Use high-quality chocolate for the best flavor impact. If your kitchen is warm, work quickly to prevent the dough from becoming too soft. Store leftover cookies in an airtight container and reheat briefly in the microwave for that fresh-from-the-oven texture.
Prep Time:
10 minutes
Cook Time:
15 minutes
Total Time:
55 minutes
Nutritional Information:
Calories: 520 per cookie
Protein: 6g
Sodium: 320mg
Conclusion
S’mores Stuffed Cookies are a delightful fusion of two beloved treats, offering a rich and satisfying dessert that’s as fun to make as it is to eat. Their gooey centers, crisp edges, and nostalgic flavors make them a standout recipe that’s sure to impress anyone who tries them. Whether you’re baking for a gathering or simply treating yourself, these cookies bring a touch of indulgence and creativity to your kitchen. Once you experience that melted marshmallow and chocolate center, you’ll understand why this recipe quickly becomes a favorite.
Questions and Answers
- Can I make smaller cookies instead of jumbo ones?
Yes, you can reduce the size, but you’ll need to adjust the filling accordingly and shorten the baking time to avoid overcooking. - Why do I need to freeze the cookie dough before baking?
Freezing helps the cookies hold their shape and prevents them from spreading too much, ensuring a thick and gooey center. - Can I substitute the chocolate bars with other types of chocolate?
Absolutely. You can use dark chocolate, white chocolate, or even flavored chocolate bars depending on your preference. - How do I store these cookies?
Store them in an airtight container at room temperature for up to 3 days, or refrigerate for longer freshness. Reheat before serving for best results. - Can I make the dough ahead of time?
Yes, the dough can be prepared in advance and stored in the refrigerator for up to 48 hours or frozen for longer storage.